Making a Box with Hidden Compartment
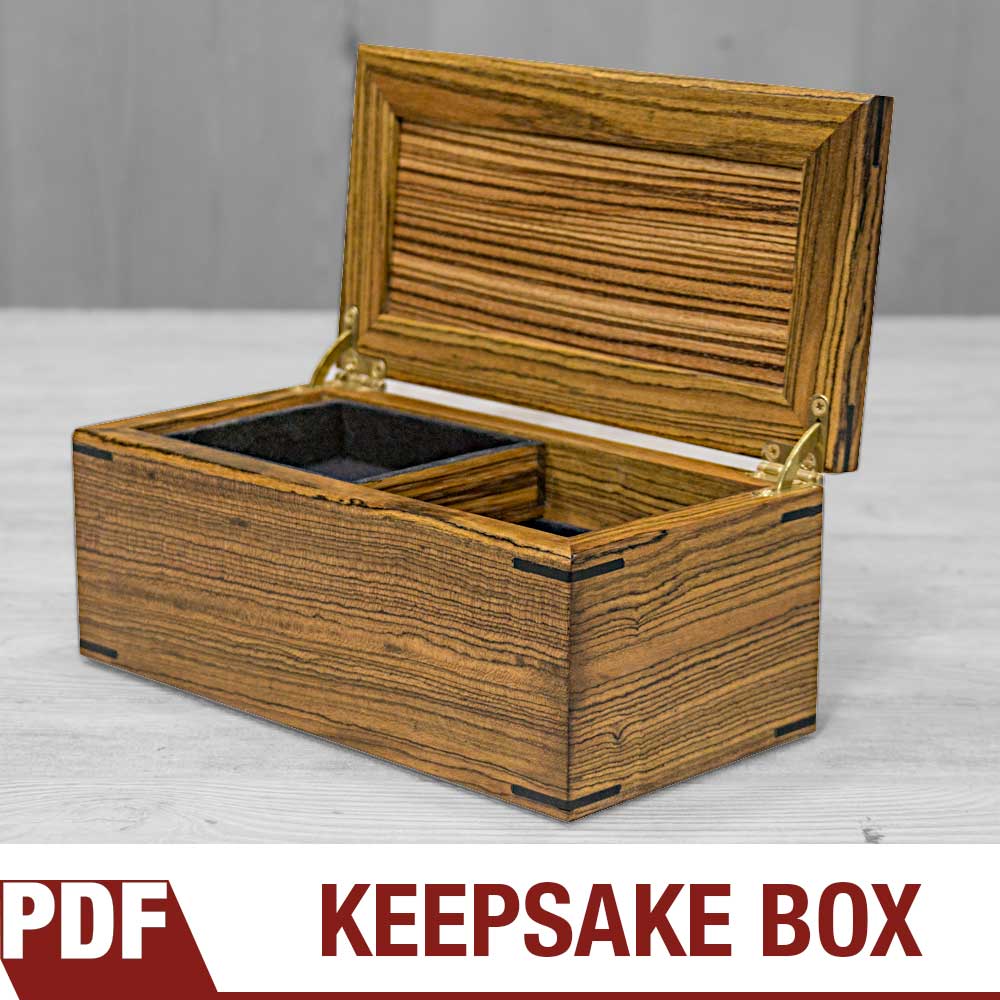
Detailed, step-by-step instructions on how to make this keepsake box.This box has mitered corners that can easily be done on the table saw and reinforced with easy-to-make splines. The inside has a top sliding tray that when moved left and right reveals two trays below it. When all the trays are lifted out, a hidden compartment is revealed underneath to hide your valuables.
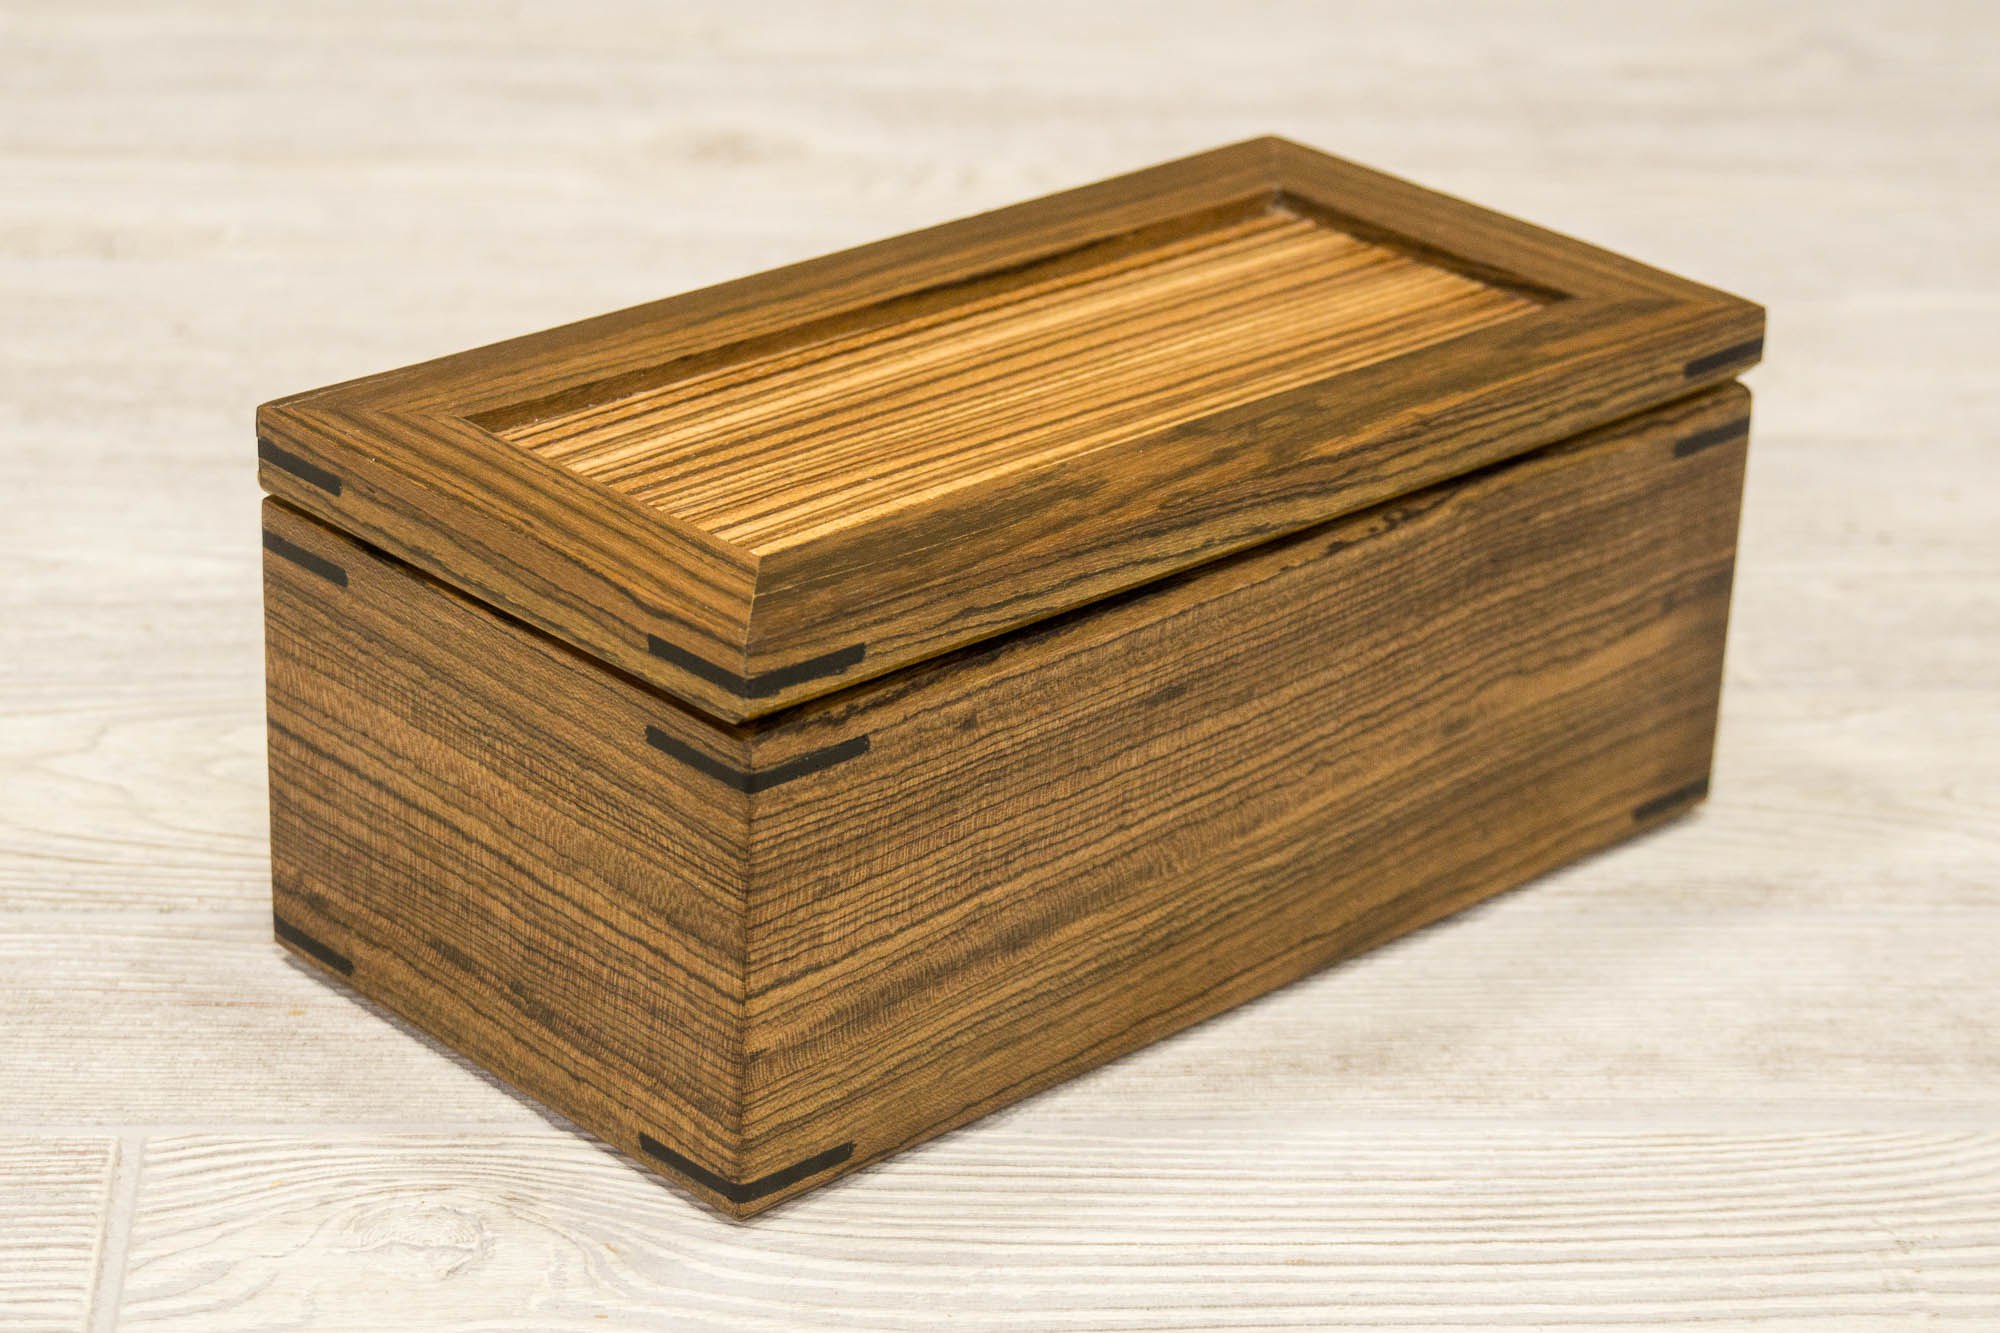
This box that we’re about to make has mitered corners that can easily be done on the table saw and reinforced with easy-to-make splines. The inside has a top sliding tray that when moved left and right reveals two trays below it. When all the trays are lifted out, a hidden compartment is revealed underneath to hide your valuables. All these trays are lined with a soft flocking that feels like velvet and I’m using solid brass quadrant hinges with lid support from Brusso Hardware. For this box I wanted to use special exotic woods so I went to Kencraft, my local hardwood dealer and picked out some Bocote for the sides, Zebrawood for the top and bottom and ebony for the splines.
Although I can’t give you an exact amount of hours it took to make this I can tell you that if well planned this could easily be made in two days. On day 1 all the pieces can be cut and glued together. On day 2 the splines, chamfers and hinges can be added. If you choose to use a lacquer finish you could also get multiple coats done on the second day as it will dry fast. The tri-blend finish I recommend on exotic woods takes 4 days but each day only requires a couple minutes of work with a full day to dry between coats. The price of wood can be very dynamic depending on the choice of woods and your location. I chose to get a little fancy and paid $73.58 for the wood used in this project without any leftovers. I also decided to use the well made Brusso hinges that come in at $49.99. Yes, the Brusso hinges cost a pretty penny but you can feel the difference in quality as soon as you hold them in your hand. They have high standards and a very good reputation for being the best in the business. So after taxes and shipping the total cost of materials was $135.62 which doesn’t include the flocking and finish.
I’m really happy with the way this box came out. The top tray slides effortlessly across the bottom tray and everything lifts out to reveal the hidden compartment. All of the joinery is mitered corners that are easily done on the tablesaw and reinforced with splines. And the solid brass hinges compliments the exotic woods and the the design. You learn more about the jigs I used as well as the flocking and finishing techniques in the links below. Plans are available in my store. I hope you enjoyed this video as I’ve got a lot more projects like this coming out as well as bigger builds and non-woodworking projects. As always, be safe, stay passionate and make something!
Tools and Supplies
- Micro Jig GB-1 GRR-Rip Block
- Micro Jig GRR-Ripper
- Brusso Solid Brass Quadrant Hinges
- Festool Random Orbit Sander
- SawStop Tablesaw
- Grizzly Bandsaw
- Blue Painters Tape
- TiteBond Glue
- Flush Trim Saw
- Suede-Tex Mini Flocker
- Suede-Tex Undercoat Adhesive – Black
- Flocking Fibers, 3 oz., Black
- Minwax Wipe-On Poly Polyurethane
- Mineral Spirits
- Boiled Linseed Oil
- Dewalt Plunge Router
- JIG IT Hinge Mortising System
- Bench Dog Router Table