
How to Make a Spline Jig for Picture Frames
How to make a spline jig for easily creating mitered corners.
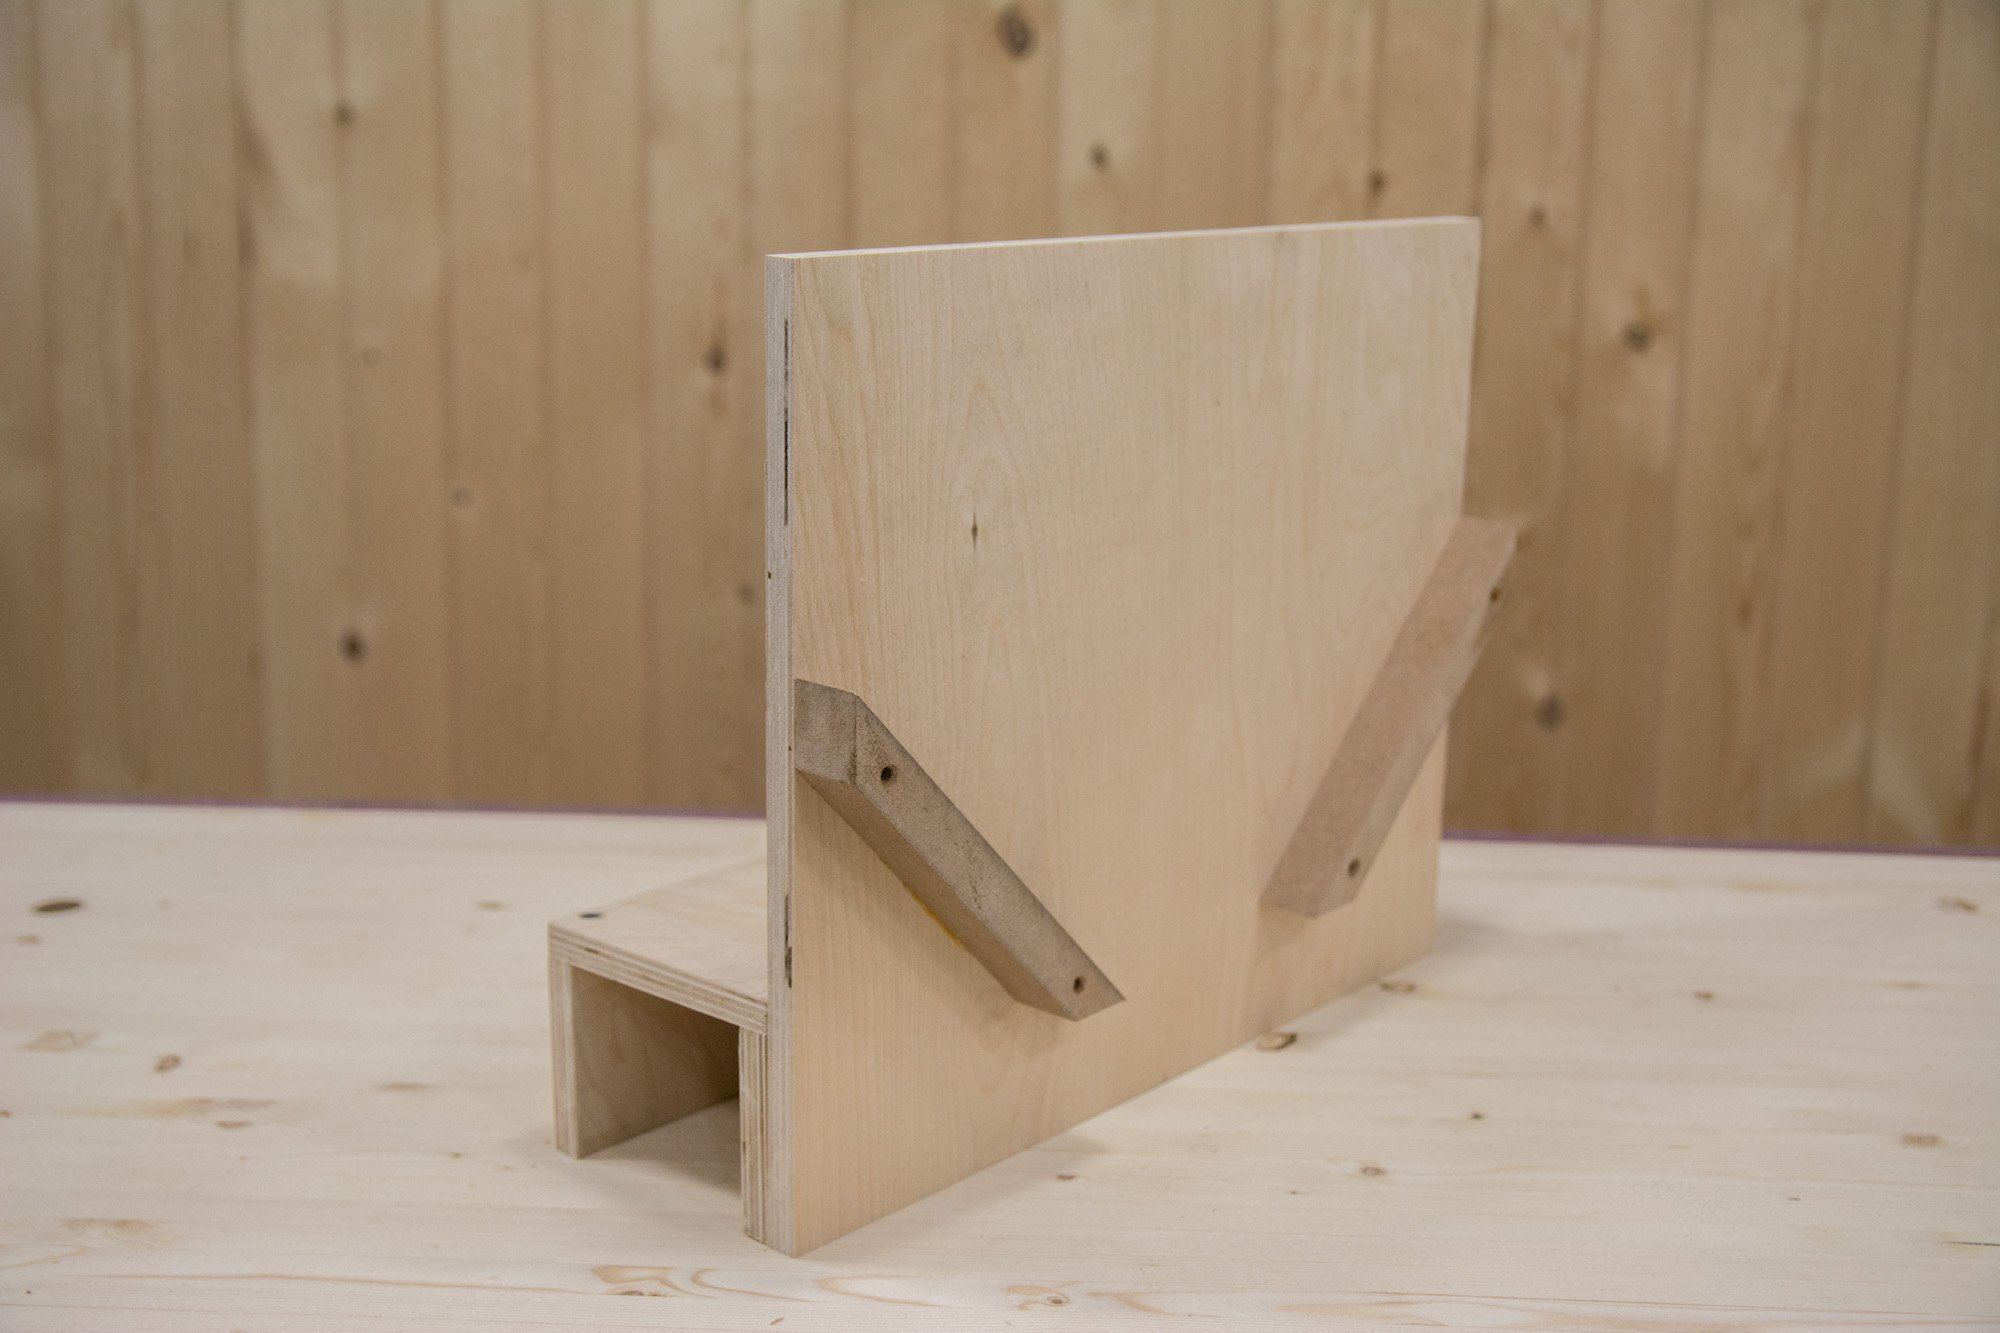
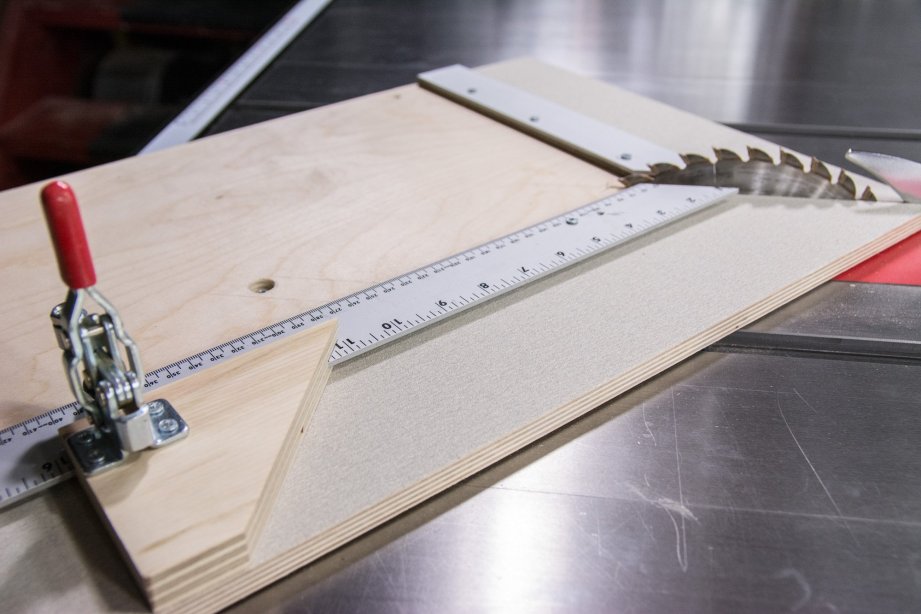
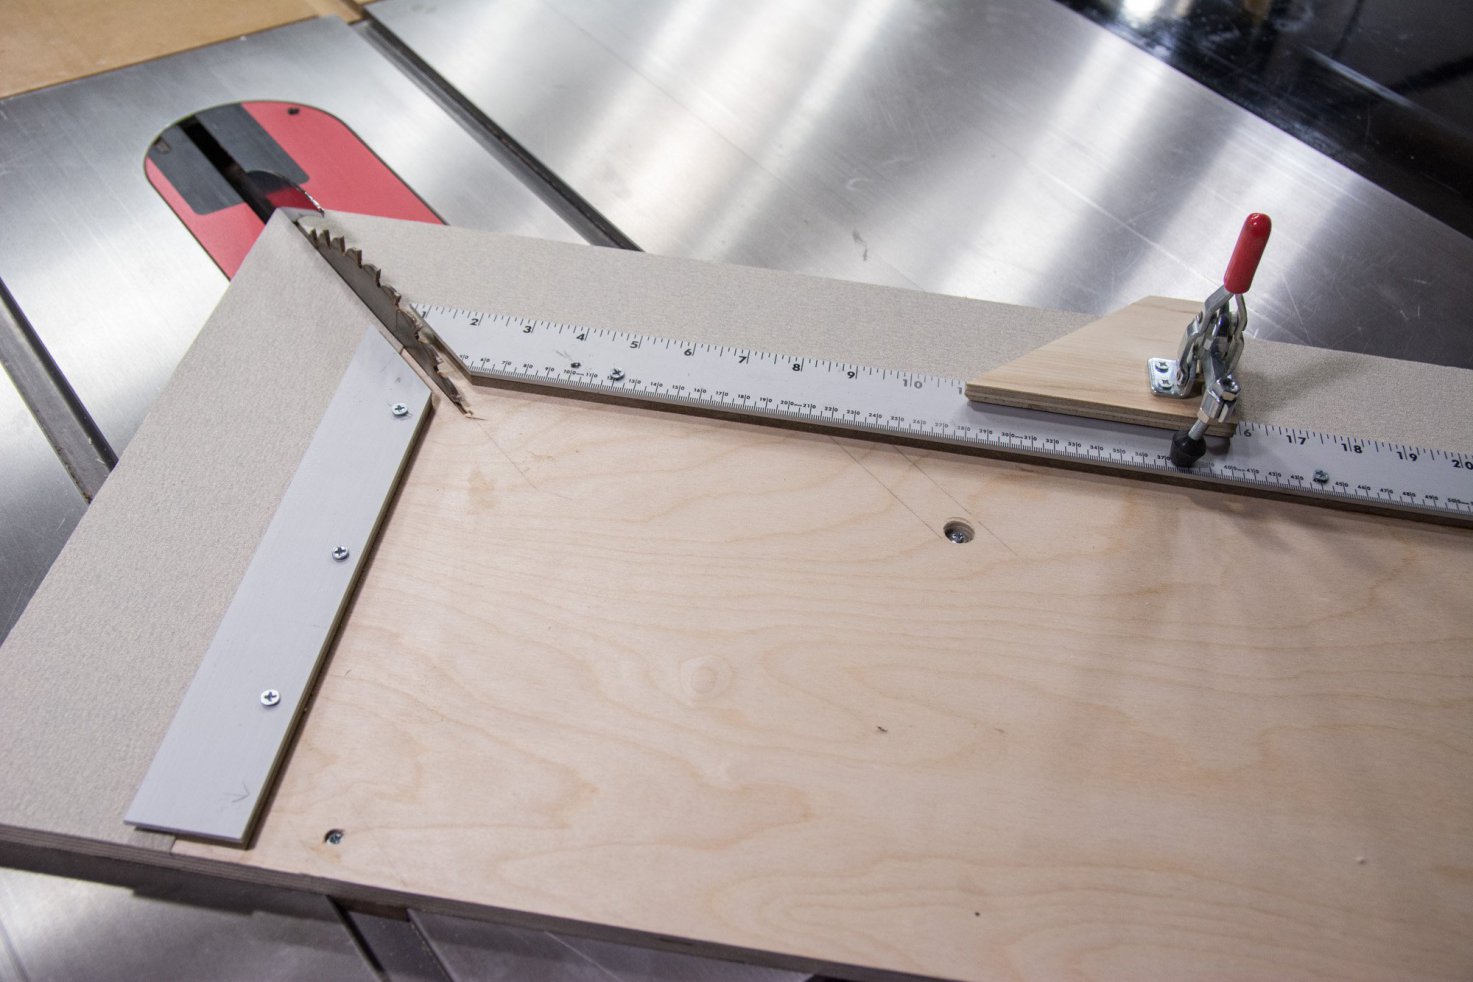
This is the second video in a multi-part series on picture frame making. You can find the other videos in the links down below. This here is a real simple and easy to make jig that rides along your table saw fence and allows you to cut splines in picture frames. Just using glue on mitered corners may seem good enough but over time as the width of the wood expands and contracts with the seasons the joints will eventually break. And that’s why you need splines. Unlike a lot of spline jigs, this rides along the fence and not in the miter slot which means you can place the spline anywhere you want and even cut wider splines by moving the fence and making multiple passes. Setting the blade height is easy since the corner sits just a hair above the table and the two guides easily clear the blade. Let’s get started!
I suggest using a full kerf blade with a flat grind. A thin kerf blade will work just as well and if your blade doesn’t leave a flat bottom cut, don’t worry about it too much. The tiny little gap that it may leave may not even be noticeable and it could always be filled in with sawdust and glue.
How to Make Picture Frames Series
Making The Ultimate Picture Frame Sled
This video gives you an overview on how to make the ultimate picture frame sled.
Here’s What You’ll Need
This is the first video in a multi-part series on picture frame making. This video gives you an overview on how to make the ultimate picture frame sled. In order to make perfect picture frames you need two things… One, the two corner pieces must add up to 90° and the short sides as well as the long sides must be the exact same length. This sled covers both of those issues as well as it allows for larger picture frames than a traditional miter sled stop system. Picture frames are not measured by the inside or outside length but by the rabbit so if your artwork or matte is 5×7 we can set the stop to create a frame for that exact size. To make sure there is no play in our sled we’re using the MicroJig Zero Play Guide bar system that adjusts to fit any table saw. Also, I must give credit to where credit is due. This is a modified and updated sled to one published by Fine Woodworking.


Craft Show Tips and Tricks
Craft show tips to help you succeed at selling your handmade items.

How to Resaw on the Bandsaw. The Easy Way!
Demystifying resewing on the bandsaw. No fancy jigs!
Resawing Problems
I get a lot of questions about resawing on the bandsaw. Problems that can happen while resawing is burning, drifting and cuts not being 90 degrees.
Four reasons why you’re not getting a good cut.
Dull Bandsaw Blade. First reason and probably the most common reason is a dull blade. If your blade is dull drifting and burning will most definitely happen.
Too Many Teeth. Second is too many teeth per inch on your bandsaw blade. If you’re resawing it’s very important to have no more than 4 teeth per inch (TPI). This is so the blade can do its job and remove the waste in time. Otherwise again you’ll end up with drifting and burning.
Fast Feed Rate. Third is pushing the board too fast through the blade not giving the blade enough time to remove the waste.
Blade Not Centered. And finally, if you’re blade is not centered on the tires. Don’t spend too much time worrying about this and just make sure it’s approximately in the middle of wheel.
How to Resaw on the Bandsaw
Resaw fences do make the job easier but in the video about you’ll see you won’t need any fancy gadgets. With the right blade you should be able to slowly push the work through the blade following your pencil line.
Products Seen

Drilling Holes Larger than your Largest Bit
Here’s a quick tip on making oversized holes using a forstner bit, rabbeting bit and a flush trim bit. This method is perfect for when you don’t have a large enough drill bit.
Here’s a quick tip on making oversized holes using a forstner bit, rabbeting bit and a flush trim bit. This method is perfect for when you don’t have a large enough drill bit.
Items Used


How to Fill a Gap in a Mitered Corner
How to fill gaps in mitered corners. This quick tip works with picture frames, legs and mitered corner case edging.
How to fill gaps in mitered corners. This quick tip works with picture frames, legs and mitered corner case edging.

Quick and Easy Way to Draw Large Circles
With just a pencil, screw, a long piece of wood and a couple of spring clamps you can easily draw large circles and curves without a trammel or compass.
With just a pencil, screw, a long piece of wood and a couple of spring clamps you can easily draw large circles and curves without a trammel or compass.

Wood Finish: How to Mix and Apply an Oil/Poly Blend
Make your own oil/poly blend with boiled linseed oil, polyurethane and mineral spirits.
Make your own oil/poly blend with boiled linseed oil, polyurethane and mineral spirits. This finishing technique is great for all woodworking projects and brings out the natural beauty in wood.
Items Used in this Woodworking Tutorial


How to Make Curved Inlay. Great Design Feature for Wooden Boxes!
A simple step-by-step technique on how to make curved inlay using thin strips of wood.
A simple step-by-step technique on how to make this curved inlay using thin strips of wood. All you need is a router with a flush trim bit, a straight bit, bandsaw or coping saw, and a way to flatten a the surface. Preferably a block plane but a planer or drum sander will do. This technique works great for boxes, cutting boards and table tops!
Tools and Supplies Used in this Woodworking Project
Woodworking Books

Make Your Own Cutting Boards
15 cutting board projects to make as gifts or sell! Get your signed copy!

The New Bandsaw Box Book
8 bandsaw box projects you can make and sell at craft shows. Signed copies now available!