
How to Make an Easy Leather Key Chain
Quick and easy project. A great first leather working project.


How to Make Wooden Clipboards
This is a real easy woodworking project anybody can do with a few basic woodworking tools.
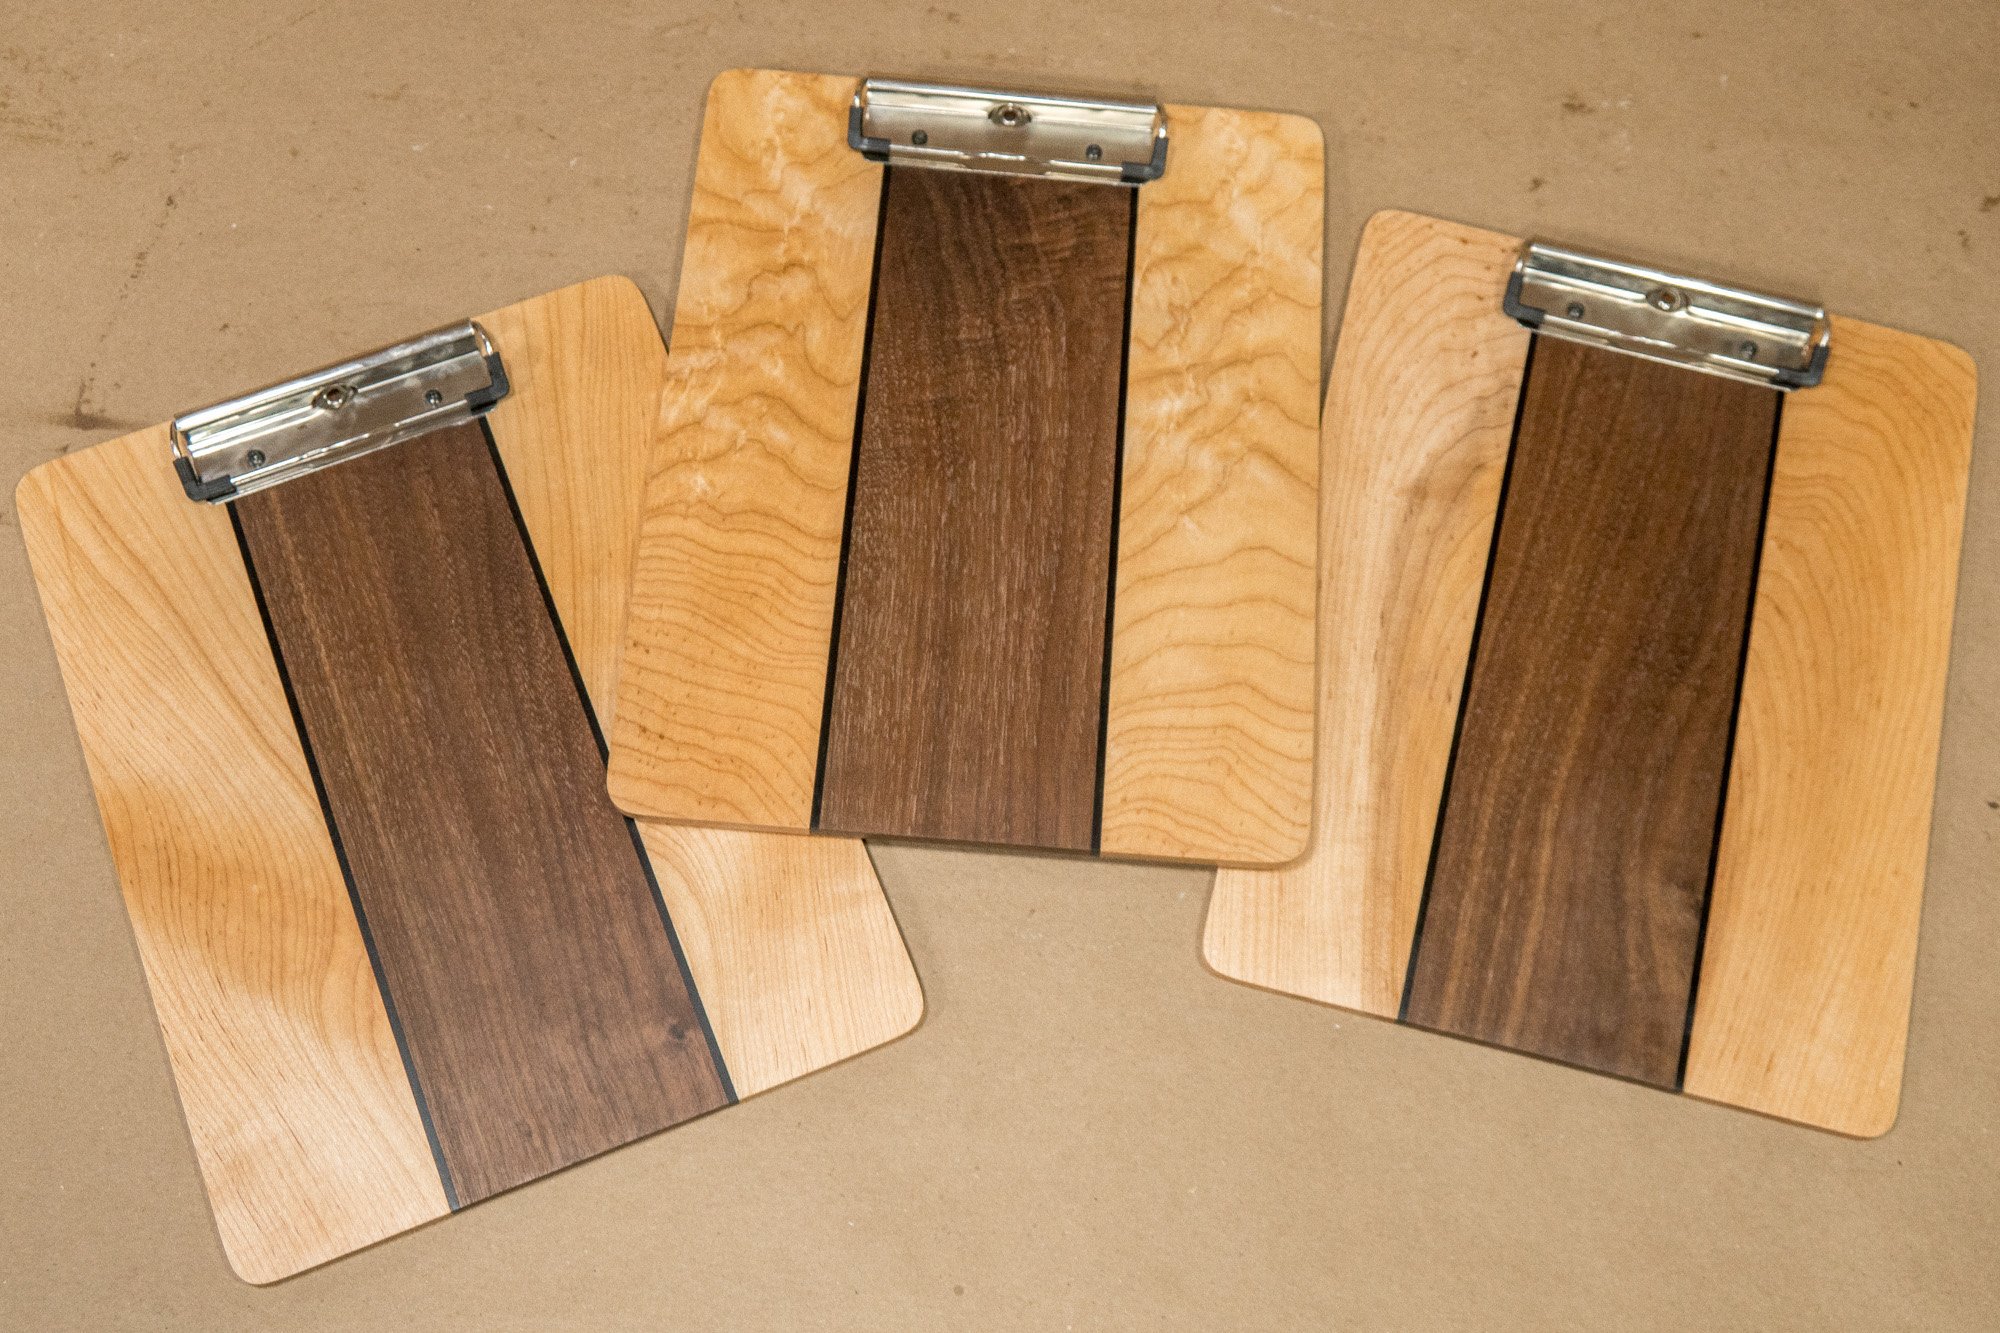
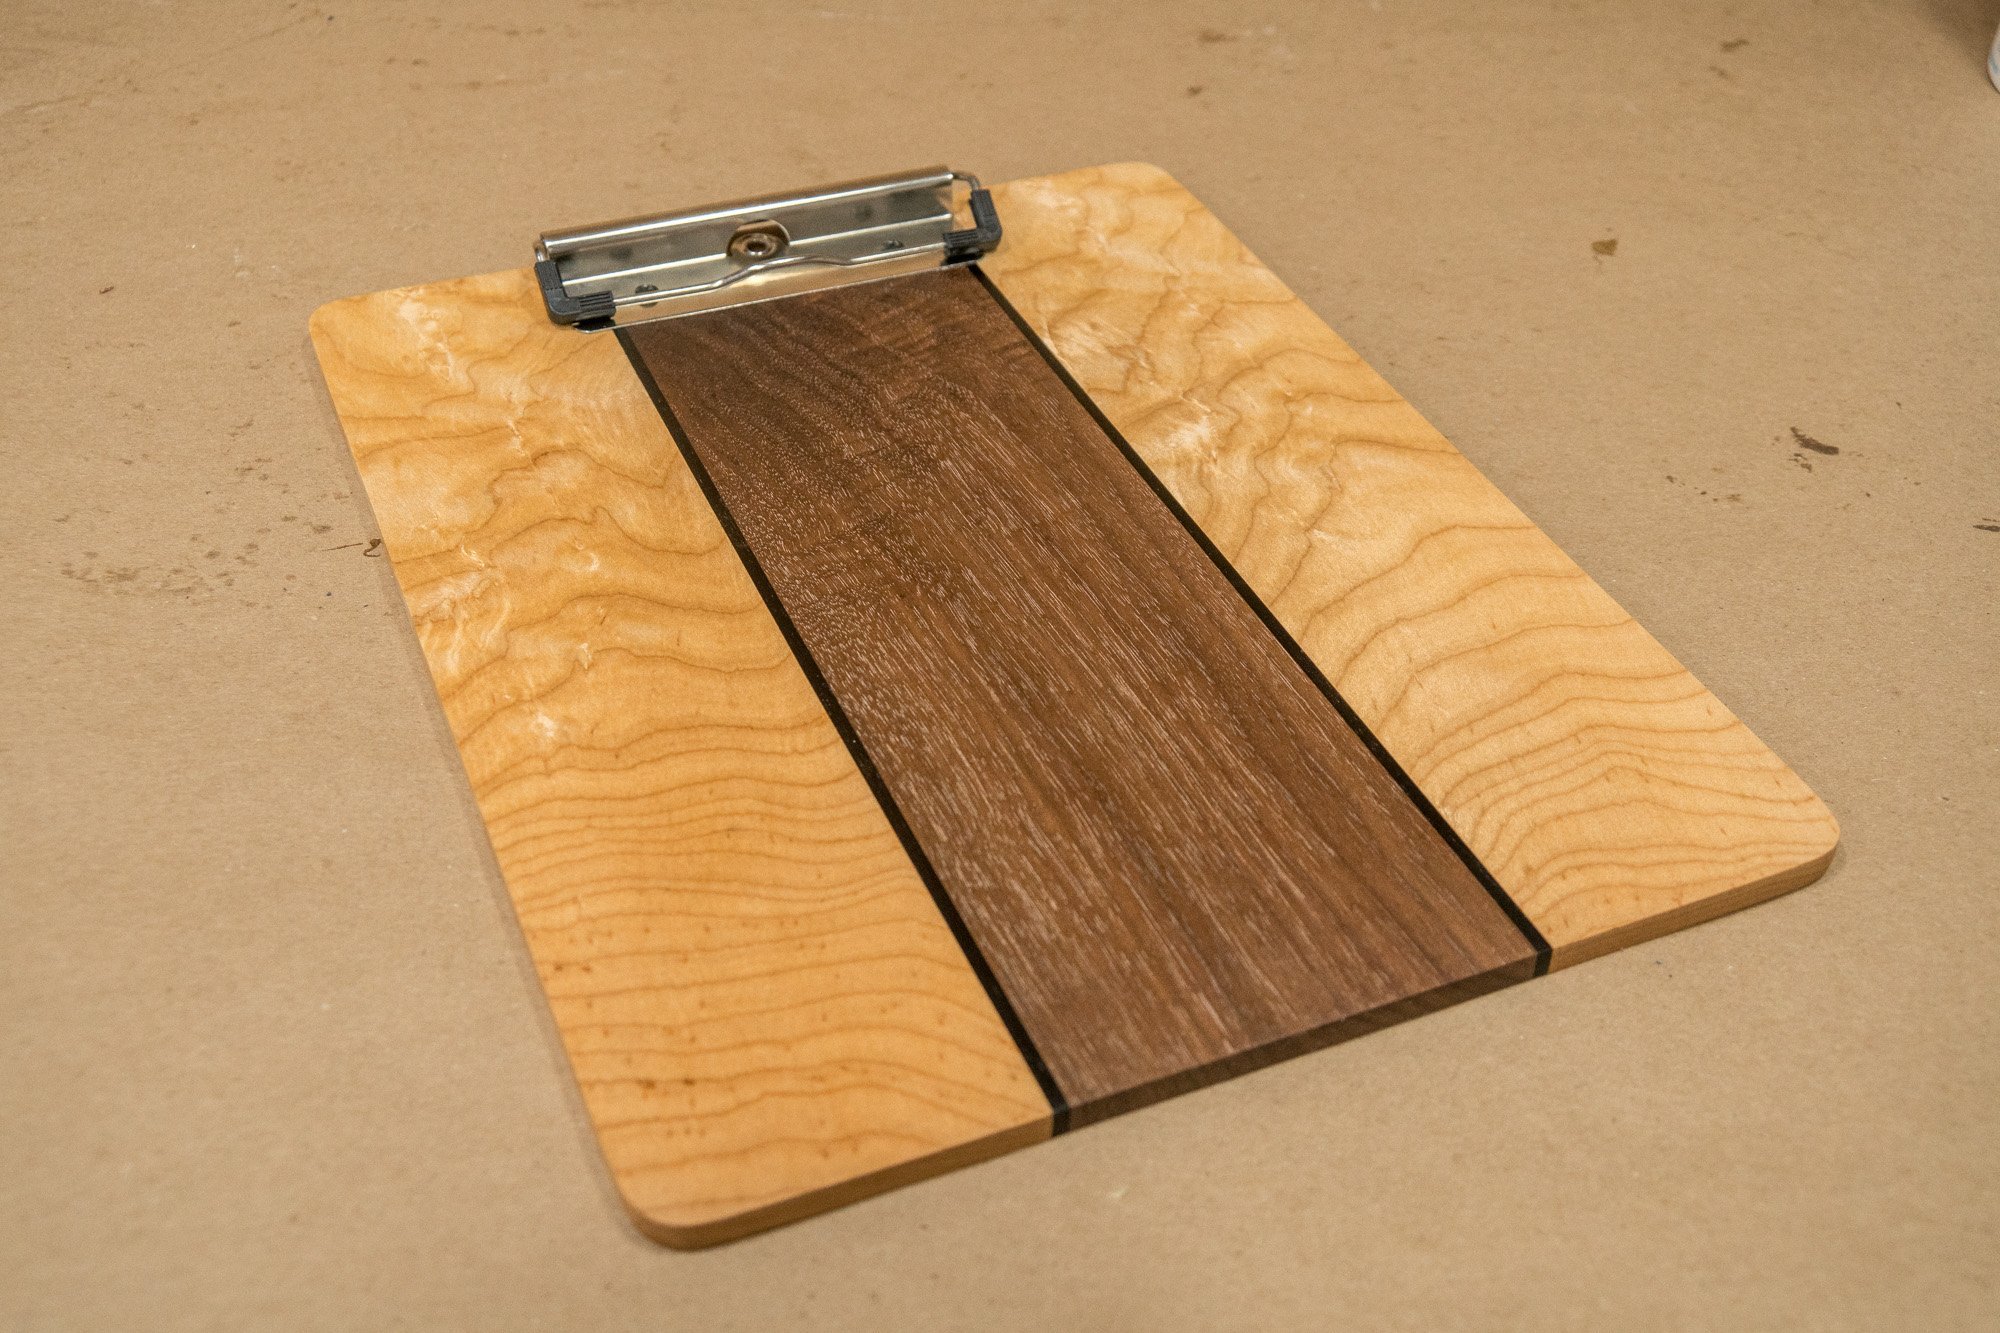
Easy Woodworking Project For Beginners
This is a real easy woodworking project anybody can do with a few basic woodworking tools. It’s also a great woodworking project that you can easily redesign and make your own. These clipboards get planed down pretty thin so make sure you source well stable wood that’s not going to warp on you. You’ll also want to use closed grain or tight grain wood. And open grain is not a suitable material to write on. Using strips of multiple species will help keep everything flat. I also find that since they are so thin the screws that hold the clips down may need some help so I like to use a 5-minute epoxy as well. This is a great project that can be batched out and at the right price can sell well at craft fairs.
Final dimensions: 9″ x 12″ x 3/16″
Tools and Supplies Used in This Woodworking Project


How to Make a Rotating Crayon Holder
This is an easy and fun woodworking project that works great for displaying and organizing a set of 64 crayons!
Easy Woodworking Project
This is an easy and fun woodworking project that works great for displaying and organizing a set of 64 crayons! I’m using a lathe to do most of the work but this could easily be made without one using a bandsaw. The handle is made from a globe squishy ball found at my local craft store which is a great alternative to using wood. When I originally designed the project I planned on using a lazy Susan base for spinning but decided in the end it was overkill and not needed. If I were to make more of these wood crayon displays I would take the plastic sharpener that comes with the crayons and mount it on the side with a removable base for emptying out the shavings.
Tools and Supplies Used in this Woodworking Project
- Microjig GRR-Ripper
- Microjig GRR-RIP Blocks
- Crayons
- Grizzly Bandsaw
- Dewalt Planer
- Table Saw
- Aluminum Bar Clamps
- Titebond Wood Glue
- Bessey Clamps
- Festool Miter Saw
- Combination Square
- Compass
- Jet Lathe
- Black & Decker Drill
- Festool Drill
- Turning Tools
- Dust Mask
- Festool Random Orbit Sander
- Jet Drill Press
- Shellac
- Felt
- Squeeze Globe (similar)


Quick & Easy Pencil Holders That You Can Sell
Looking for a quick and easy project that you can batch out and sell at craft shows? These pencil holders are a great way to earn some extra cash.
Looking for a quick and easy project that you can batch out and sell at craft shows? These pencil holders are a great way to earn some extra cash.


Tie Rack Woodworking Project from a 1959 School Textbook
Making a wiener dog tie rack from an old school text book.
How to Make a Tie Rack | Woodworking Project
I love collecting old woodworking books from thrift stores and antiques stores. There’s so much useful information in them and since woodworking technology moves slow these books are still relevant. Plus the illustrations are just fantastic to look at and represent the style from their time period.
While flipping through the book the other night I found this wiener dog tie project and about lost my marbles! I’m a wiener dog owner/lover and thought I just have to make this! The truth is I only own 1 tie so I had to go out and buy new used ties to demonstrate this project. This is a start to many more projects from old books. As always, be passionate and Make Something!
Tools and Supplies Used for this Woodworking Project


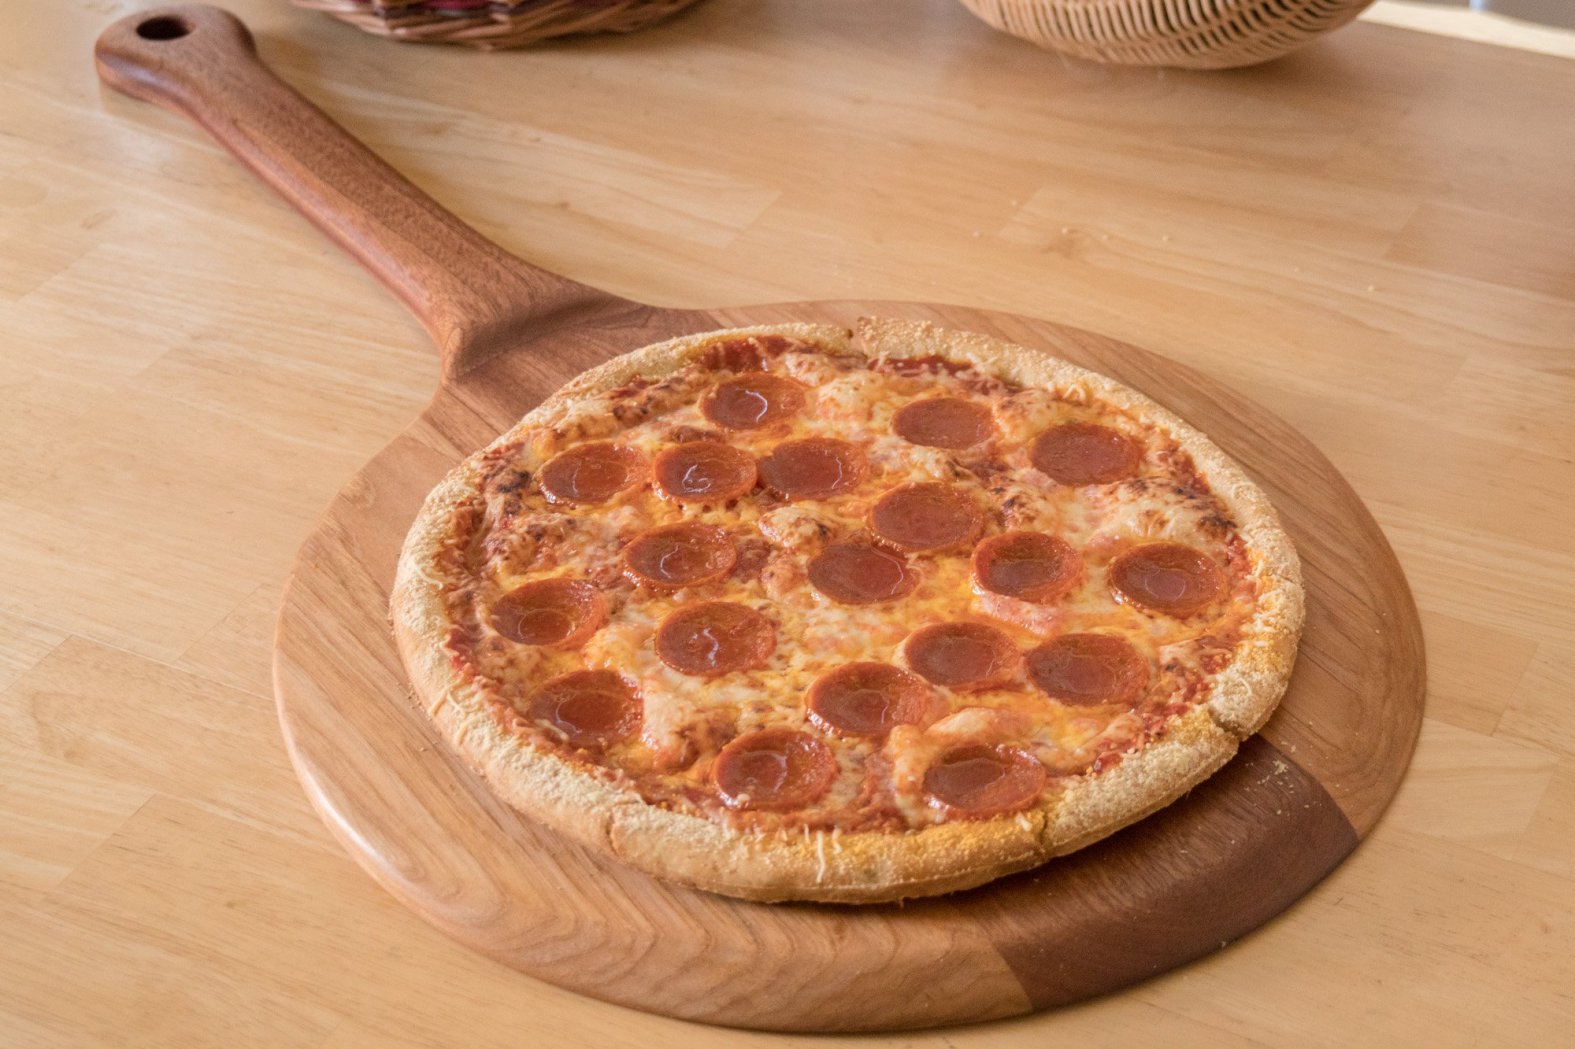
How to Make a Pizza Peel
Having a pizza peel in your kitchen is a great way to pull pizza out of the oven and also doubles as a cutting and serving board.
Making a Wooden Pizza Peel | Woodworking Project
This was a crazy fun and easy project. I didn’t know how useful a pizza peel was until we had one in the house. We generally cook our pizza right on the oven grill so having a pizza peel available to pull the pizza from the oven is very useful. Plus you can cut the pizza right on the peel and use it as a serving tray. The finish used on this is a food grade mineral oil and paraffin wax. Like any cutting board you’ll need to reapply a finish on it after a handful of uses. We like to keep a bottle of butcher’s block conditioner in our kitchen for quick and easy applications. If you like this tutorial please share it with your friends! Let me know in the comments down below what you think and how you would make yours different! As always, be safe, be passionate and Make Something!
Tools and Supplies Used in This Project
- Festool Kapex Miter Saw
- Bar Clamps
- Titebond Wood Glue
- Spring Clamps
- 50 Pack Pencils
- Grizzly Bandsaw
- Disc Sander
- Spindle Sander
- Dremel Tool
- F Style Clamps
- Microjig GRR-Rip Block
- Belt Sander
- Jet Drill Press
- Festool Random Orbit Sander
- Gulfwax Paraffin Wax
- Food Grade Mineral Oil
- Camera Used – DJI OSMO
- Wireless Mic – Sony

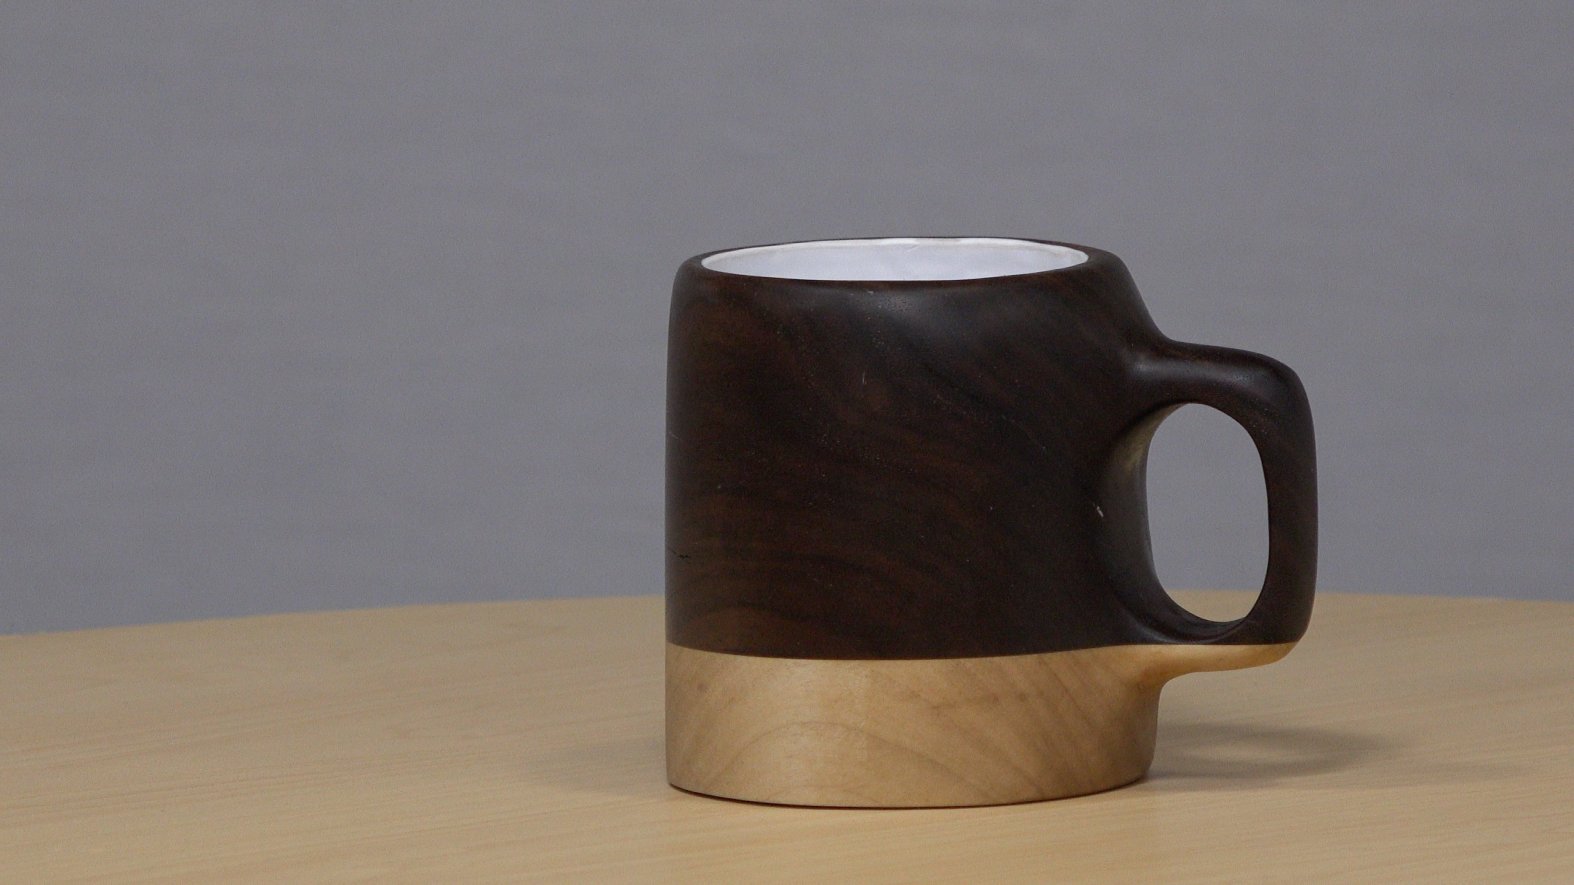
How to Make a Wood Coffee Mug
How to make a coffee mug out of walnut and maple.
Making a Wooden Coffee Mug
I got this beautiful chunk of walnut from my step dad. He cut down an old walnut tree from my childhood home an it’s been air drying for a few years now. I wanted to make the entire coffee mug out of one piece of walnut but the slab I had wasn’t tall enough so I ended up adding the maple bottom as you see here.
Food Safe Finish
When I started this wood coffee mug project I fully intended to use it as a real coffee mug. I coated the inside with a white Smooth-On plastic resin. When most resins and finishes completely cure after a few weeks they are food safe. Even if they don’t claim to be food safe. Your dining room table for instance probably has a polyurethane finish on it. Polyurethane isn’t promoted as food safe but once fully cured after a few weeks it’s safe enough to eat off of. I thought the white plastic resin I used would be perfect but it turns out that it gets soft when exposed to heat which is definitely not food safe. In my research I was able to find a few different “food safe” labeled epoxies but none of them mentioned they can be used for hot liquids. I’m sure there is something out there that can be used but I was unable to find it. If you know of anything that’s food safe for hot liquids please let me know in the comments down below. I may try and find a stainless steel insert and attempt this project again.
Thanks for stopping by! Be safe. Be passionate and Make Something!
Tools and Supplies Used


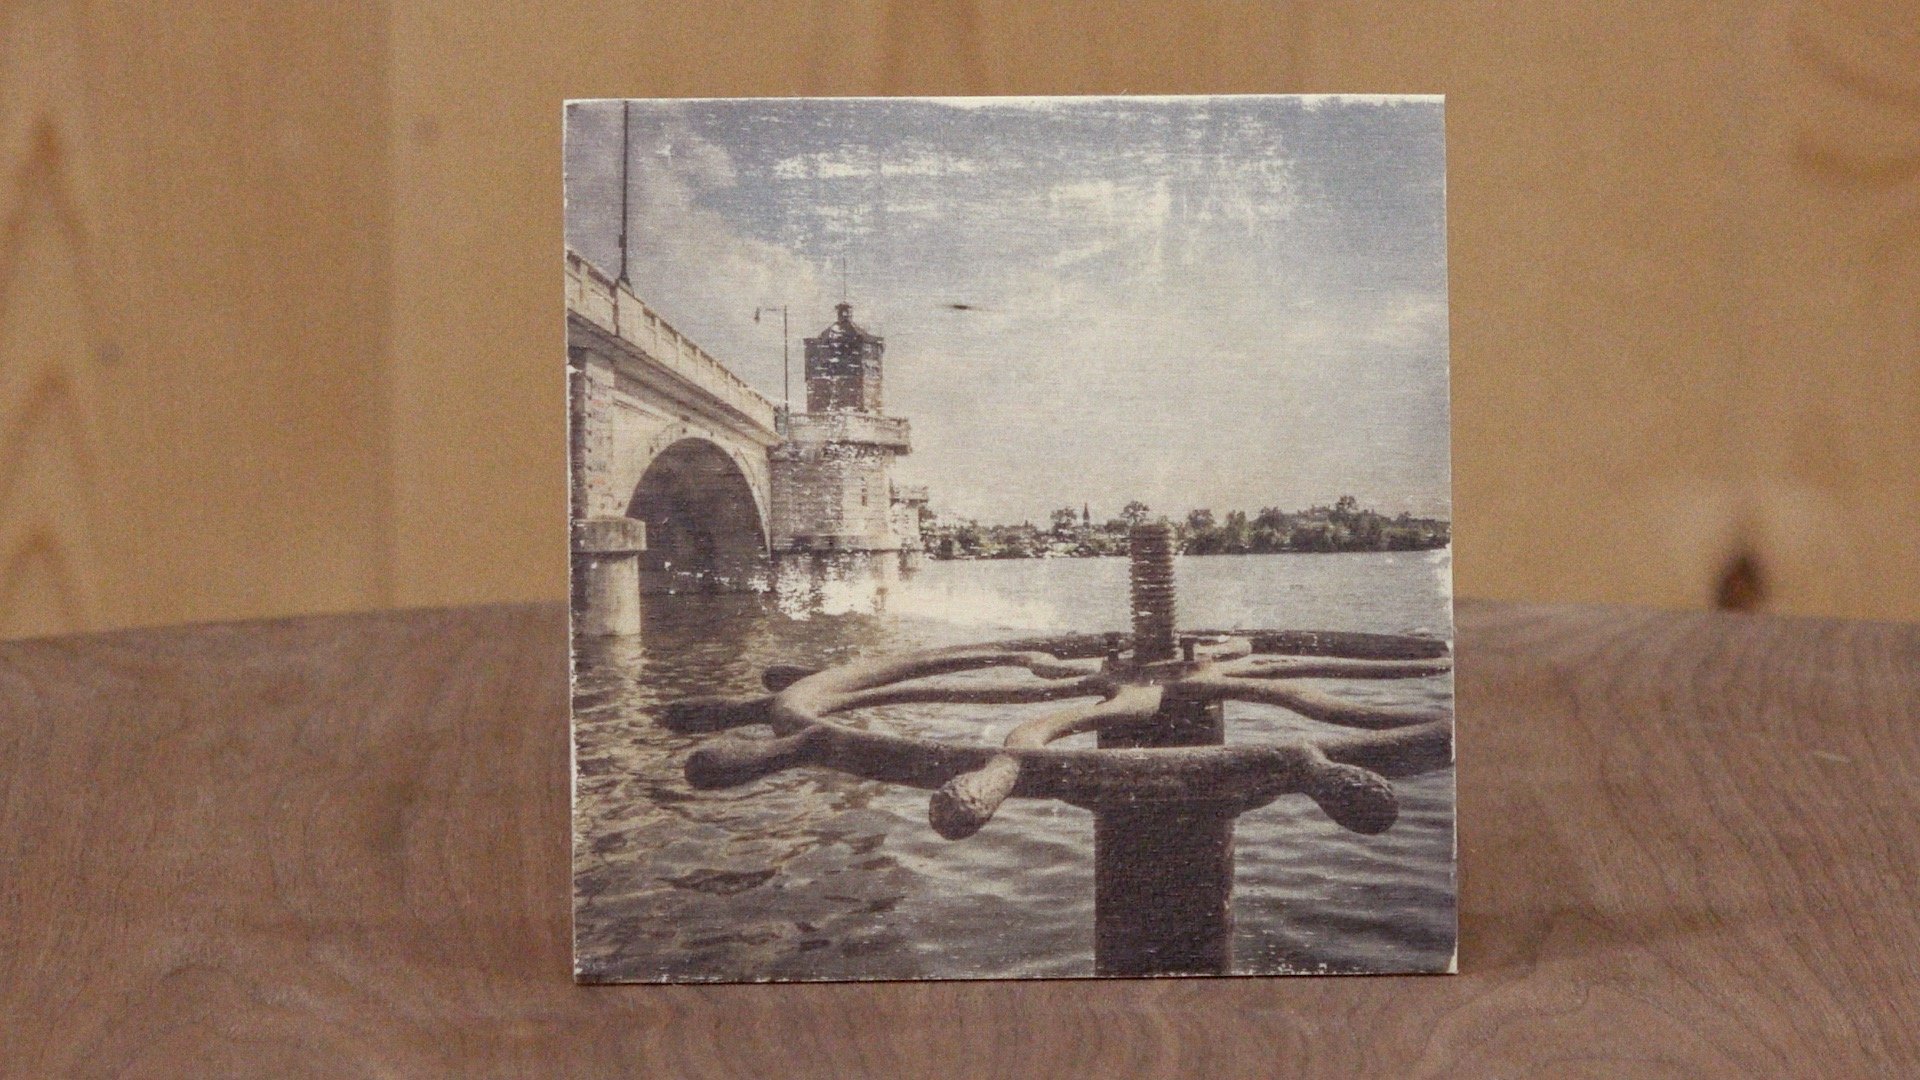
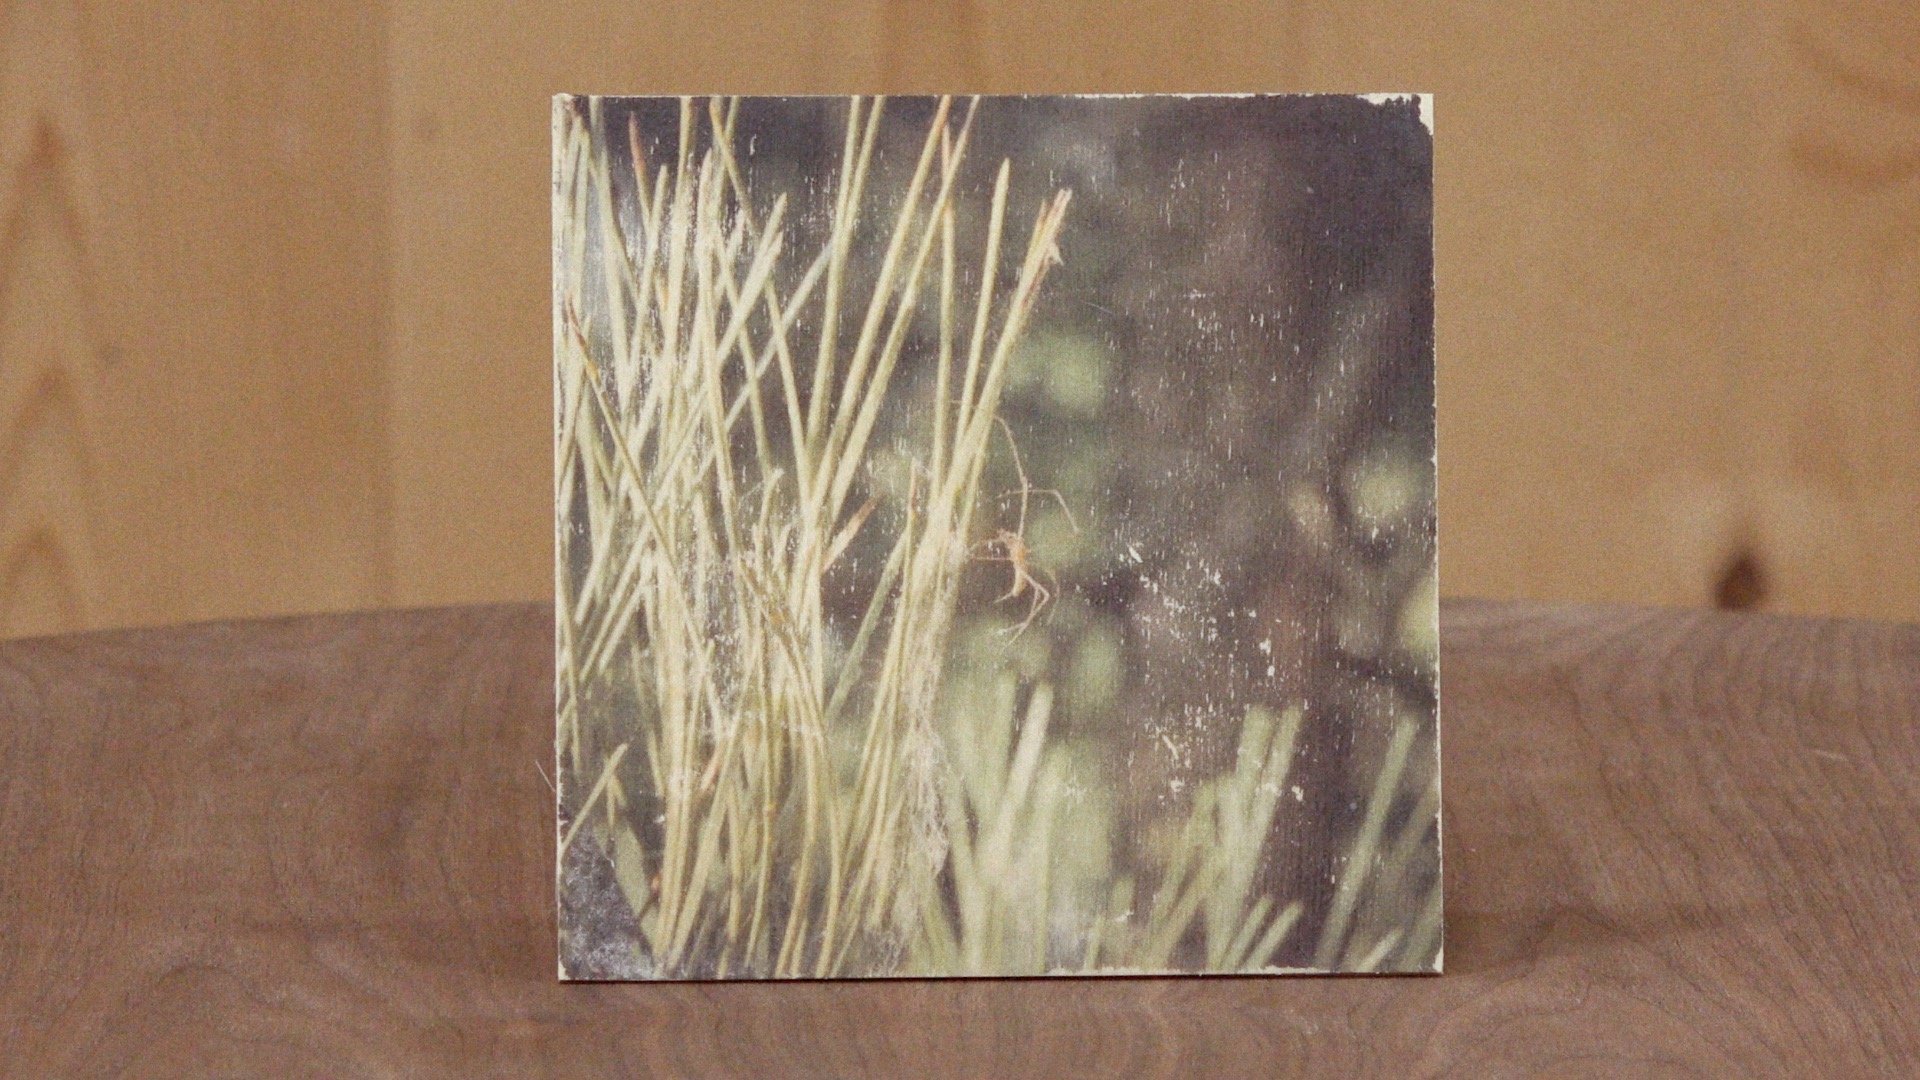
How to Transfer a Photo to Wood
This is an easy way to add some style and texture to your photos!
Image Transfer to Wood
This is an easy way to add some style and texture to your photos. Using this photo transfer technique there will be some loss of quality and some photos will work better than others. You’ll want to choose images with high contrast (dark areas and light areas). Any photographs with lots of detail or made up of mostly mid-tones may not work. The final product will have a vintage look and feel, almost like an old postcard. I chose some clean baltic birch plywood without much noticeable grain pattern so the focus would be on the photos. This is one of those art projects I’ll be experimenting with more and trying to come up with creative pieces using this simple technique. Let me know in the comments down below if you have any cool techniques you’d like to see me try!
Tools and Supplies Used


How to Make an Alaskan Ulu Knife
How to make a classic ulu knife and cutting board combination.
The Making of the Ulu Knife
In our house we’ve been using an Alaskan ulu knife for many years. It’s an easy and quick way to cut fruits and vegetables. The curvature of the blade rocks back and forth on the mating cutting board for efficient slicing. The ulu knife and cutting board is based on one we purchased while visiting Alaska many years ago.
Knife Making
The blade is made from a sheet of 16 gauge stainless steel cut with a jigsaw and metal cutting blade. Some final sanding and shaping was done on the disc sander and belt sander. I sharpened the blade using a Work Sharp 3000 sharpening station and finished up by hand with a sharpening stone. The blade is sandwiched and glued using epoxy between to pieces of soft maple and reinforced with 1/4″ brass dowels.
Cutting Board
The mating cutting board is also made up of soft maple with walnut accents. Once squared up I chucked it on the lathe to carve a recessed bowl to allow the blade to rock back and forth. All the wood was then sanded smooth and finished with butcher block conditioner.
Cook With Meat
This video was made in collaboration with Cook With Meat. Check out his YouTube channel and website for some amazing cooking tutorials.
Tools and Supplies Used


How to Make an Armrest Drink Holder
A simple and quick project that allows a place to put your beverage no matter what shape your couch arms are.
Easy Woodworking Project for Beginners
This is one of those woodworking projects that I’ve had in the back of my mind for months. We don’t have room for end tables in our living room and depending on where you sit the coffee table can be out of reach. This project was made in about 2 hours which includes the time it took to glue and finish. Something I don’t do very often is go into a project without a plan and that’s exactly what I did here and it turned out great. I just started cutting to size on the table saw what I thought looked to be a good size. The center piece is 4″ x 4″ with a 2 7/8″ hole drilled in the middle. Many of you may not have a forstner bit that big and a jigsaw would do just fine in this situation. The bottom is made up of leather scraps I got from a local art scrap store. Another option would be to take an old pair of jeans and I think that would work equally as well. If you make this project be sure to Tweet me some photos! I’d love to see what you come up with! Be passionate and Make Something!
Tools and Supplies Used
- Micro Jig GRR-Rippers
- Kreg Trak and Stop (Tablesaw Sled)
- 2 7/8″ Forstner Bit
- GRR-Rip Block
- 1/4″ Round Over Bit
- Festool Orbital Sander
- Minwax Lacquer Spray, Satin
- Leather used was picked up from a local art scrap store.
- Titebond Quick and Thick (Not available yet and didn’t work for this)
- Contact Cement
- Foam Brush


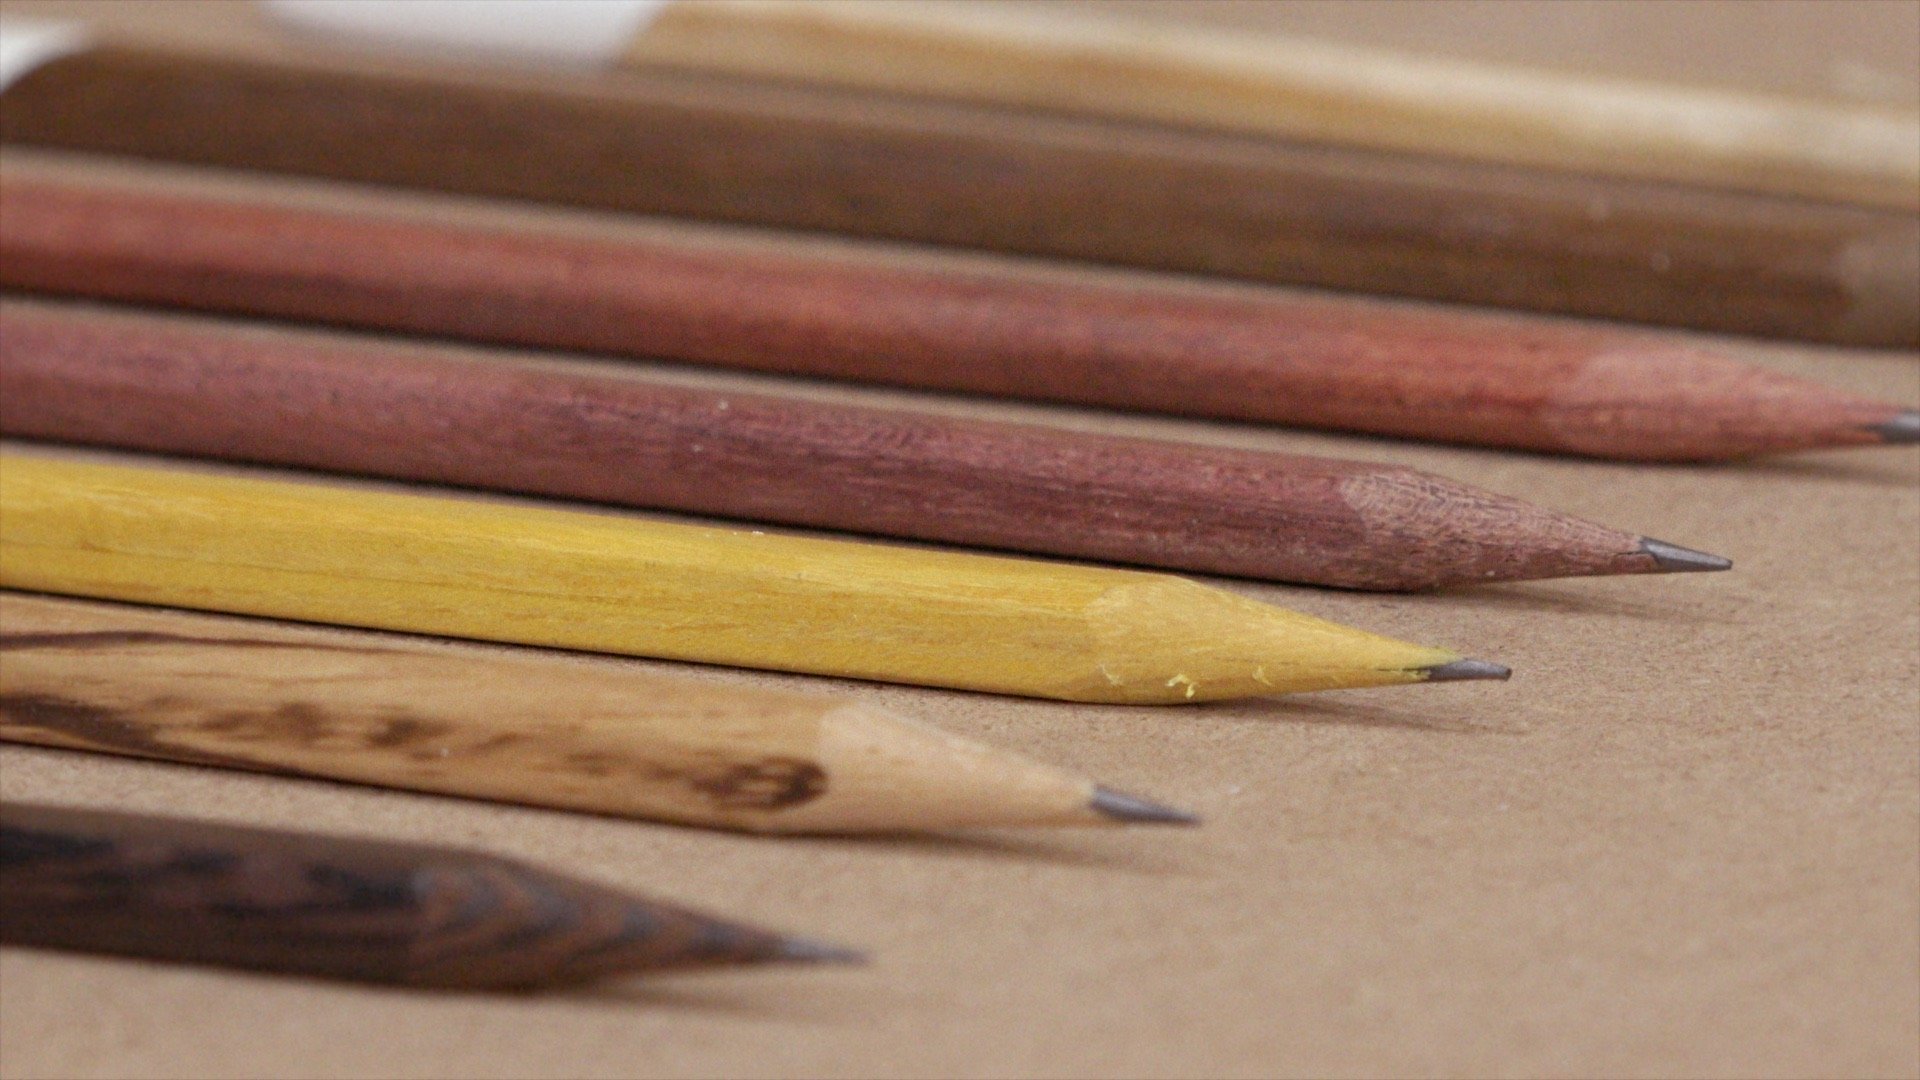
How to Make Wood Pencils
Make your own exotic wood pencils for no reason other than the fun of it!
This is one of those projects I’ve been thinking about for a long time and really glad I followed through on. I couldn’t be happier with how they came out. These were made by routing a very small groove into two pieces of wood to hold the graphite and glued together. I tried to have continuous grain to hide the seam and it worked pretty well. I sanded a hexagon shape into each pencil but it’s not really noticeable because as I was doing some final sanding they rounded out. The shape is still there and the pencils don’t roll off the table but the shape is not as noticeable as I was expecting. I did want them to be super smooth and have a “fine woodworking” feel so I thought the final sanding was necessary. Adding polyurethane and dipping the end in paint was the icing on the cake.
All of these pencils were made in a day. After doing one batch I feel like I could make them even quicker the next time around. These would make a great craft show seller since a handful could be made all at once keeping the final price down and I think I could make them even more eye catching by choosing different color paints for the ends.
If you make any yourself be sure to Tweet some photos to me so I can share them with my audience. Be safe! Be Passionate and Make Something!
Tools and Supplies


How to Make Bent Laminated Spoon
Using bent lamination to create this wooden spoon for the kitchen.
Way back in 1992 when I was just a junior in high school, I made a bent laminated wooden spoon in shop class for a Mother’s Day gift. Now 24 years later I’m recreating the spoon for an updated gift to give to Mom this Mother’s Day. Bent lamination involves resawing the wood into thin bendable strips that can be placed in a mold and glued in place. Once the glue dries the spoon shaped can be cut out on the bandsaw with some final shaping done with the spindle and orbital sander. This is a quick and fun woodworking project that can be done in just a few hours. If you plan on using the spoon for cooking then you’ll need a food safe finish such as the butcher block conditioner I used in the video. As always, be passionate and Make Something!
Tools and Supplies Used


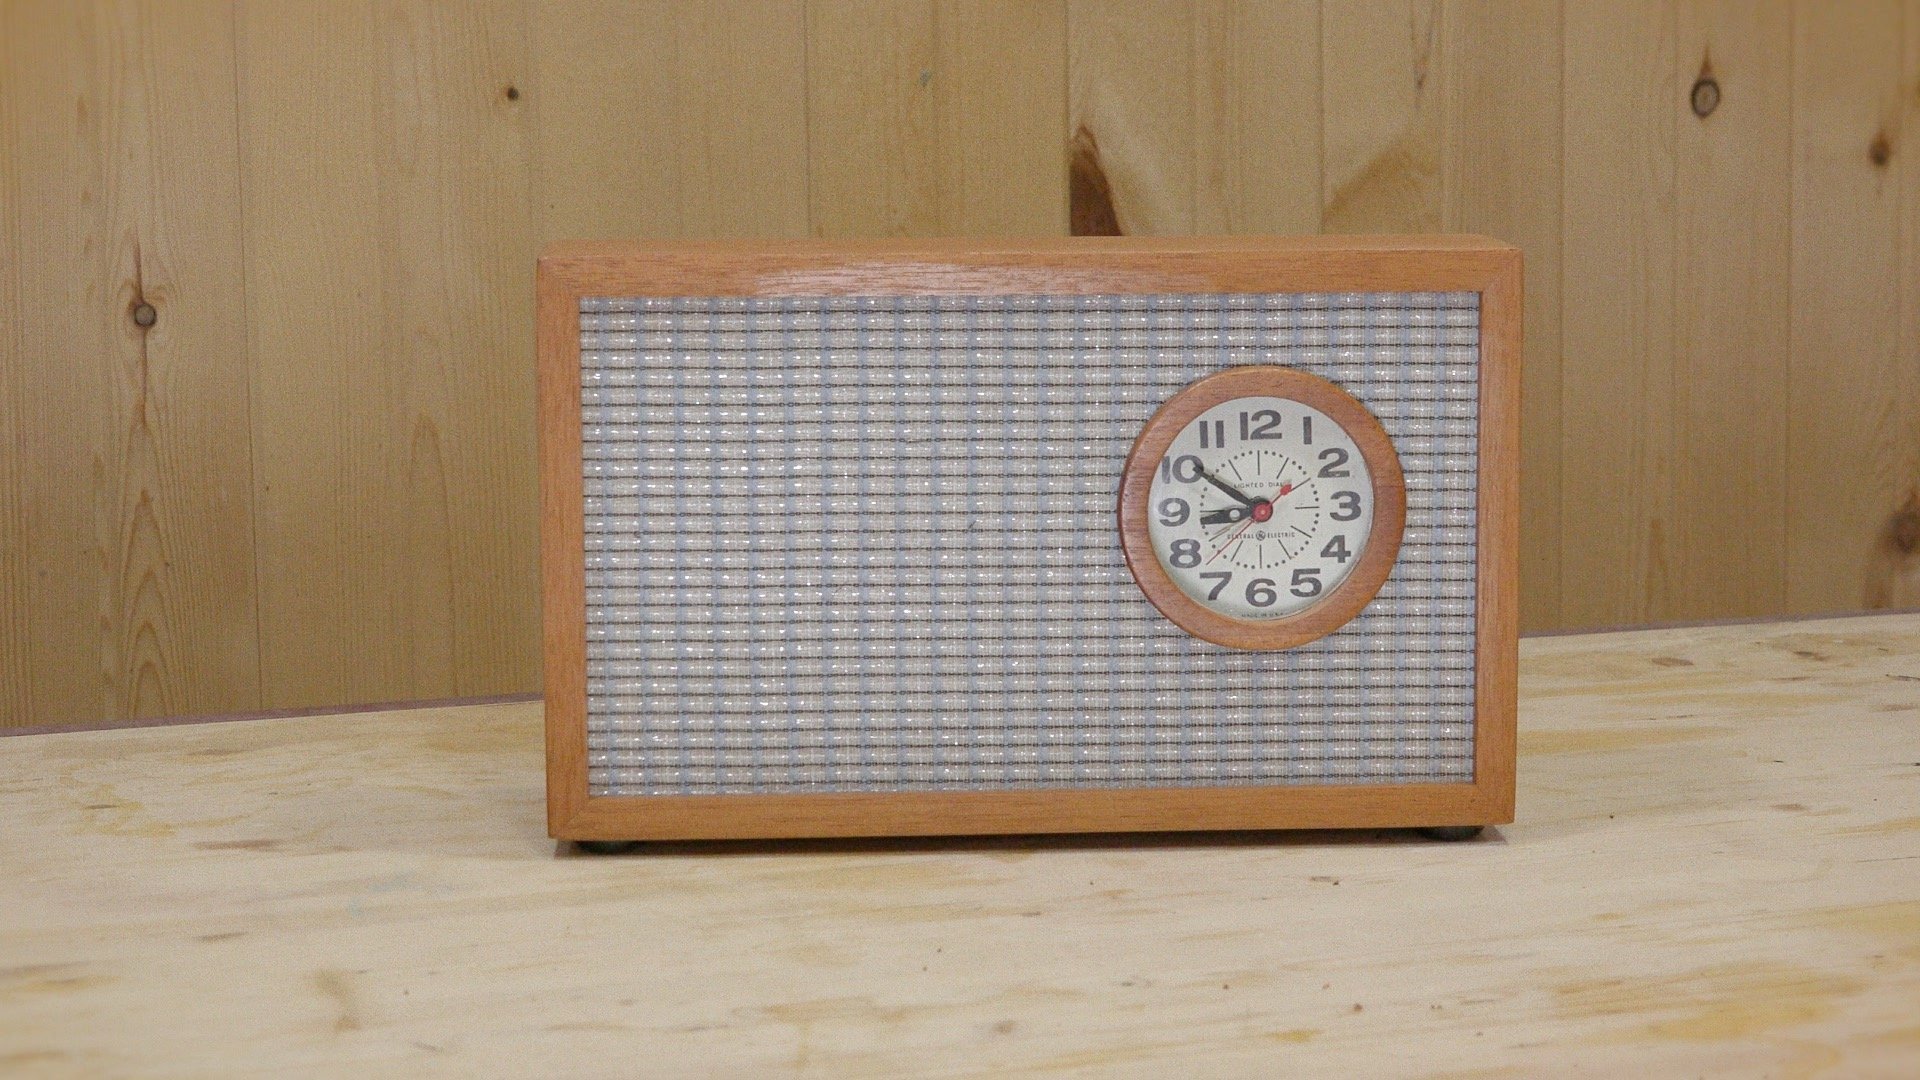
Upcycling a Clock from an Antique Store into Something New
Turn an old clock into something new and stylish in the upcycle project.
This was a fun project that involved one of my favorite hobbies and that’s going shopping at the antique store. I’m lucky enough to live close to a large antique mall in Maumee, Ohio and that’s where I found this old vintage clock I could upcycle into something new. What I liked about the clock is the face and the typography of the numbers so I decided to keep that and scrap the rest. I made a new case out of mahogany wood and guitar amp grill cloth. I liked the idea of having the clock offset with a lot of negative space and decided to fill that space with a piggy bank and removable money bag recycled from a Crown Royal sack.
I ended up donating the clock to my local Goodwill donation center in hopes that some stranger will find joy in this find. Inside the clock I left a note stating when it was made and to spread kindness.
I hope you found this build fun as I plan on doing more upcycle projects such as this in the future. As always, be passionate and make something!
Tools and Supplies Used


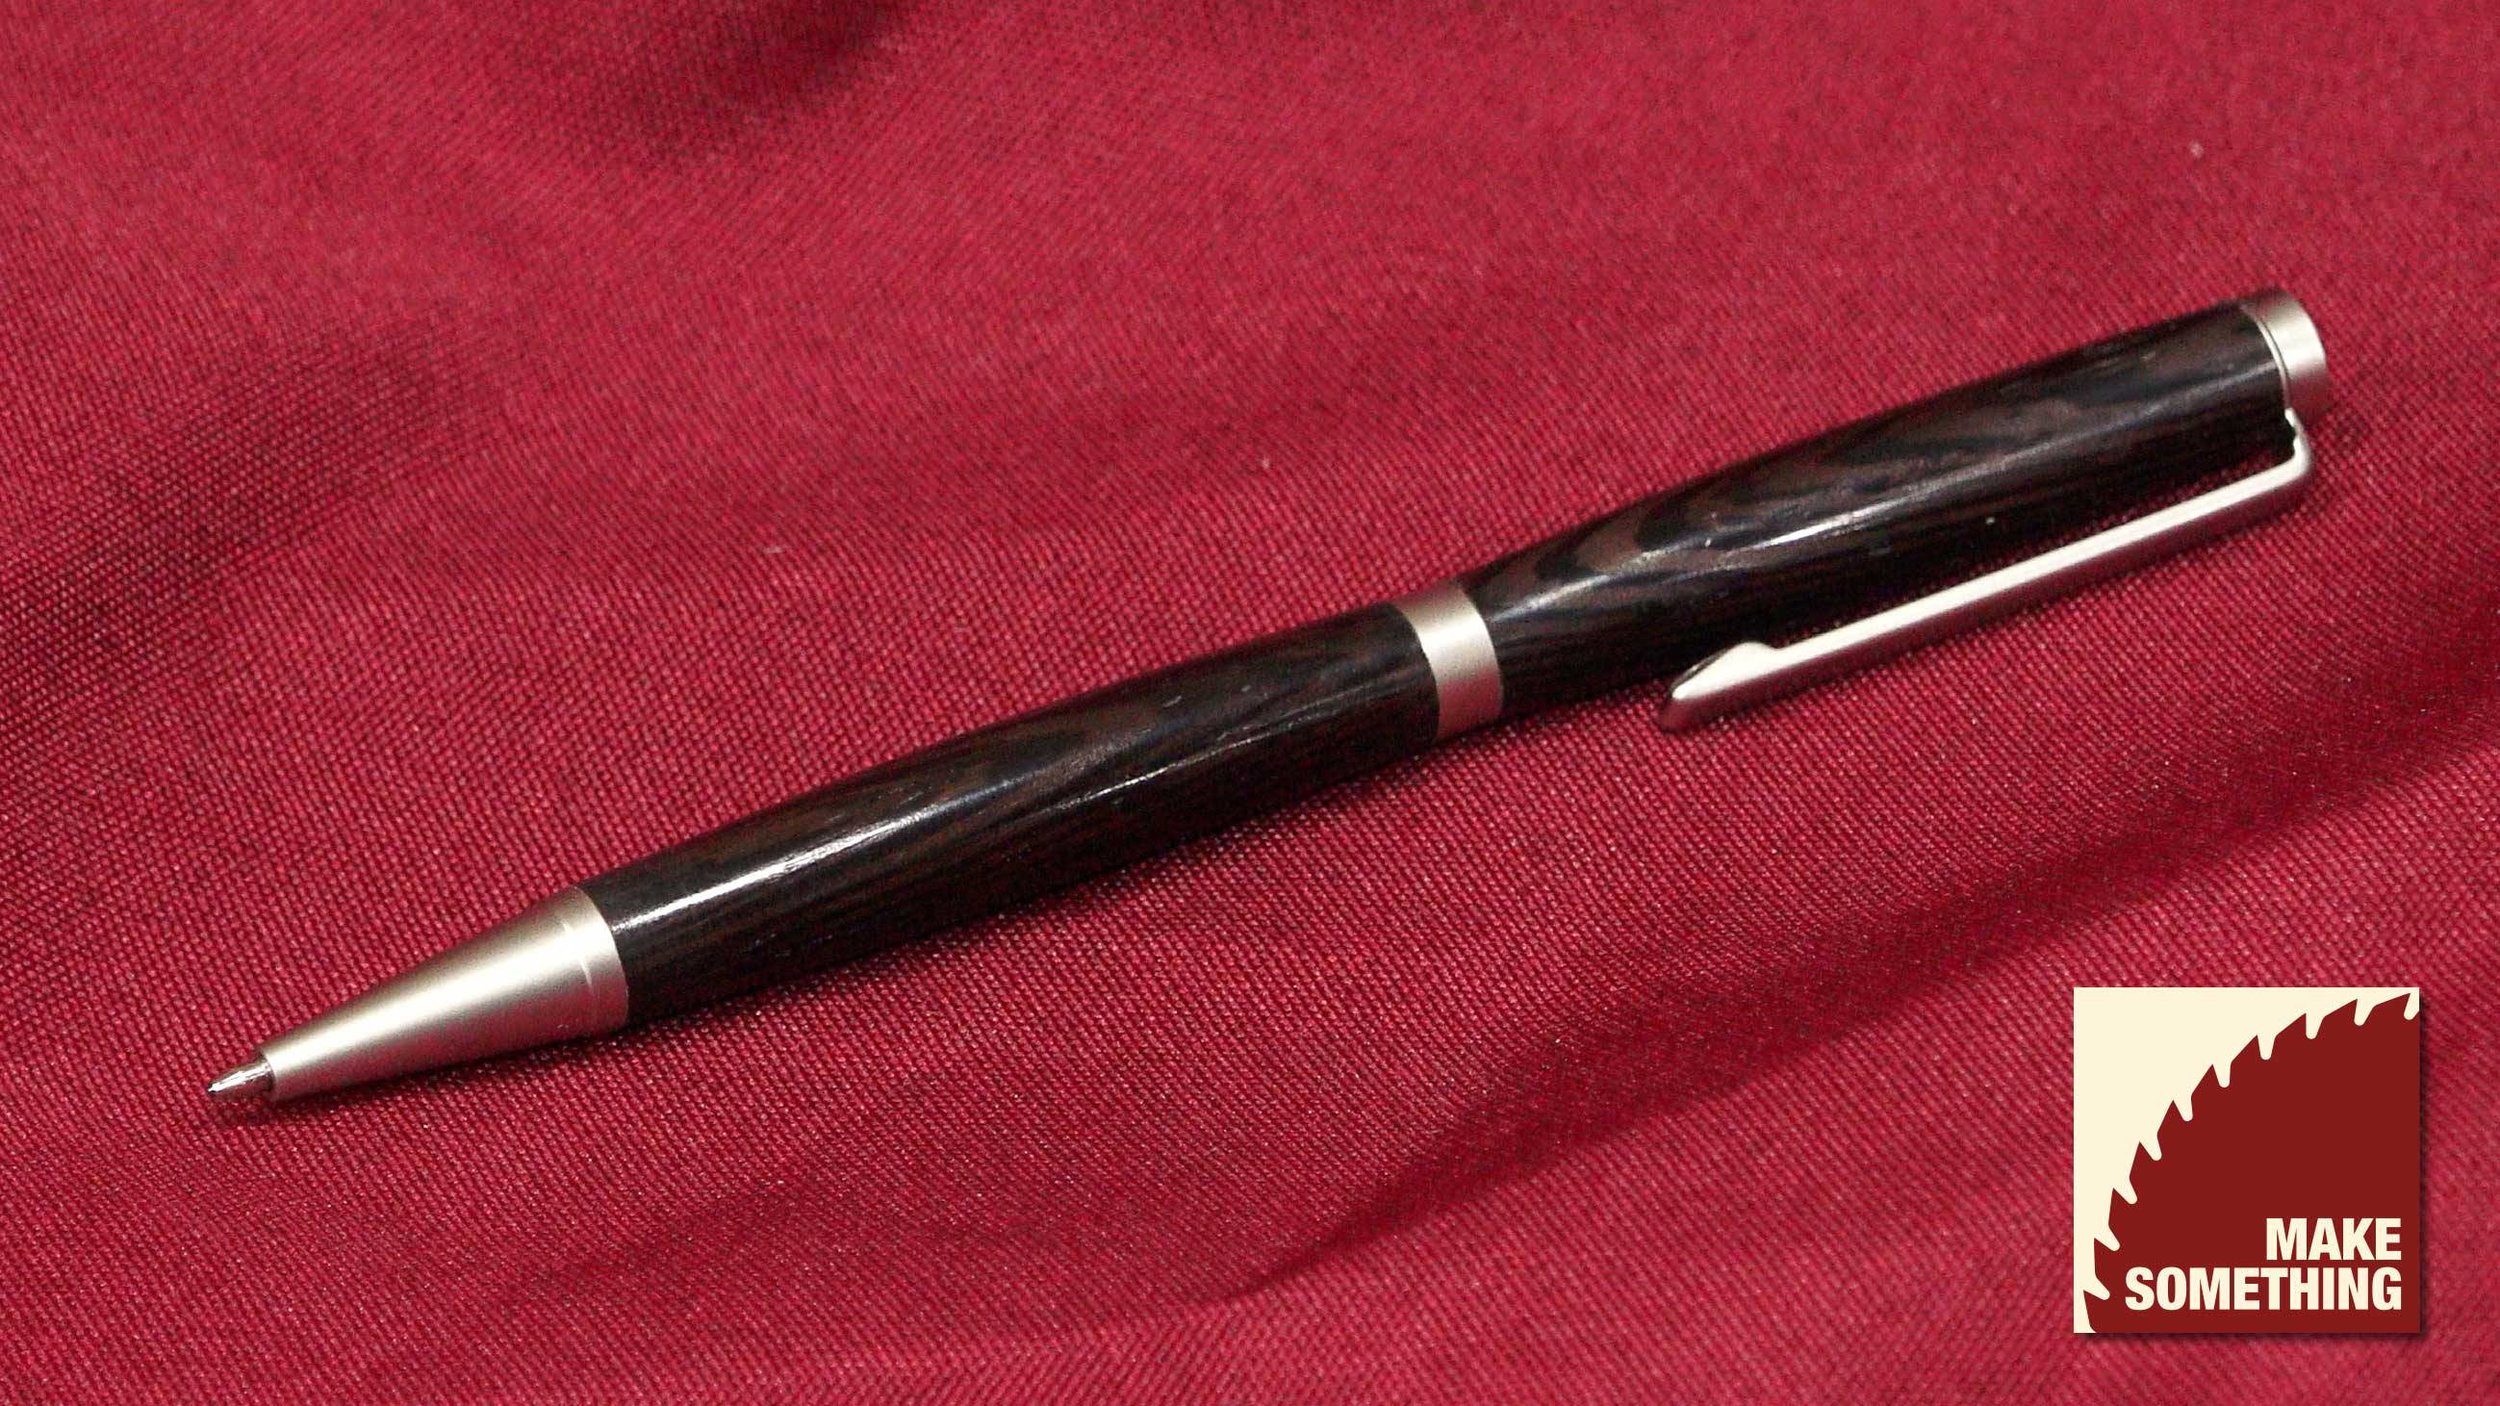
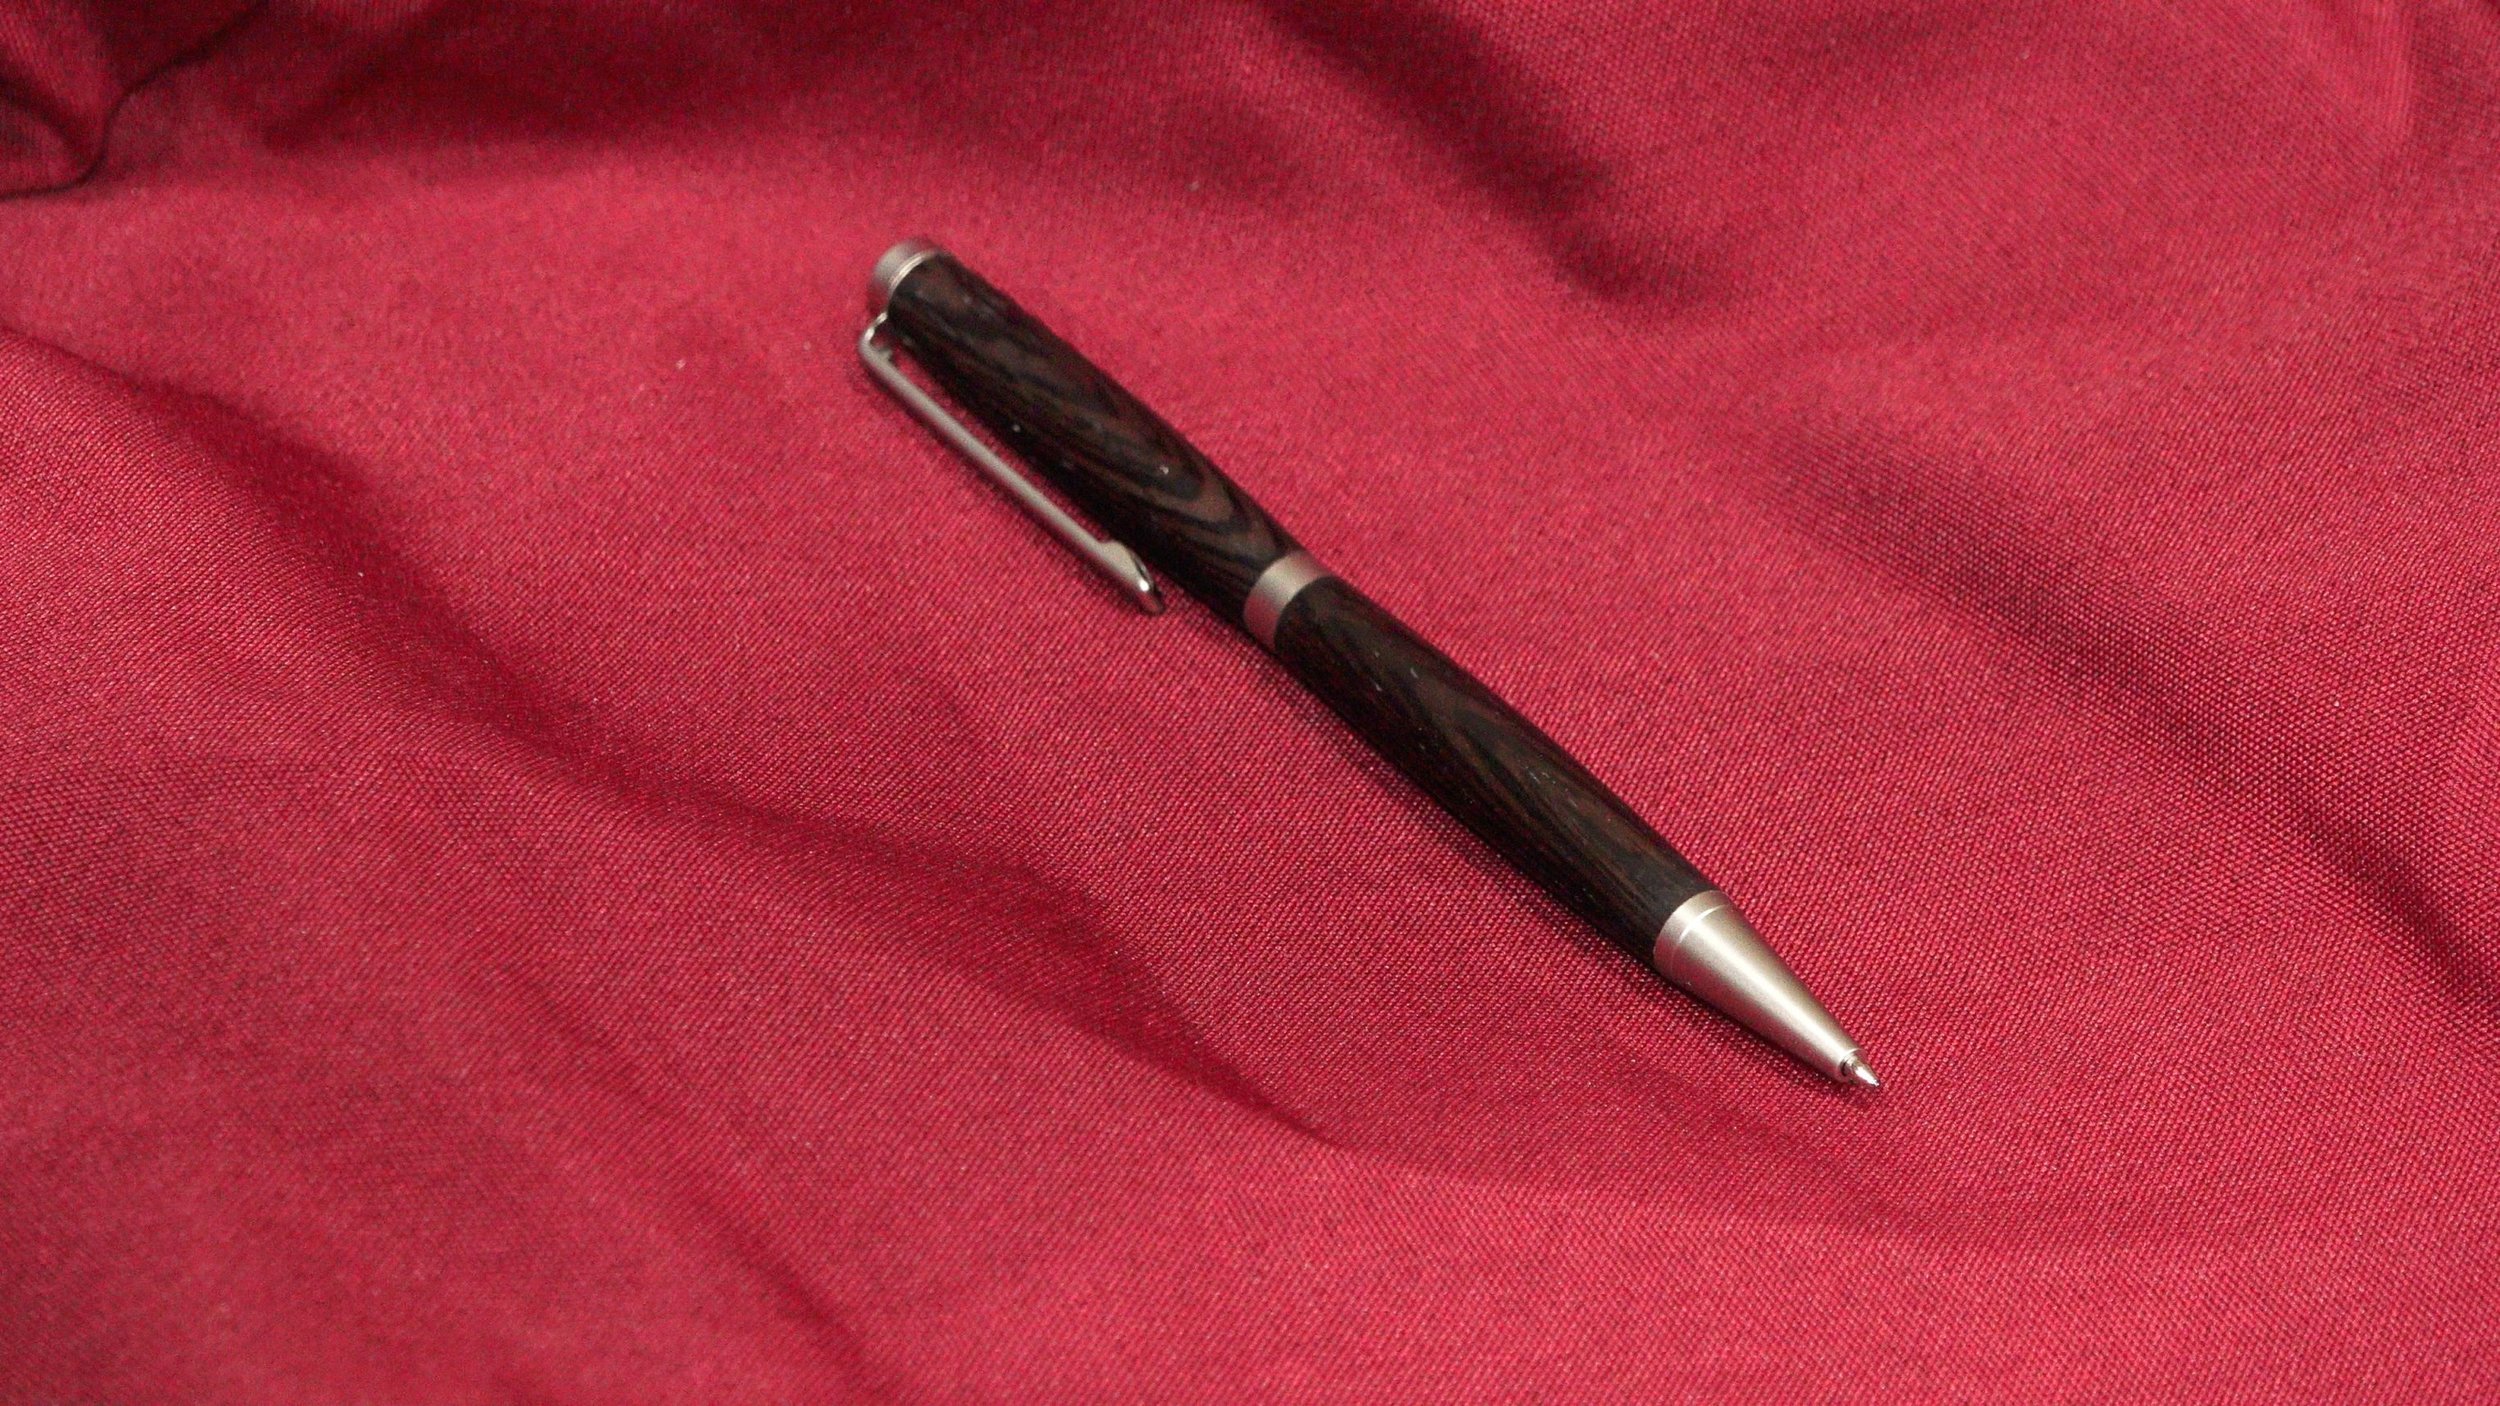
How to Turn a Slimline Pen
How to turn a slimline pen on the lathe. A quick and simple project that a great seller at craft shows.
Turning pens on a lathe is one of those addicting hobbies you come across in woodworking. They can be made from start to finish in about 30 minutes and can be very profitable at craft shows and also make great gifts that family and friends will love. There are a ton of gadgets available for pen turning which may be confusing. In the video above I simplify the process and break down what pen turning accessories you need and the ones you may not need for the slimline kits. The following steps are the basics in getting started in slimline pen turning. Once you have these down you can start to get into the more complicated pen kits and work with segmented pieces as well as acrylics and non traditional materials. I am by no means an expert turner so if you have any suggestions and pen turning tips, leave them in the comments below. As always, be safe, stay passionate and make something!
Pen Turning Supplies and Tools


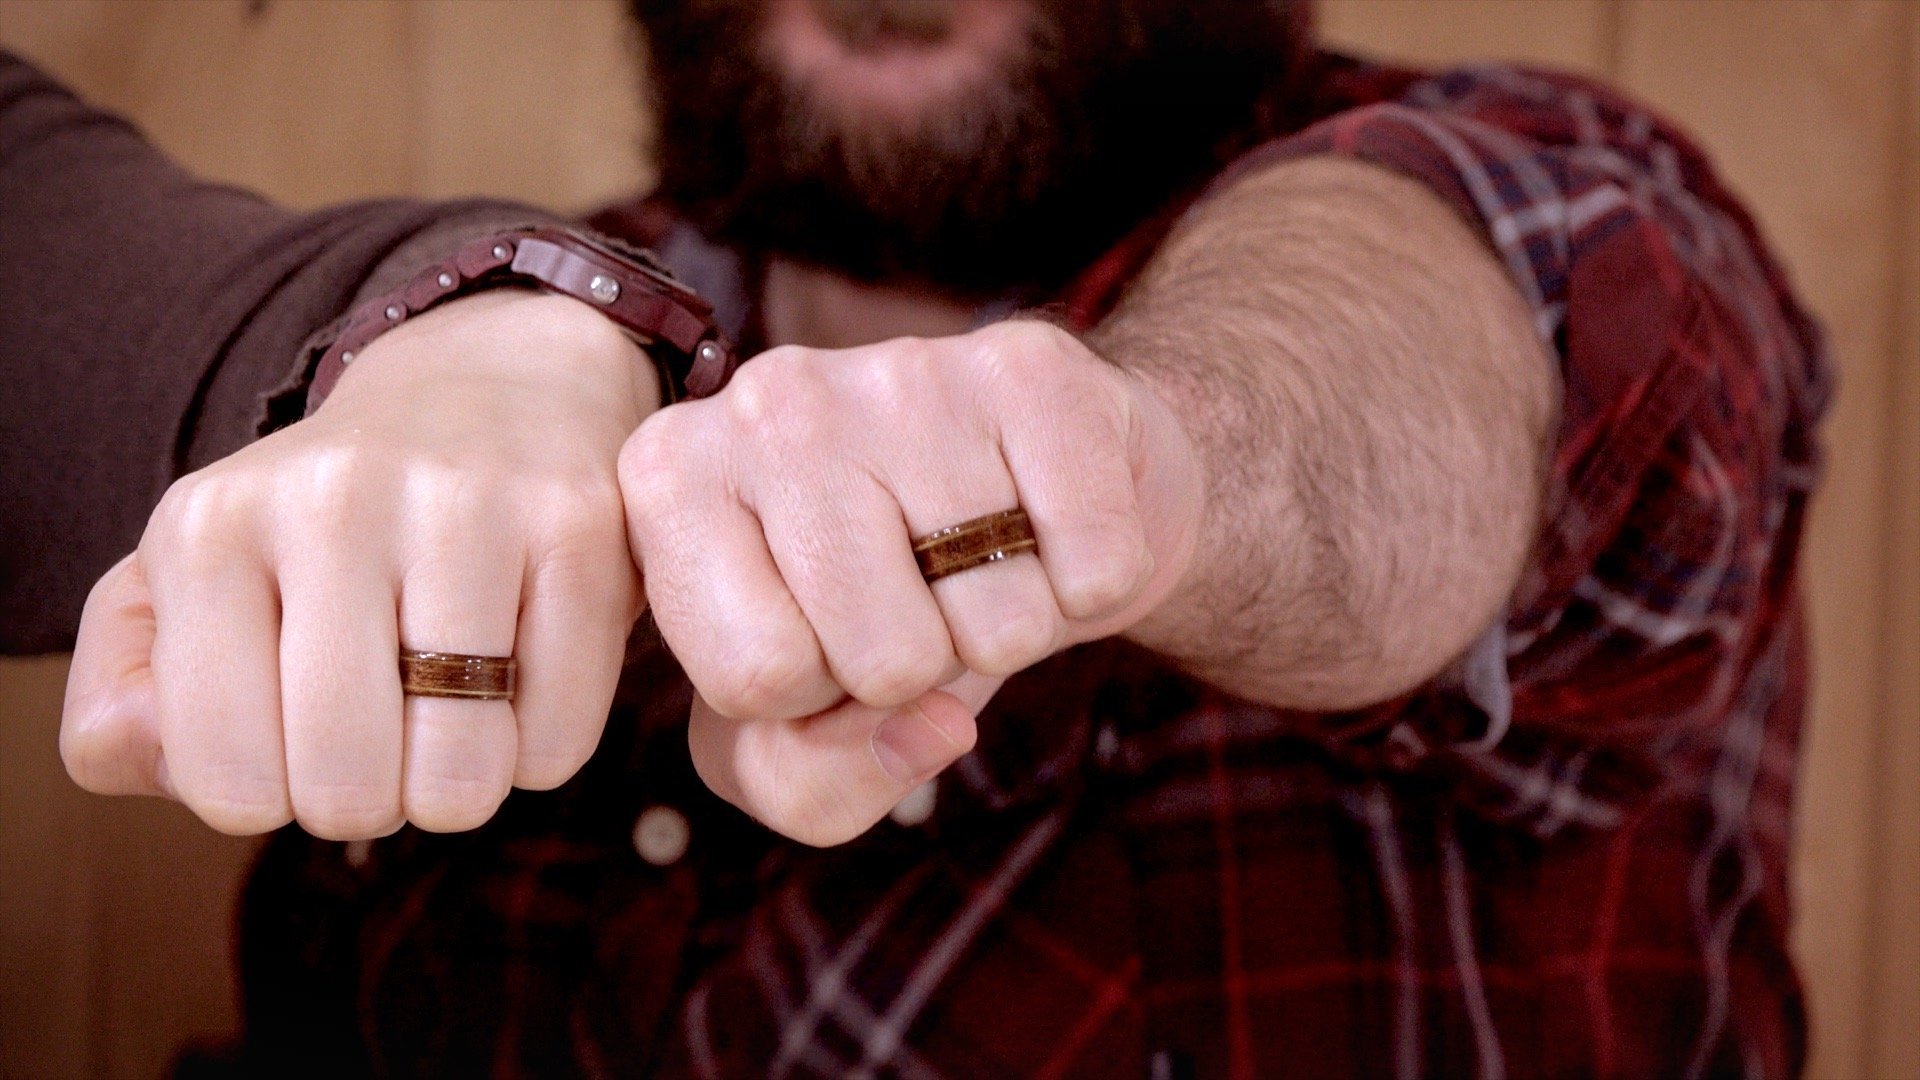
How to Make Wood Rings / Bentwood Rings
Making these wood rings is pretty simple and can be done without many tools.
Making these wood rings is pretty simple and can be done without many tools. Basically we’re going to take some veneer and boil it in water to make it more pliable. We’ll then coil the veneer onto itself and bonding it with CA glue. You’ll find these rings are much stronger than just drilling a hole into wood and cutting the outside shape. That’s because we won’t have any weak points with endgrain. There will be many layers with straight grain laminated with glue which will make them very strong and durable. I’ll also show you how I added these accent lines with a contrasting veneer between 3 coils. Let’s get started.
Items and Supplies Used


Cheap and Easy to Make Planter Boxes
A quick an easy DIY project making window planters.
Earlier this year we had a new front deck installed and we thought it was time to replace all the old planter boxes in the front of the house to go along with the new porch. To make these planters I’m using $6 common board pine from Home Depot. One $6 board is enough for one planter box. This is a real quick and easy project that anybody with a few basic woodworking tools can do.
Products Used


How to Make a 3D Layered Photograph with ArtResin Epoxy
How to make a 3D layered photo using epoxy.
I to show you how to make this 3D layered photograph of my dog. It involves taking 1 image, cutting out the background and making a print from that and another print from the foreground image. In this example I’m making the frame from scratch but you could easily take an existing frame and do this as long as the depth is over 1/2”. That will allow a reservoir for all the epoxy we’re about to use.
I’m using a new product call Art Resin and I’m loving it. Unlike most 2-part epoxies, Art Resin is free of VOCs has no fumes and safe. It’s super clear and easy to use. This is now my go-to for all my kitchen based woodworking projects.
Products Used


Pallet Wood Project: Key and Coat Rack
A simple coat rack make from free pallet wood!
Pallet Wood Project
The goal of this video is to inspire you to make something. Pallet wood is free and readily available to use and makes for some great woodworking projects. If you leave it rough you’ll get a nice rustic look. This is my first time using pallet wood as well as chalk paint. In this video I’m making a key rack/coat rack/sunglass holder that will be used in the entrance of my house. This is a very basic and simple woodworking project that anybody can do with a few tools. The chalk paint takes that rustic look over-the-top. I’ll add a base coat of gray let that dry and then add some color over top of that. Which we will then distress using sandpaper and a scraper.
- Micro Jig GRR-Ripper
- Folkart Plaid 34168 Home Decor Chalk Paint, 8-Ounce, Castle
- Folkart Plaid 34994 Home Decor Chalk Paint, 8-Ounce, Tuscan Red
- Folkart Plaid 34155 Home Decor Chalk Paint, 8-Ounce, Vintage Mustard
- Folkart Plaid 34169 Home Decor Chalk Paint, 8-Ounce, Rich Black
- Folkart Plaid Sanding Foam Block
- Folkart Plaid Scraper


Antique Flip Clock Up-Cycle Project
Taking an old antique flip-clock and upcycling it into a modern design.
Antique flip clock up-cycle woodworking project. I found this old antique flip clock at an antique store for $15. I gutted the clock and rebuilt the outer shell out of walnut using a joinery technique called birdsmouth joinery. Birdsmouth joinery takes a special router bit designed for 8 sided pieces (you can also purchase a router bit for 6 sided pieces). Using some glass I had lying around and a glass cutting tool, cut the octagonal shape. Wedged in behind the glass is metallic card stock cut on a Silhouette Cameo die-cutting machine. The glass and the metallic card stock sits in a groove cut into the inside of the walnut. There is also a rabbet cut in the back to hold the rear piece that is held in by hot glue. The gutted clock fits into the shell snuggly by hot gluing pieces of scrap wood on the inside to hold the mechanical unit. The complete clock was finished with a mixture of boiled linseed oil and polyurethane.
Here’s What You’ll Need


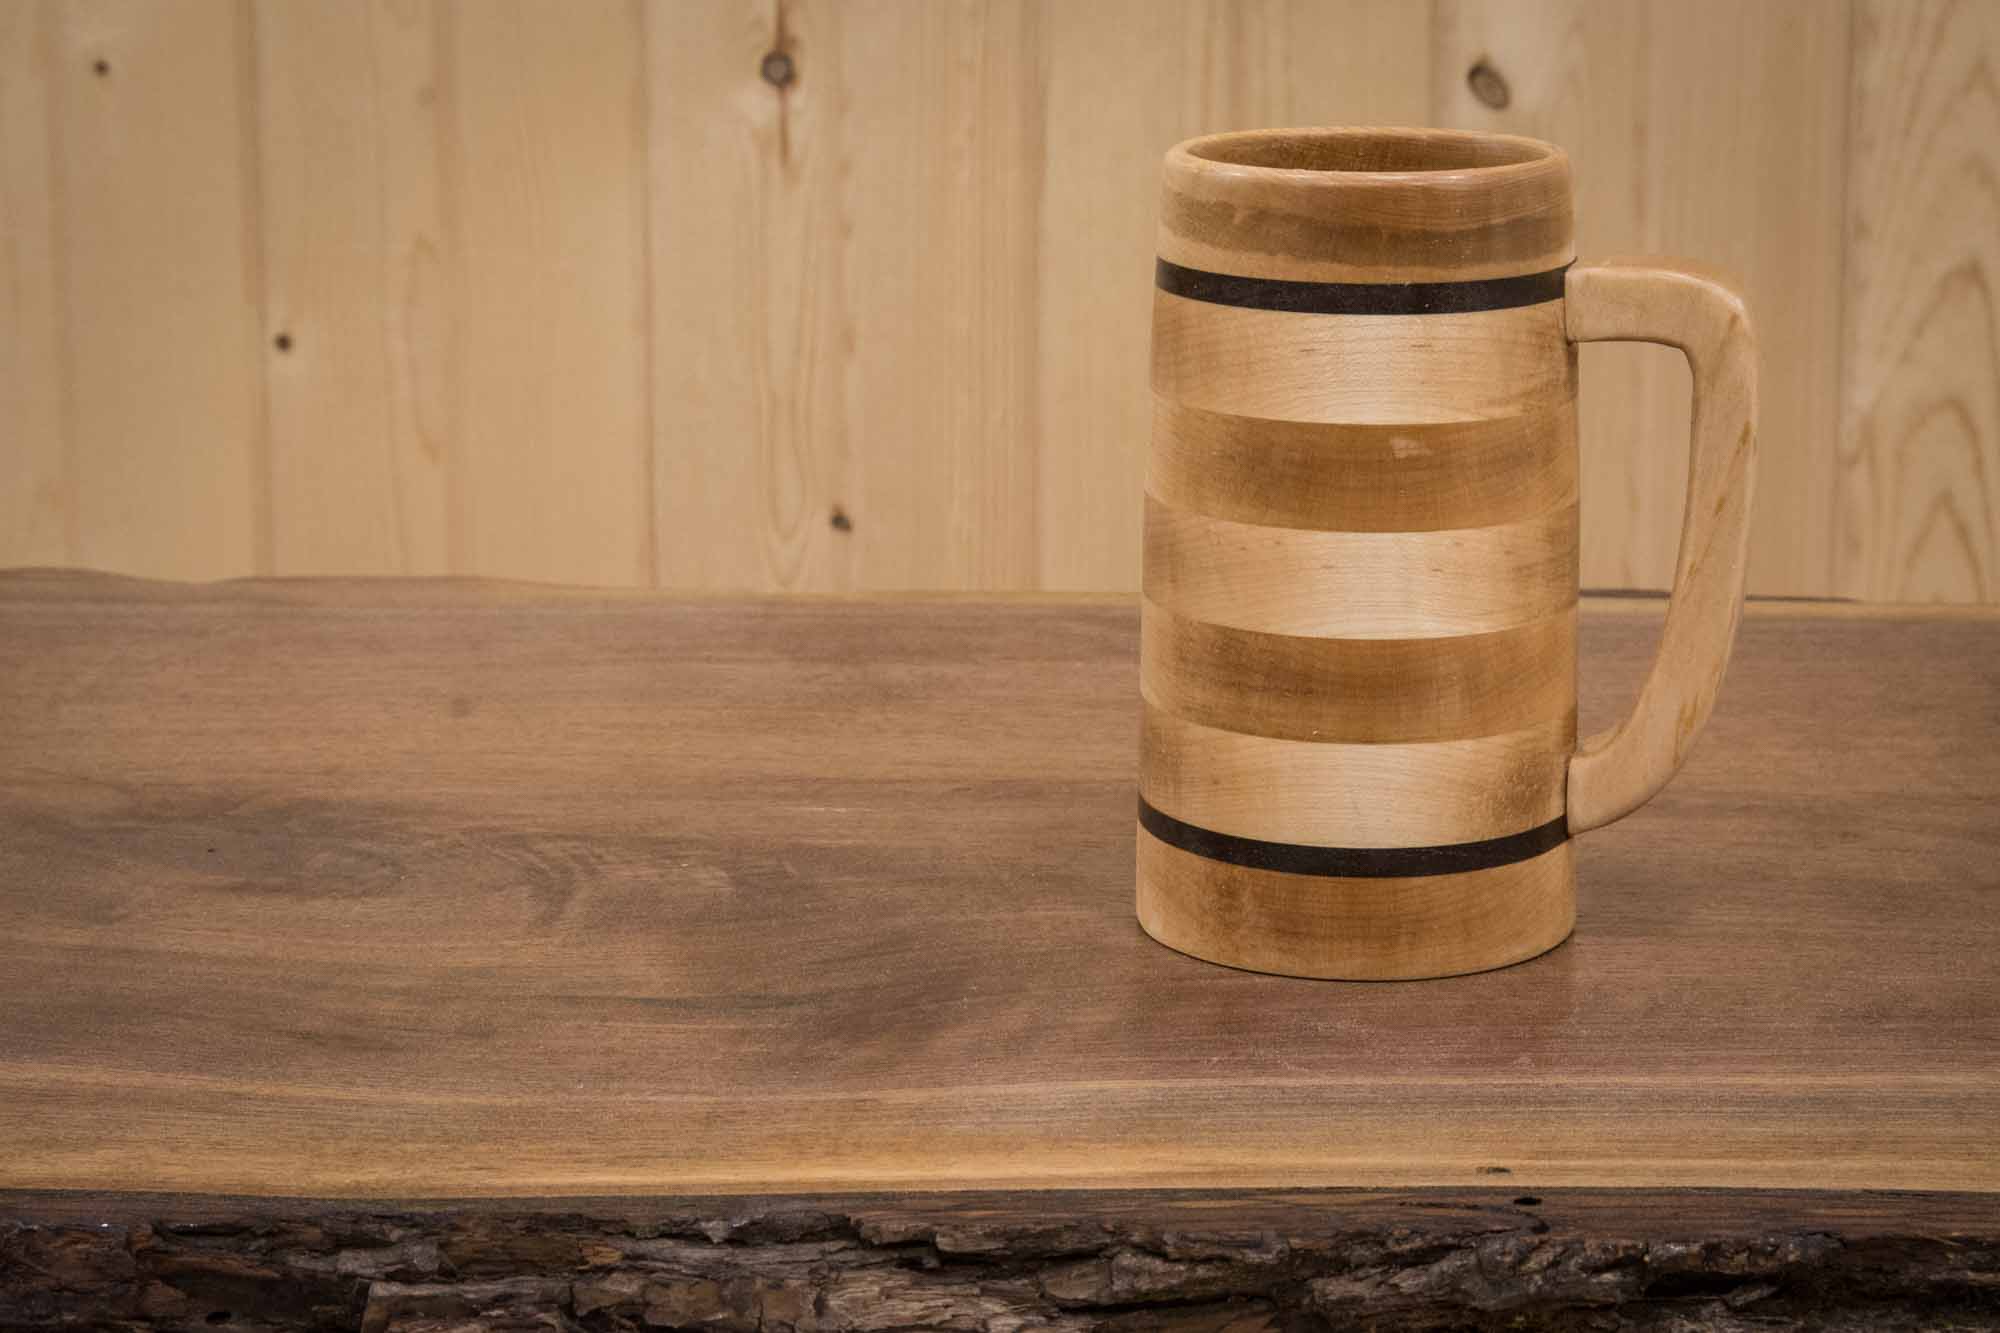
How to Make a Beer Mug on the Lathe
A fun weekend woodworking project on how to make a beer mug/beer tankard on the lathe.
Making a Beer Tankard
A fun weekend woodworking project on how to make a beer mug/beer tankard on the lathe. We’ll start by cutting up all the pieces on the tablesaw. Next we’ll glue and clamp them all up and once dry, mount it up on the lathe and start turning. The inside is hollowed out using a forstner bit which makes it a quick and clean cut. And finally we’ll coat the inside with epoxy making it water proof and ready for a nice cold beer.
This is one of those projects where you’ll want to make a few at a time because once your family and friends see it they’re going to want one as well!
Is Epoxy Food Safe?
That’s not an easy question to answer and there are very few epoxies that are labeled food safe. Acquiring that label is a long costly process that many companies just don’t bother with. I’ve found a few woodworking articles saying all finishes are food safe once fully cured. It is to my understanding that epoxy is fully cured and inert after 30 days and is not much different than using a plastic cup. There are a few people who say that the mix of the two-part epoxy must be the exact ratio for this to be true and if it is mixed correctly and fully cured must only be used to serve cold drinks and not be exposed to high temperatures like coffee or a dishwasher. From what I gathered I feel safe drinking beer out of these mugs using the epoxy I got from the Home Center. It is up to you to use your best judgement and research what will work for you.
Here’s What You’ll Need
Woodworking Books

Make Your Own Cutting Boards
15 cutting board projects to make as gifts or sell! Get your signed copy!

The New Bandsaw Box Book
8 bandsaw box projects you can make and sell at craft shows. Signed copies now available!