
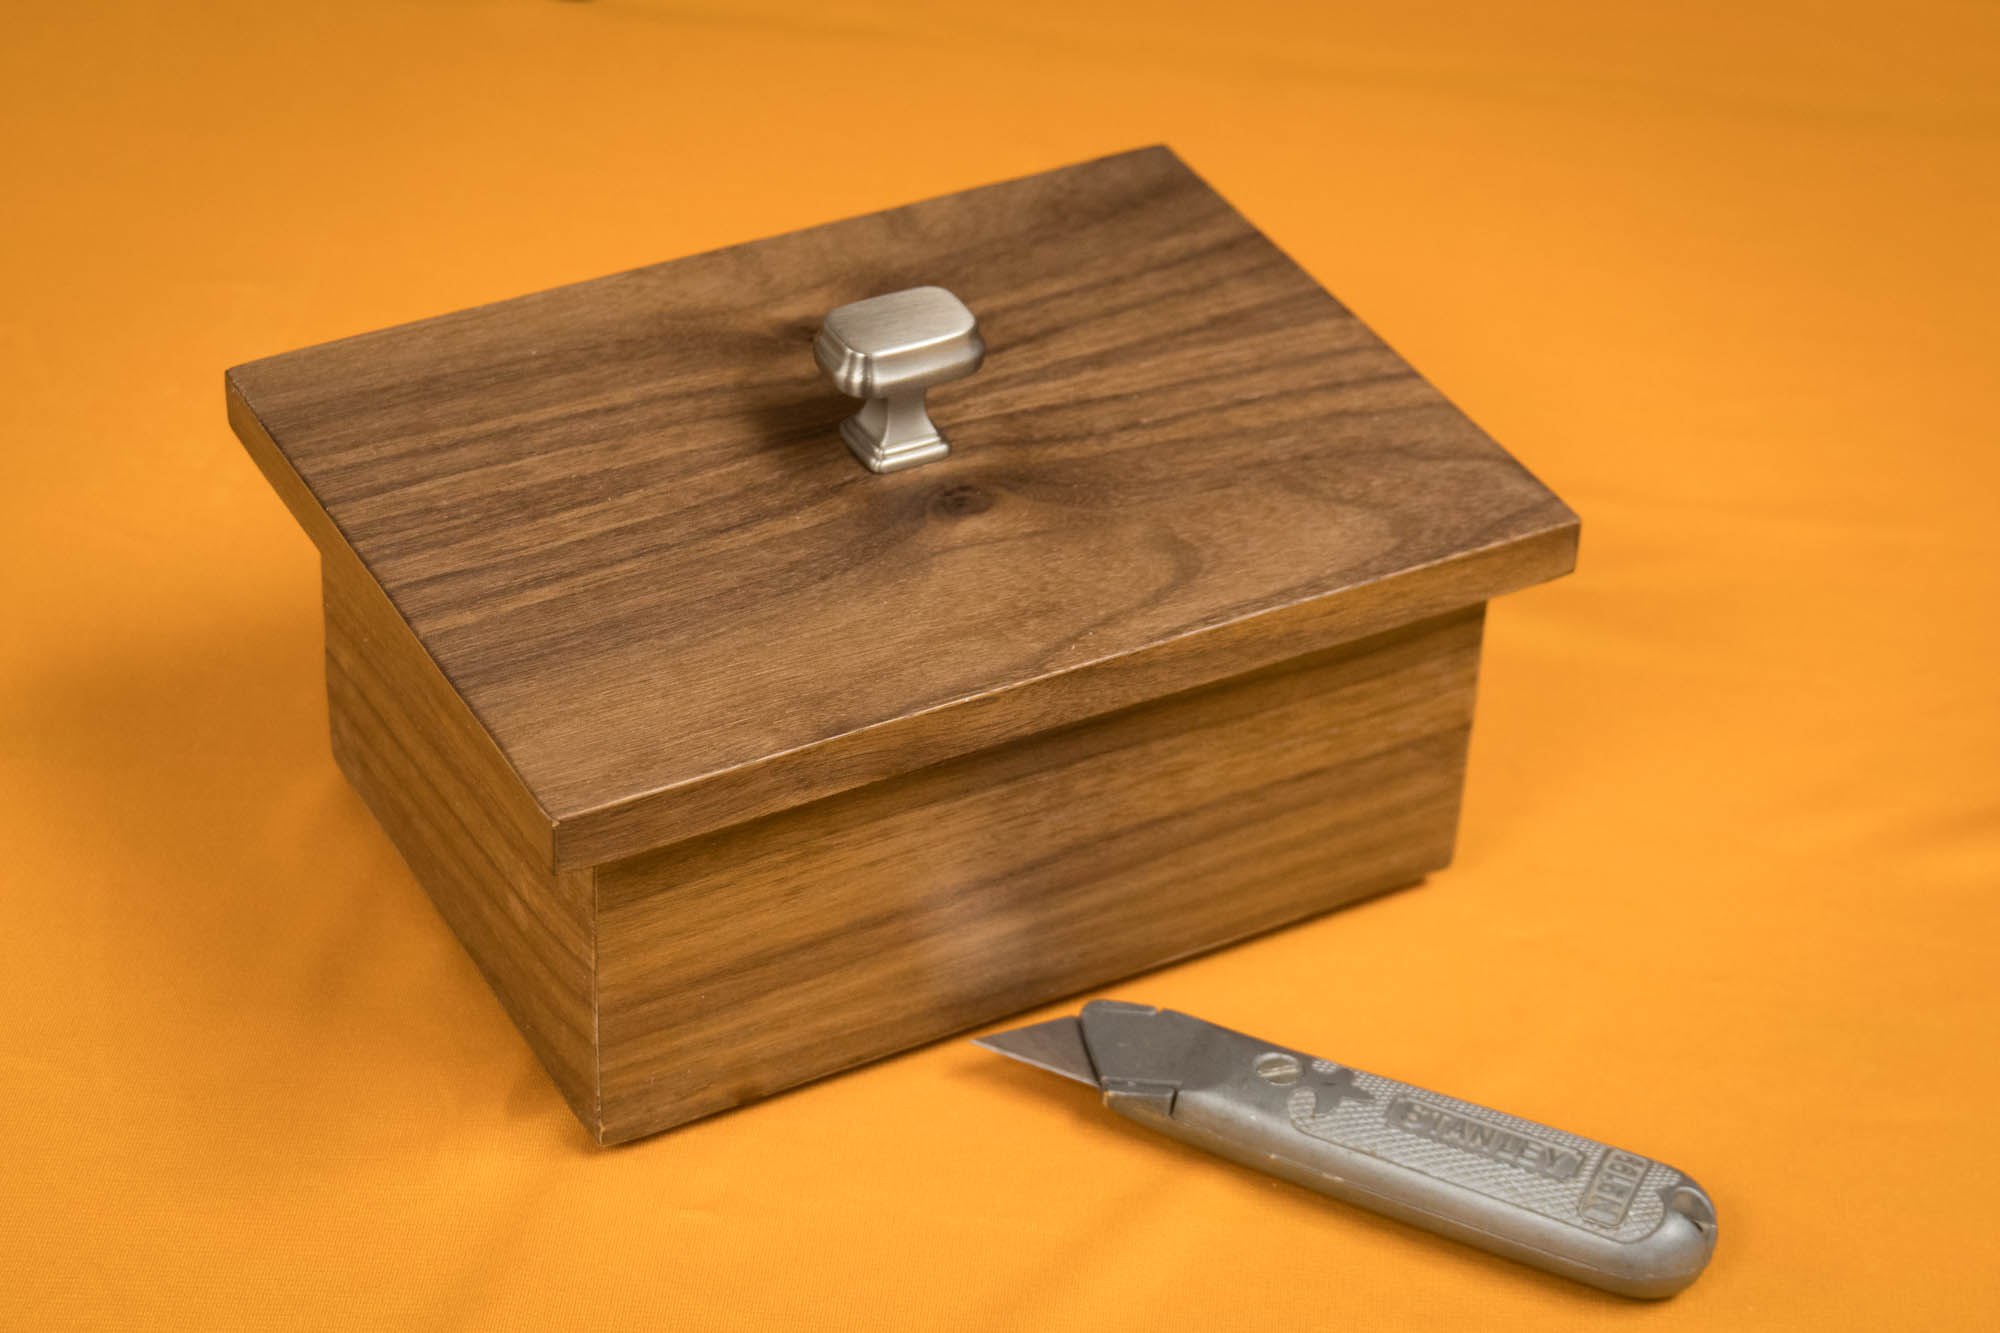
Walnut Box Made with Utility Knife
Create a 100% functional box from foam and veneer, using nothing more than a utility knife and a little ingenuity
Create a 100% functional box from foam and veneer, using nothing more than a utility knife and a little ingenuity
Tools and Supplies Used in this Woodworking Project
I’m not going to lie — I love having all these tools around here, and I’ll bet you feel the same way about the tools in your shop. But sometimes the key to developing your creativity is figuring out how to do more with less. In this tutorial, we going to make something using just one tool.
Armed with only a utility knife, I’m creating a simple box out of foam, veneer and glue, and I think you’ll find it comes together very well. And by limiting the resources available to me, I’ve forced myself to think outside the box (see what I did there?), using just my imagination and a rudimentary understanding of geometry.
Don’t freak out, though, people — I’m not going to start building everything out of foam and veneer. We’ll be getting back into straight-ahead woodworking before you know it. But this was an exercise in challenging myself, and I hope it inspires you to challenge yourself as well.


Making a Dozen Christmas Ornaments // Woodworking & Basket Making
12 Quick and easy Christmas ornaments.
Quick and Easy Christmas Decorations
The folks at True Value Hardware issued a challenge: Create a dozen ornaments (for the twelve days of Christmas, we presume), using their Black Friday specials, everything from Christmas lights to a crock pot. A tall order, so I called in the big guns—my wife and basket-weaving genius Kelly Johns.
Between Kelly’s basket weaving skills and my woodworking, we were able to decorate the Christmas tree in style. Some of the ornaments were simple enough and would make a great activity for the whole family. Other more intricate ornaments came from the turning of the lathe.
What did we make? How did we make it? And what exactly did we do with the crock pot? You’ll just have to watch. Kelly and I were inspired enough to make this an annual holiday woodworking / basket weaving tradition, adding new handmade ornaments to the tree every year. We hope you’ll be inspired to make something as well!
Supplies Used in This Project


Making Segmented Wood Wedding Rings
Every year my wife and I retire our wedding rings and make new ones.
A Yearly Woodworking Tradition
Every year my wife and I retire our wedding rings and make new ones. This is a yearly tradition and this year we’re celebrating our fourth set of wooden rings. Each ring contains 17 segmented pieces meticulously glued together one-by-one. The outside of the wooden rings are made from cocobolo that sandwiches a thin piece of maple.
Wood Provided By Kencraft Company Hardwoods
Tools and Supplies Used in This Woodworking Project


Outdoor Halloween Decor Ghost | DIY Project
How to turn an ordinary outdoor lamp into a spooky halloween ghost.
Easy Halloween Decoration | Spooky Ghost
How to turn an ordinary outdoor lamp into a spooky halloween ghost. All the materials used in this DIY project are common supplies found at your local True Value hardware store.

Tools and Supplies Used in This Halloween Project | True Value Hardware

STEP 1: Rough out the head and shoulders shape with a marker and cut it out with a jigsaw. It doesn’t need to be pretty as we’ll drape some cloth over it in the next step. Also, ghosts ain’t pretty! Now’s also a good time to paint the cutout black.

Step 2: Take some drop cloth and using a staple gun tack it to the head and shoulders. Make sure to not cover the eyes and keep it lose for a spooky effect.

Step 3: Cut the drop cloth to length and start ripping it to long thin shreds. This will help “age” the cloak and add movement in the wind.

Step 4: Now with some grey, black and brown paint you can randomly spray streaks and spots to give it that century warn look.

Step 5: To add a tombstone to your halloween yard decor take some insulation foam board and cut out a tombstone shape. This can easily be done with a utility knife. In this example I also carved out the letters “RIP” and scalloped the edges for a more authentic look.

Step 6: Now you can add some color to your tombstone with some grey and black spray paint.

Step 7: Use what works best for your yard. For my halloween display I needed my tombstone to peak over the bushes so I cut out a stake and attached it using zip ties.

Step 8: Finally, you can attach your spooky halloween ghost to your light pole. Now just wait for it to get dark and turn on your light!
CAUTION: Make sure your light doesn’t get hot as you don’t want to start a fire. If you find it does get hot you can fine replacement LED bulbs that don’t throw off any heat.
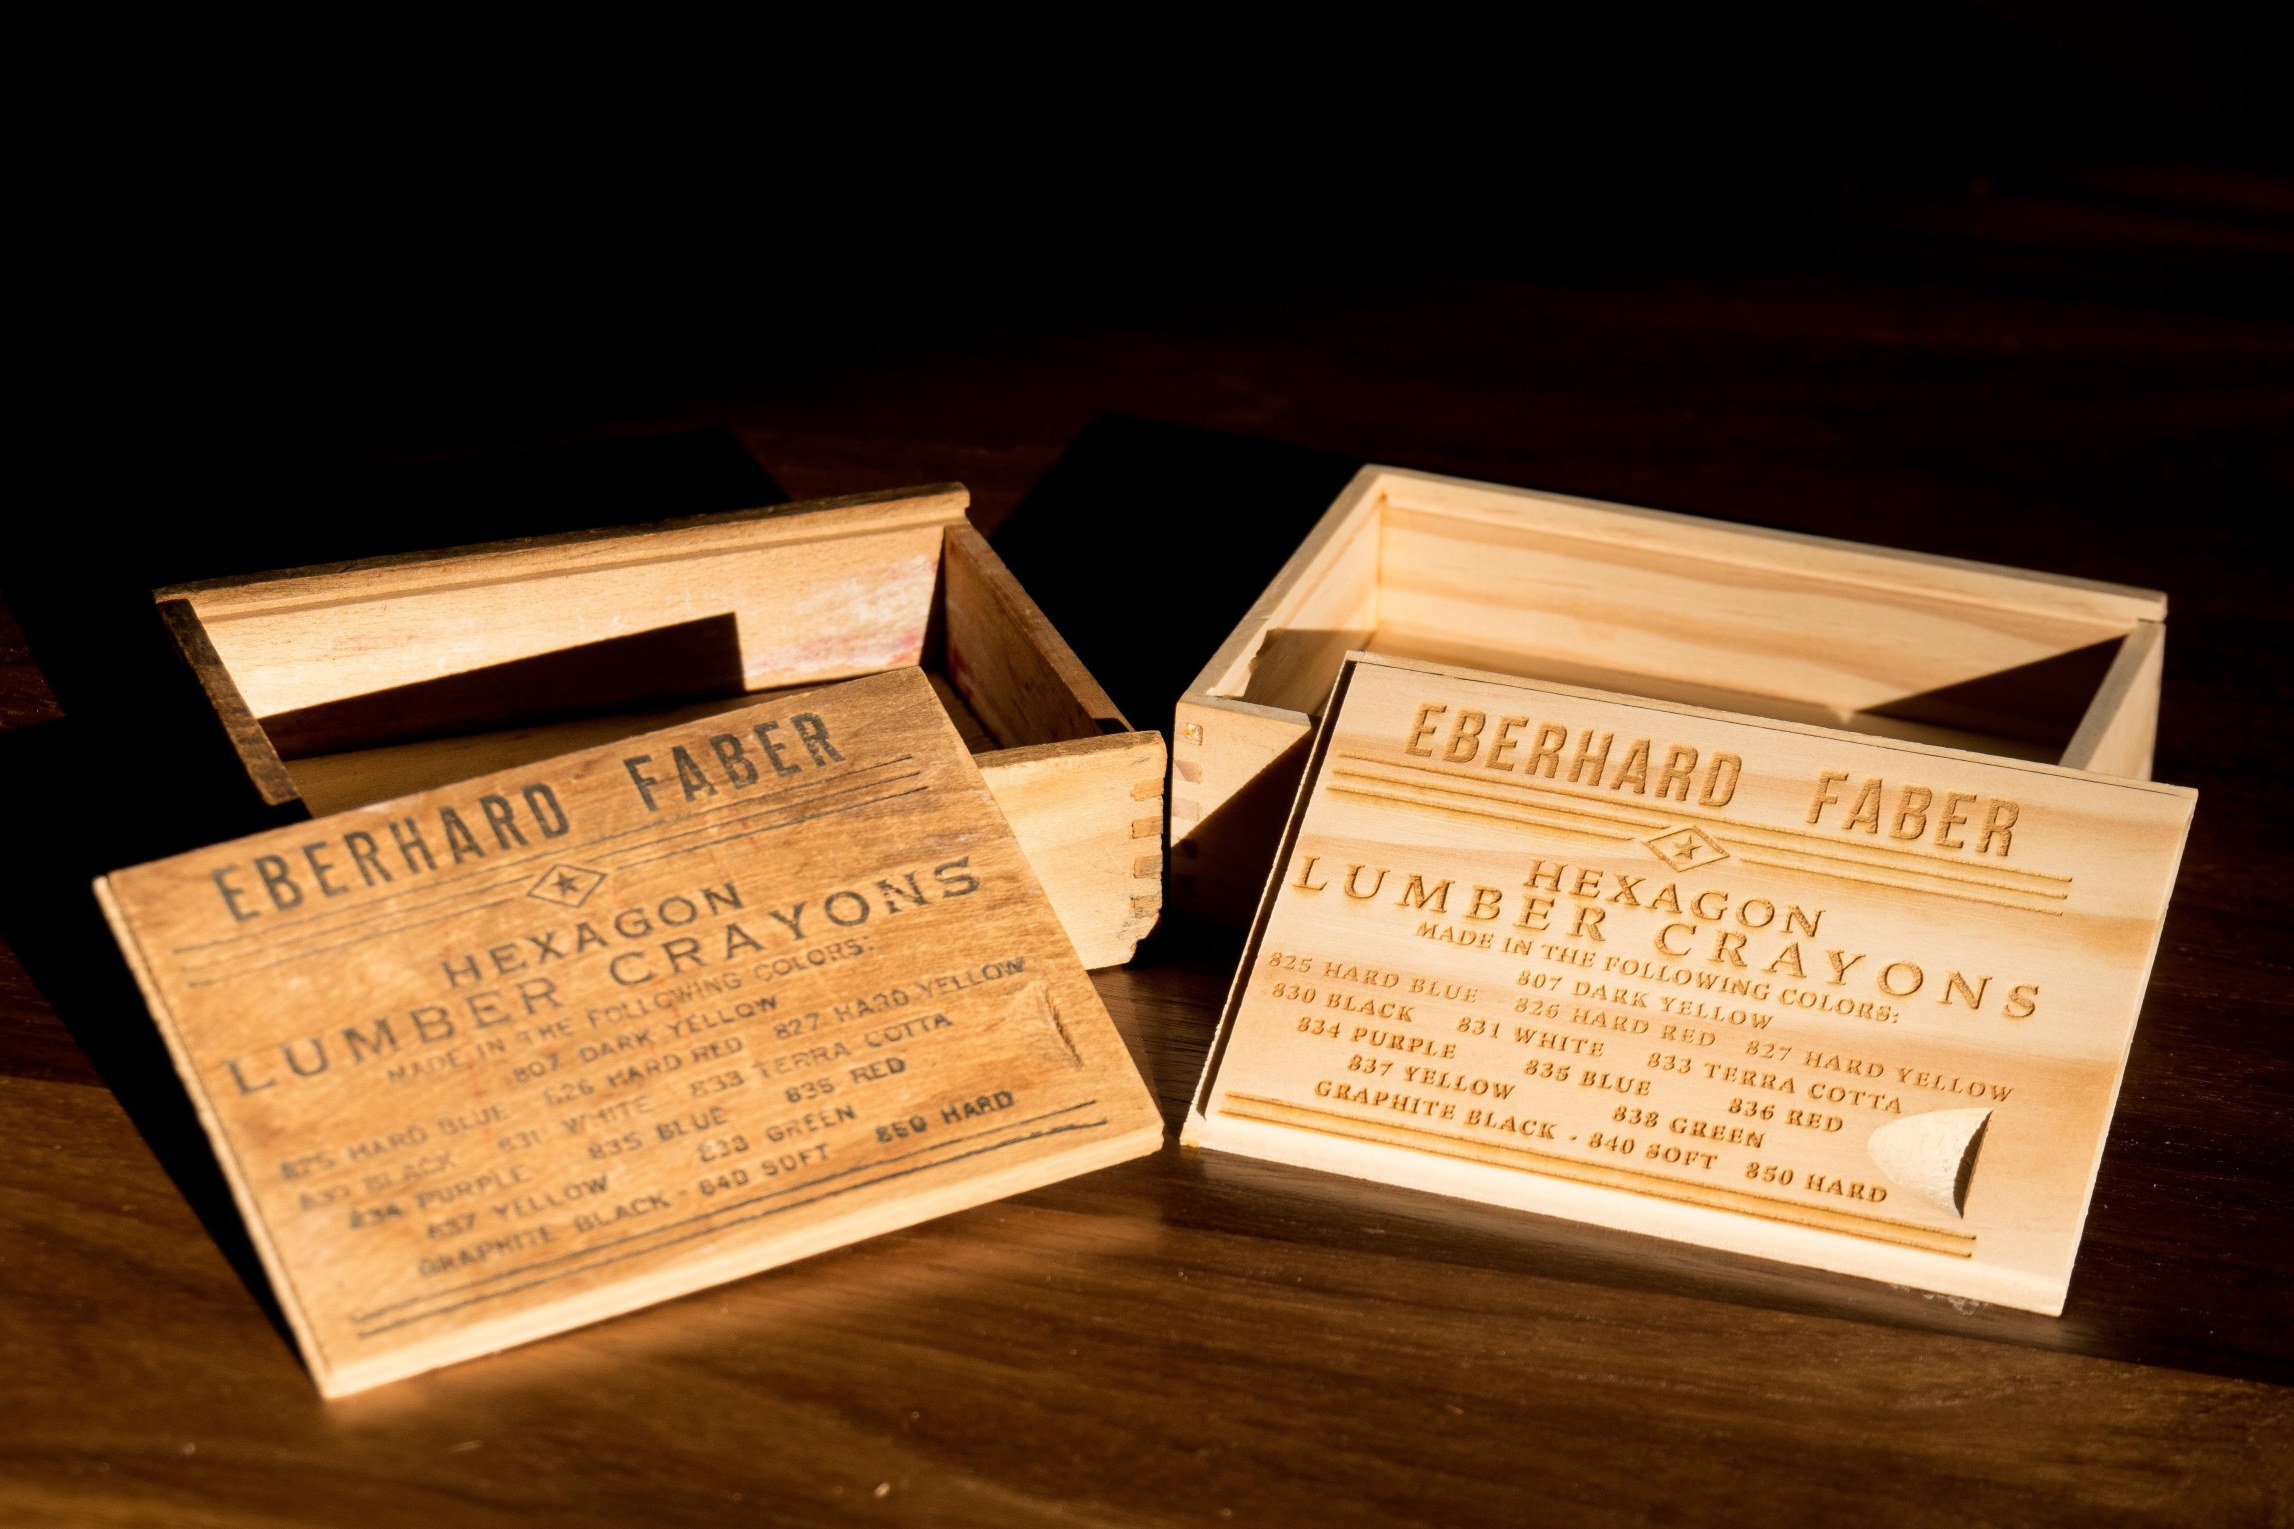
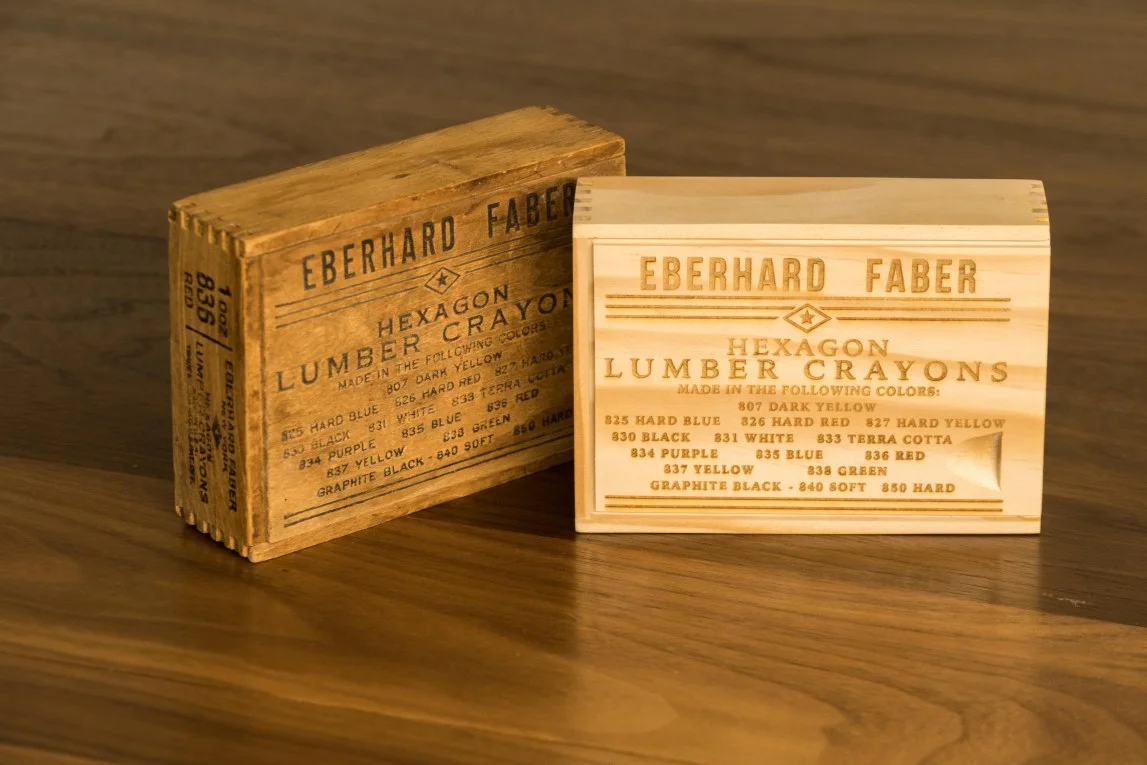
Recreating a 100 Year Old Finger Joint Box
Deconstructing a vintage Eberhard Faber Lumber Crayon box and making a replica.
Box Joints and Finger Joints Made Easy
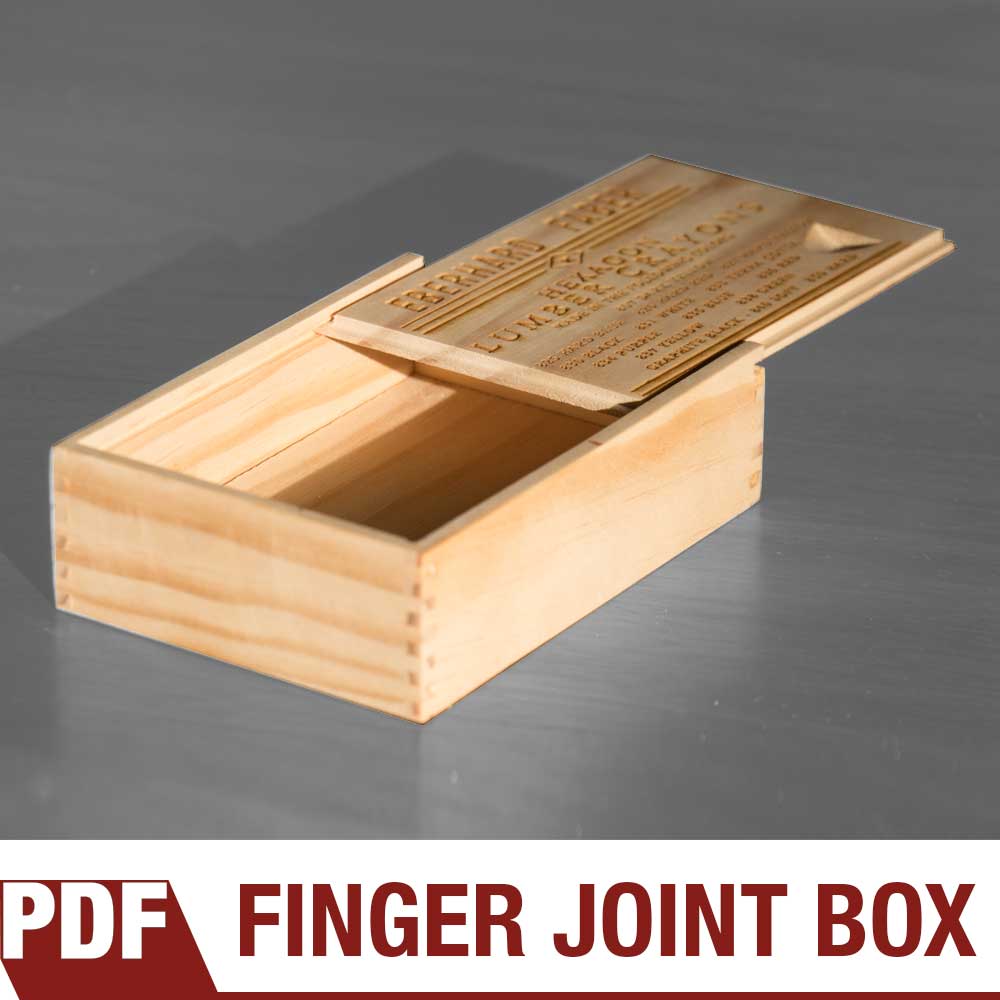
Deconstructing a vintage Eberhard Faber Lumber Crayon box and making a replica. This classic box features box joints (also called finger joints) and a sliding lid complete with engraved and branded lid. Makes for a great woodworking project you can sell at craft fairs.
Tools and Supplies Used In This Woodworking Project


Turning Rotten Walnut Wood Into Art
I take a trip to my local hardwood dealer to look for walnut that would typically be thrown out so we can turn it into art.
Woodworking Project. Nature Made Art
This week we take a trip to my local hardwood dealer Kencraft Company in Toledo, Ohio to look for walnut that would typically be thrown out so we can turn it into art. We found a large gnarly piece with a rotten worm hole that we resawed into a book matched pair. The heart shaped hole left by the worm holes was backed with a bright red velvet fabric to highlight the beautiful pattern left by nature.
The overall size of the piece is 25″ x 25″ framed with a nice contrasting cherry and finished with boiled linseed oil.
Tools and Supplies Used in This Woodworking Project


Making Art Out of Walnut Knots
Super fun and easy woodworking project using walnut knots to turn into wall hanging art.
Instead of Throwing Away Those Ugly Knots Turn Them Into Art!
Super fun and easy woodworking project using walnut knots to turn into wall hanging art. I went to my local hardwood dealer and asked them if they had any ugly knots and while I was there I had them resaw it into four slices. This will allow me to book match them into a 4-up configuration inspired by Andy Warhol. I used home center paint chips taped to the back to allow the color to pop through. These colorful chips can be swapped out to compliment the colors of your wall, match seasonal colors or show off your favorite sports team.
Tools and Supplies Used In This Woodworking Project


How to Make a Modern Retro Magazine Rack
How to make a vintage modern magazine rack. Easy woodworking project that can be made in a couple of hours with very few woodworking tools.
Simple Woodworking Project with Limited Tools
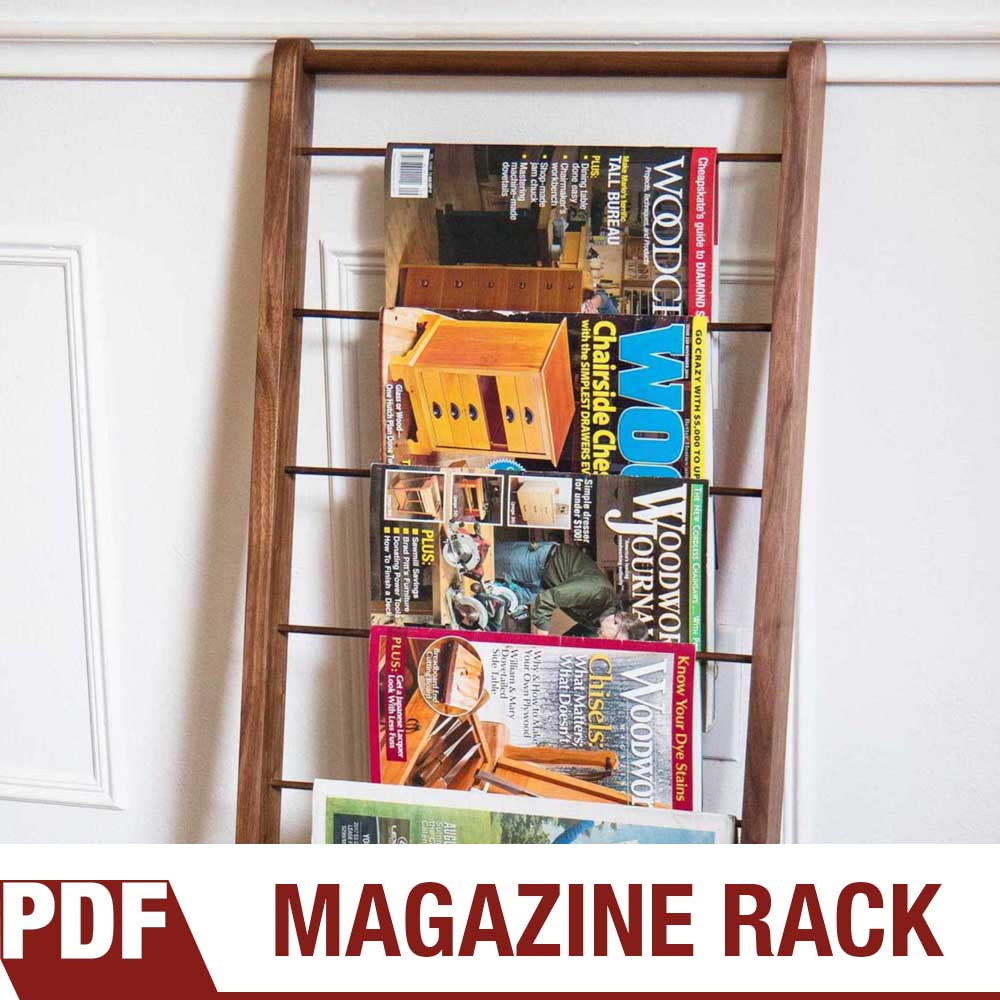
Detailed, step-by-step instructions on how to make a simple magazine rack. Requires very little wood and a few pre-made dowels. Watch the video below to see how easy it is!
How to make a vintage modern magazine rack. Easy woodworking project that can be made in a couple of hours with very few woodworking tools. Even though we live in a digital age I’m a firm believer in holding physical books and magazines. There’s something special about turning through the pages and the effortlessness about picking up a magazine and flipping through it. Here’s a great way to showcase and store your favorite newspapers and magazines!
If you’d like the free plans for this woodworking project, fill out the form on the bottom of this page and you’ll get immediate access to the 8 page PDF with step by step instructions.
Tools and Supples Used in This Woodworking Project


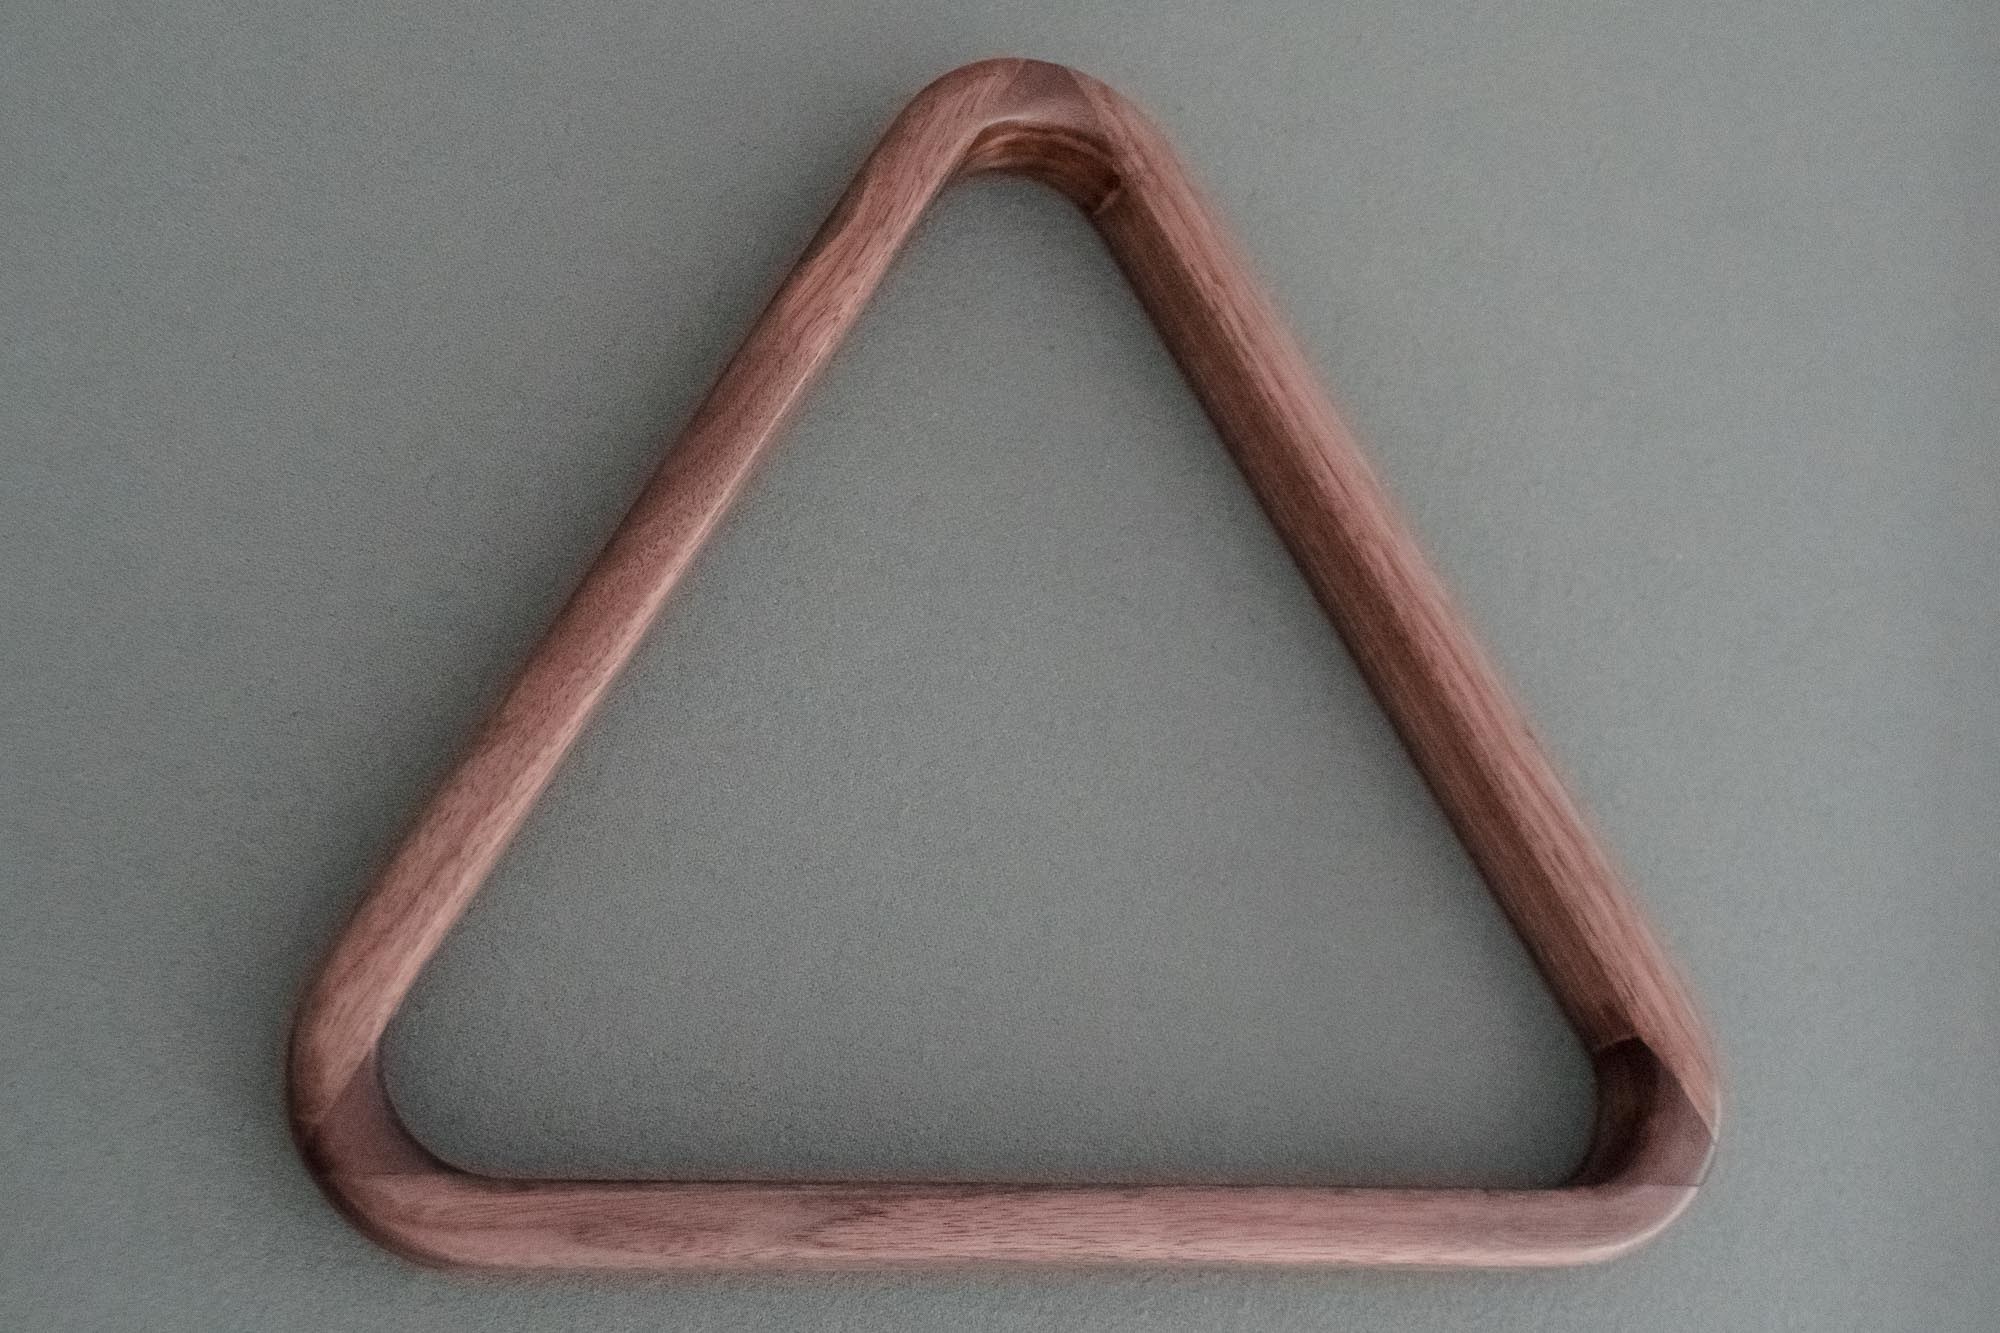
Pool Billiard Ball Rack Made With Black Walnut
Turns out making a billiard rack was a bit more challenging than I originally expected. Watch the video to see some of the challenges!
Making a Walnut Pool and Billiard Ball Rack
Turns out making a billiard rack was a bit more challenging than I originally expected. The three main pieces are joined together at 60 degree angles. To cut these angles I use my table saw sled and a 60 degree triangle as a guide to push it through the blade. Technically once you glue up the three pieces you have a working billiard rack but this makes the rack too big to fit into the holder in my pool table. To allow me to cut the corners down I added some reinforcement triangles in each one of the corners. This also gives me plenty of glue surface which eliminates the need for splines.
Tools and Supplies Used in This Woodworking Project


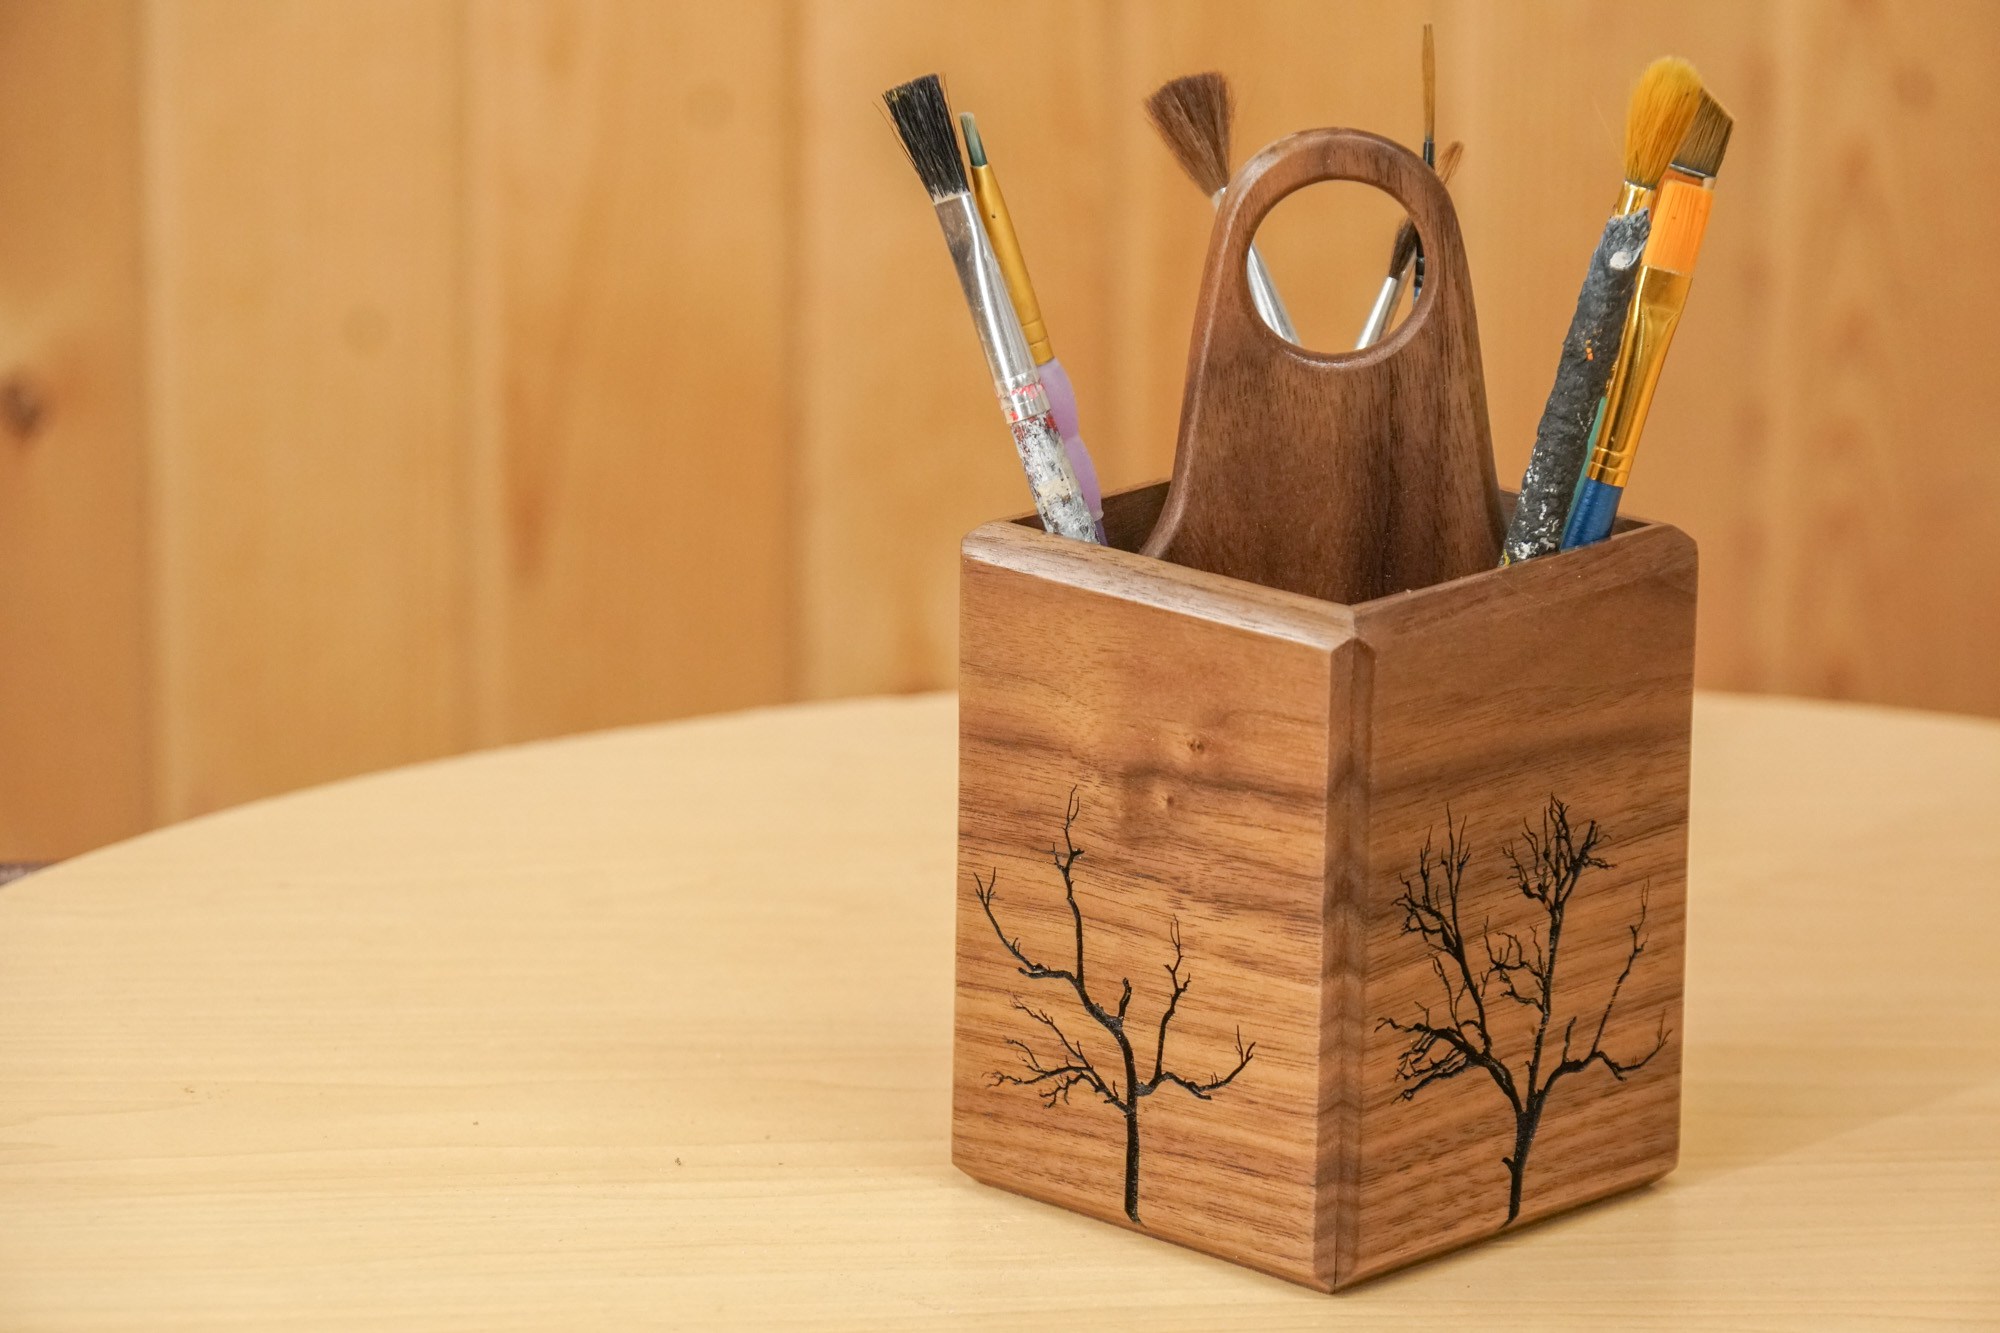
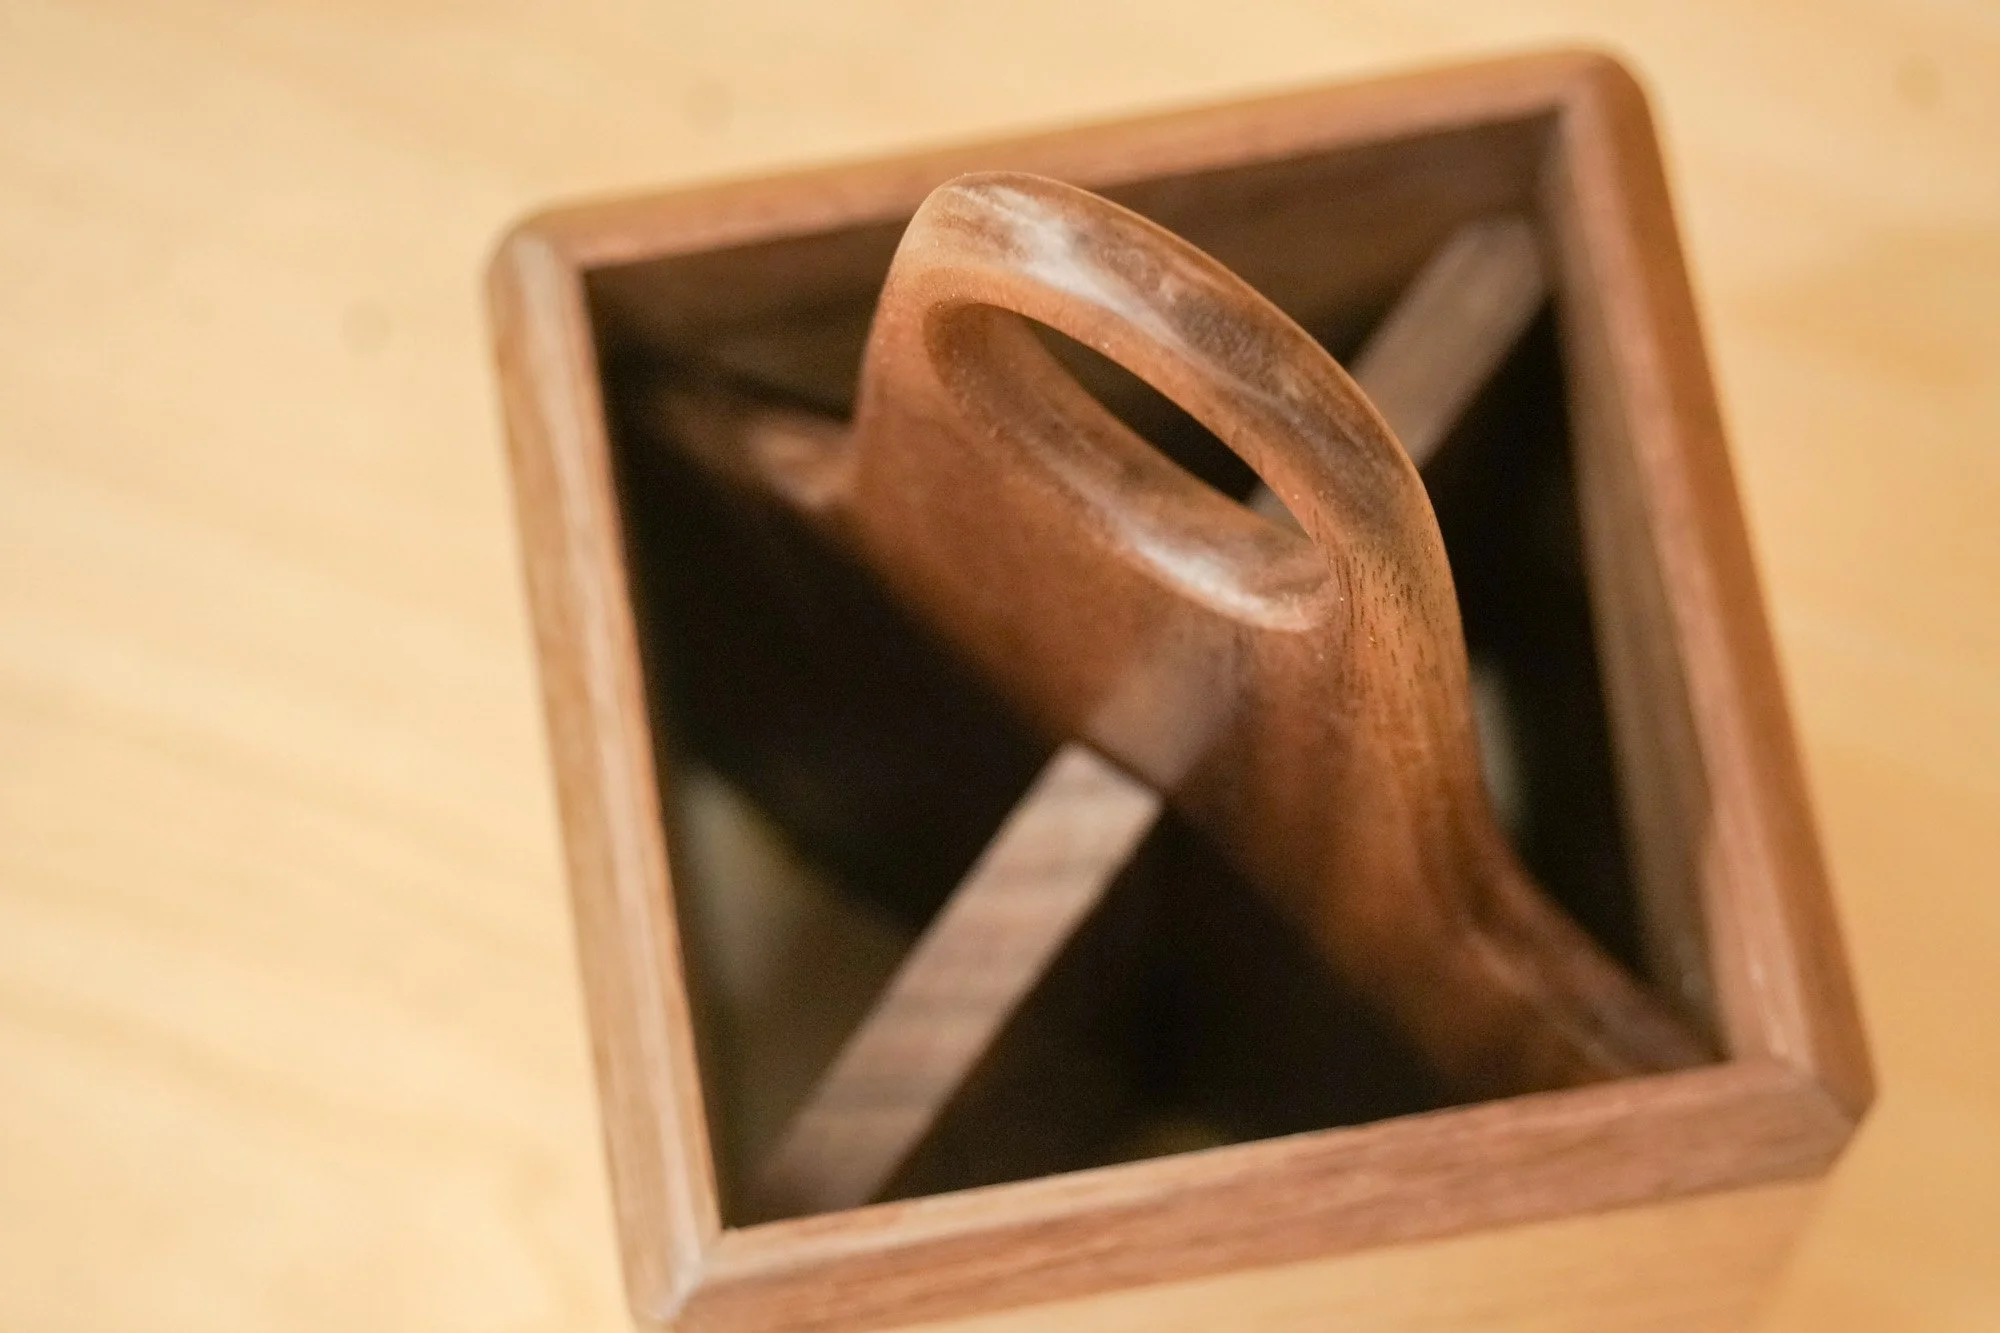
How to make a Pencil Holder/Art Caddy
Making this pencil holder/art caddy is a quick and simple woodworking project that can easily be made in an afternoon.
Making this pencil holder/art caddy is a quick and simple woodworking project that can easily be made in an afternoon. I began my resawing some 3/4″ walnut in half to use for all the pieces. The 4 main side are all cut to the exact same size with a 45° bevel on all the edges for easy joinery. The pieces are glued together and clapped with nothing but blue painters tape. There’s an inserted divider to keep different utensils separated and everything is coated with 2 coats of shellac.


How to Make an Easy Leather Key Chain
Quick and easy project. A great first leather working project.


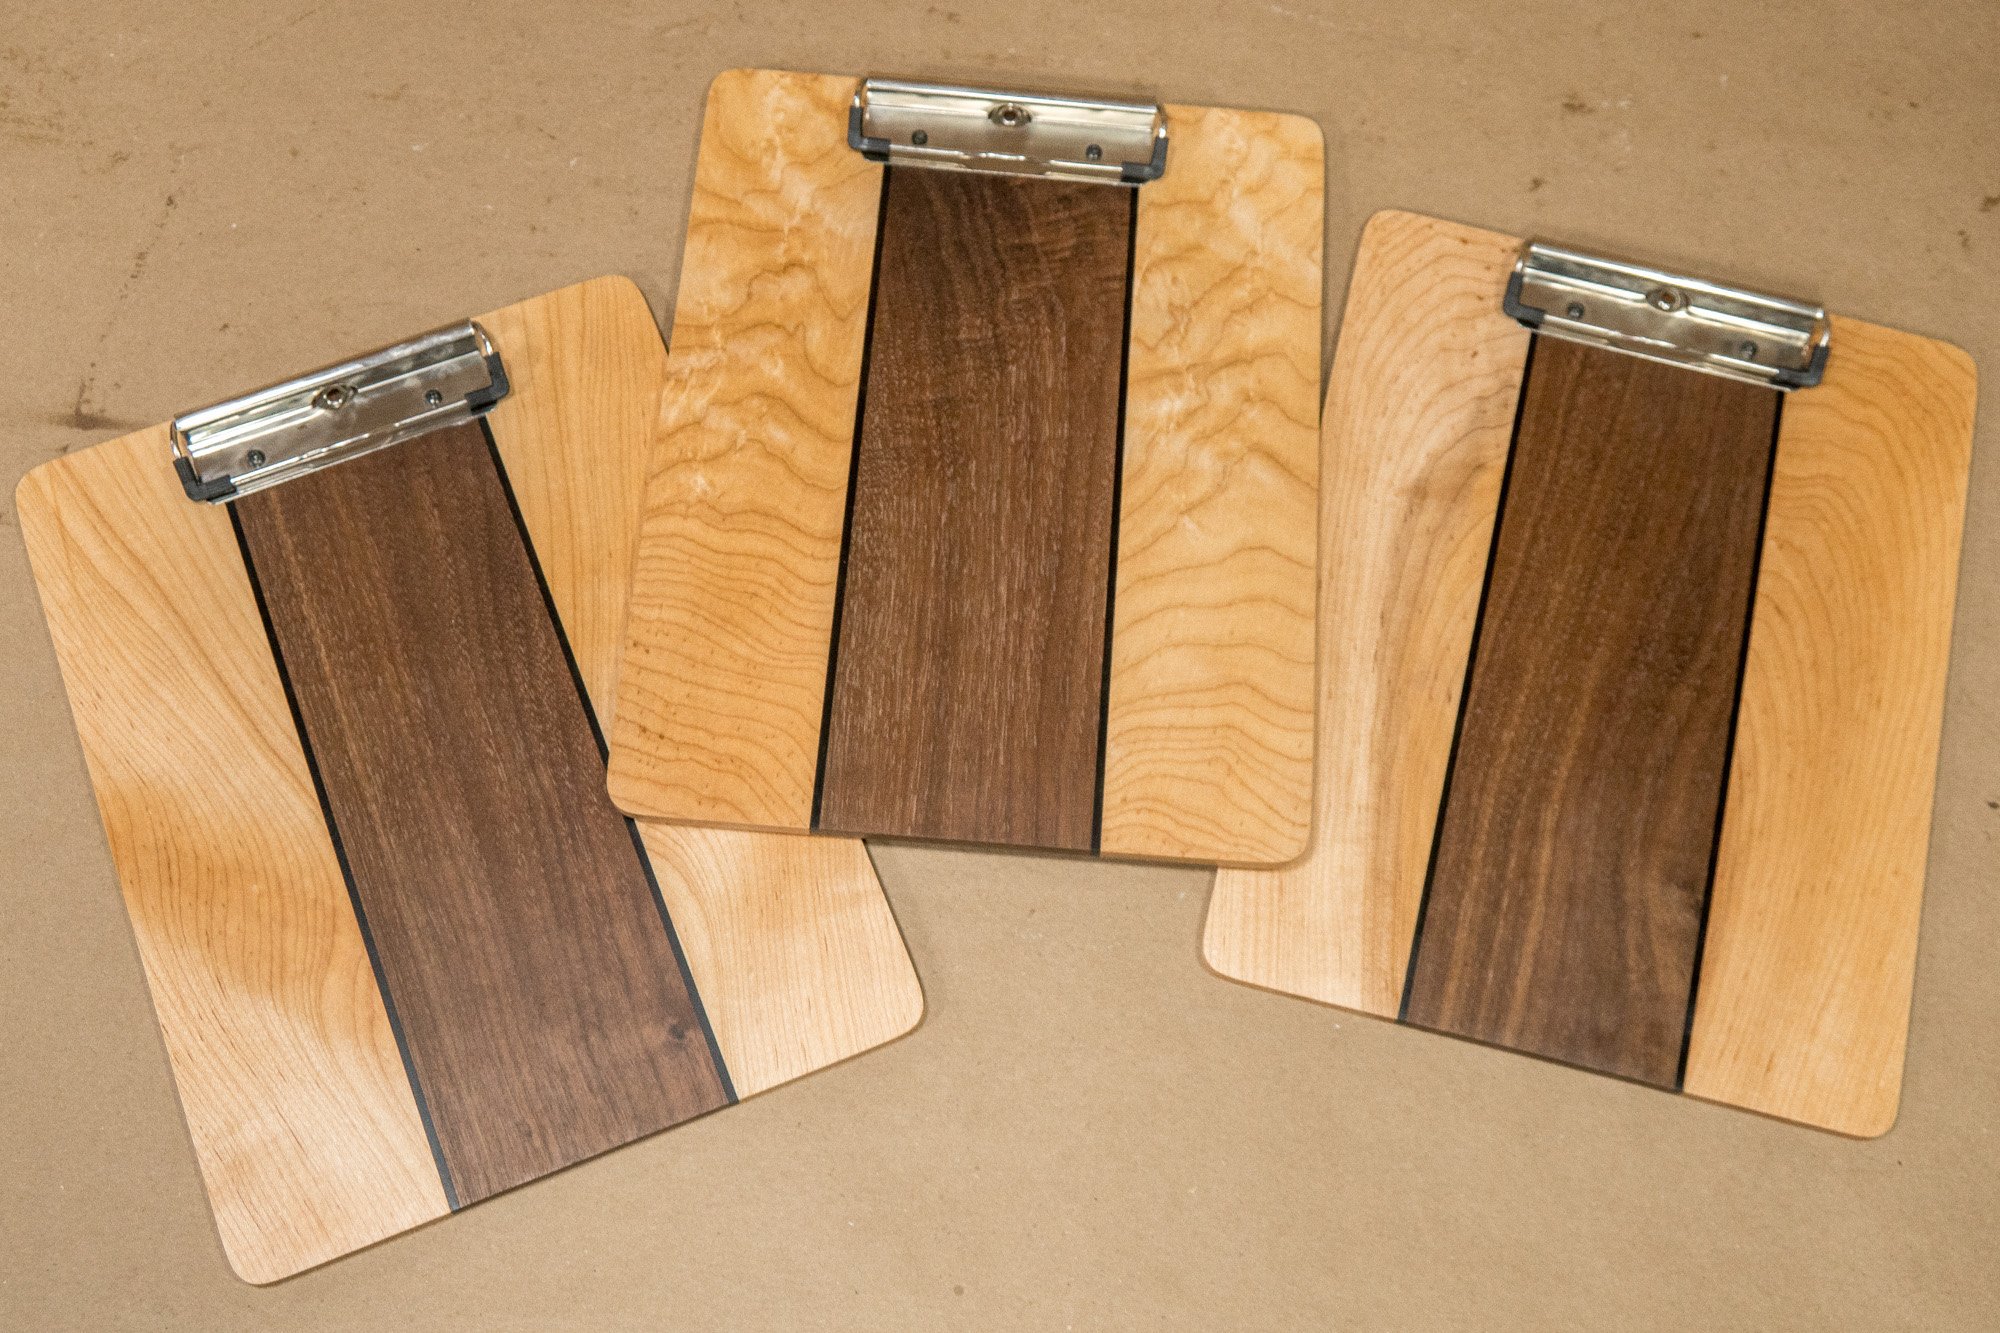
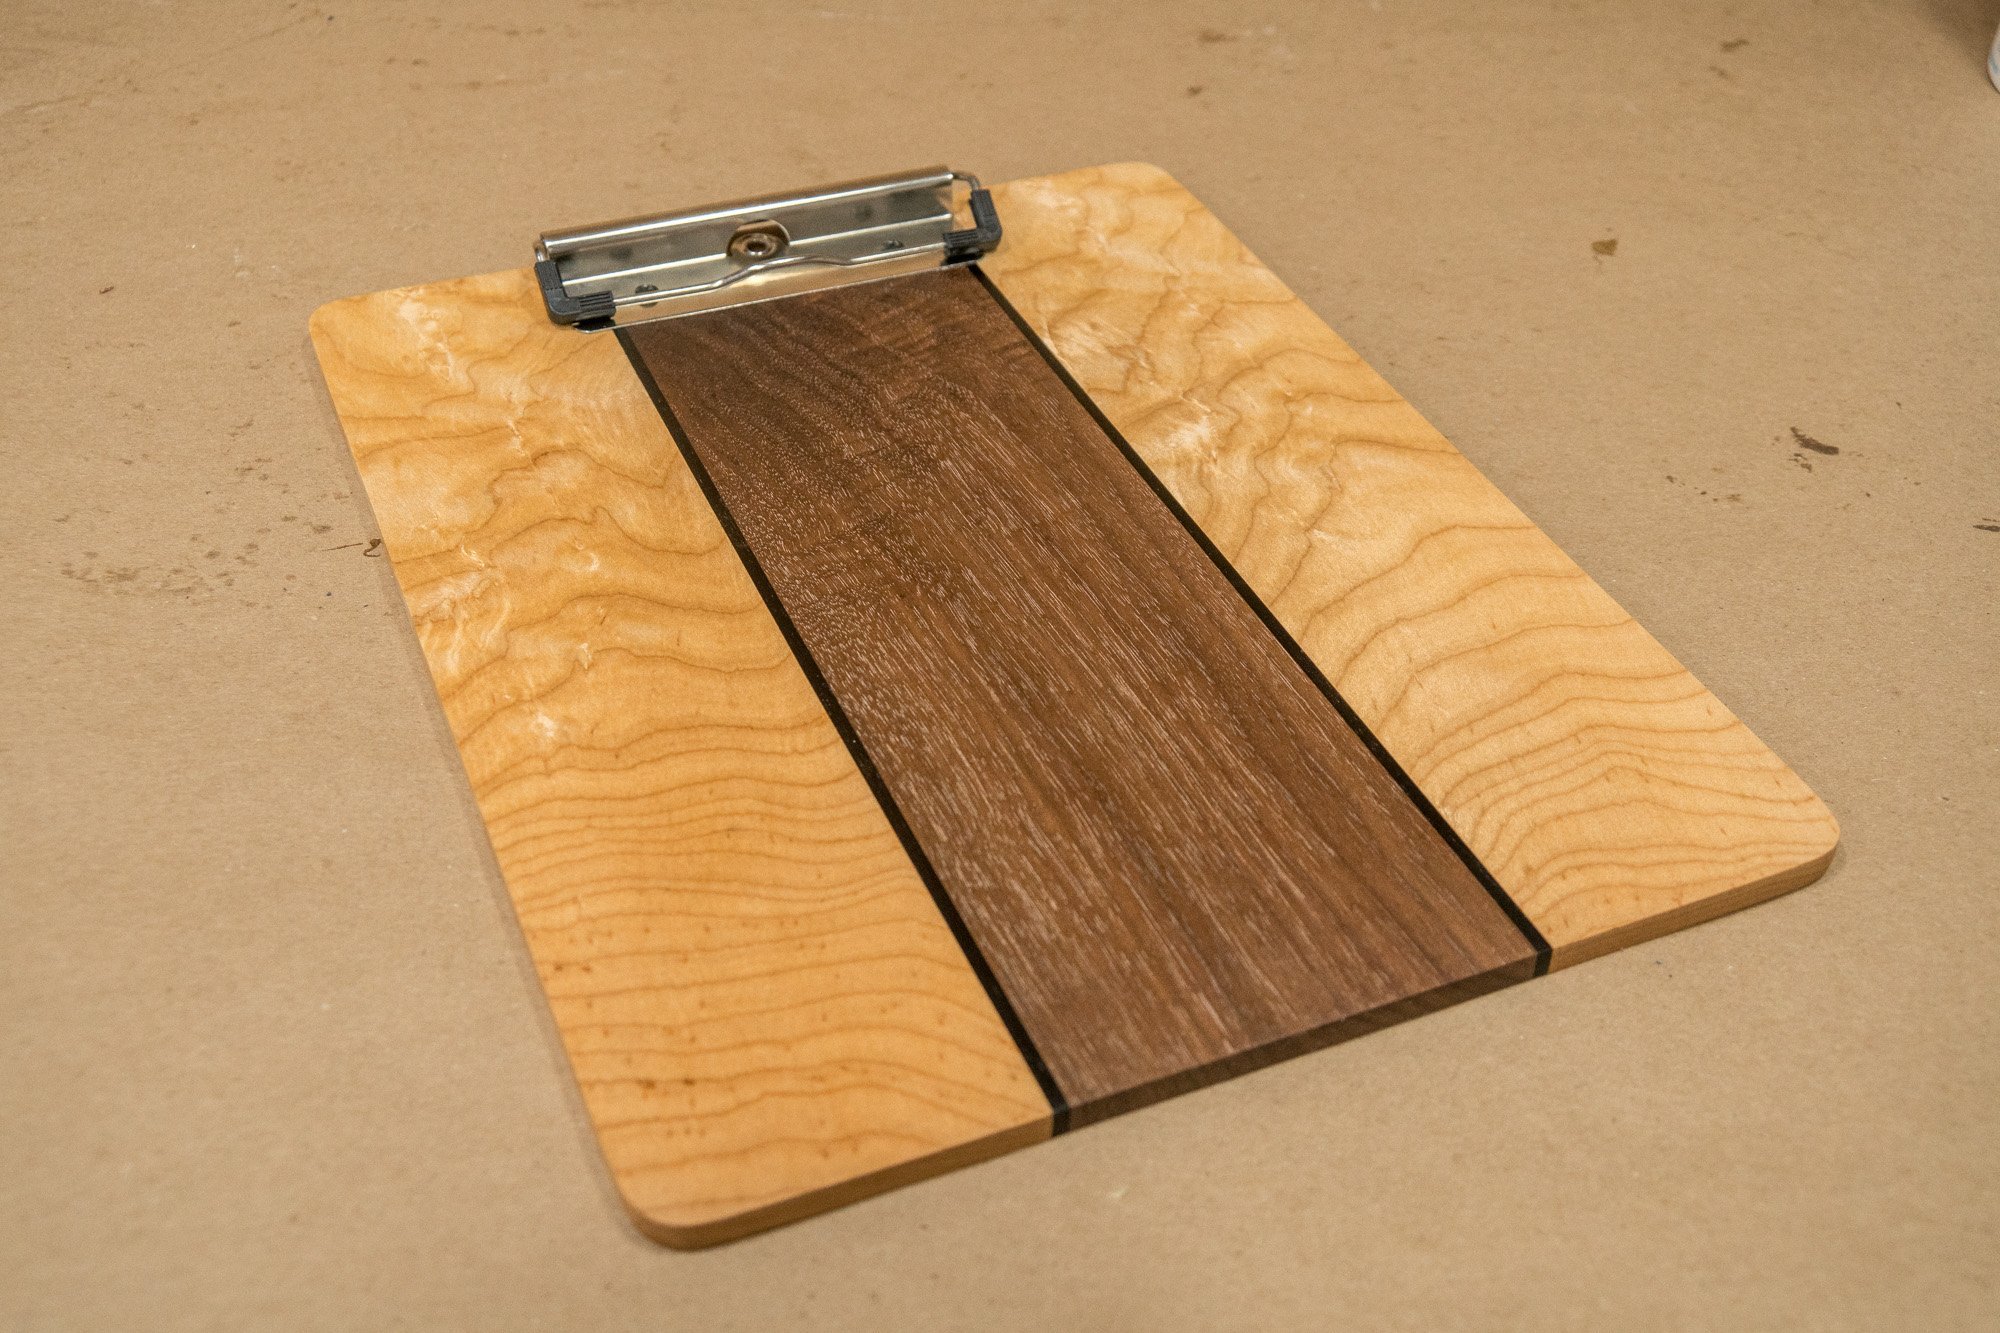
How to Make Wooden Clipboards
This is a real easy woodworking project anybody can do with a few basic woodworking tools.
Easy Woodworking Project For Beginners
This is a real easy woodworking project anybody can do with a few basic woodworking tools. It’s also a great woodworking project that you can easily redesign and make your own. These clipboards get planed down pretty thin so make sure you source well stable wood that’s not going to warp on you. You’ll also want to use closed grain or tight grain wood. And open grain is not a suitable material to write on. Using strips of multiple species will help keep everything flat. I also find that since they are so thin the screws that hold the clips down may need some help so I like to use a 5-minute epoxy as well. This is a great project that can be batched out and at the right price can sell well at craft fairs.
Final dimensions: 9″ x 12″ x 3/16″
Tools and Supplies Used in This Woodworking Project


How to Make a Rotating Crayon Holder
This is an easy and fun woodworking project that works great for displaying and organizing a set of 64 crayons!
Easy Woodworking Project
This is an easy and fun woodworking project that works great for displaying and organizing a set of 64 crayons! I’m using a lathe to do most of the work but this could easily be made without one using a bandsaw. The handle is made from a globe squishy ball found at my local craft store which is a great alternative to using wood. When I originally designed the project I planned on using a lazy Susan base for spinning but decided in the end it was overkill and not needed. If I were to make more of these wood crayon displays I would take the plastic sharpener that comes with the crayons and mount it on the side with a removable base for emptying out the shavings.
Tools and Supplies Used in this Woodworking Project
- Microjig GRR-Ripper
- Microjig GRR-RIP Blocks
- Crayons
- Grizzly Bandsaw
- Dewalt Planer
- Table Saw
- Aluminum Bar Clamps
- Titebond Wood Glue
- Bessey Clamps
- Festool Miter Saw
- Combination Square
- Compass
- Jet Lathe
- Black & Decker Drill
- Festool Drill
- Turning Tools
- Dust Mask
- Festool Random Orbit Sander
- Jet Drill Press
- Shellac
- Felt
- Squeeze Globe (similar)


Quick & Easy Pencil Holders That You Can Sell
Looking for a quick and easy project that you can batch out and sell at craft shows? These pencil holders are a great way to earn some extra cash.
Looking for a quick and easy project that you can batch out and sell at craft shows? These pencil holders are a great way to earn some extra cash.


Tie Rack Woodworking Project from a 1959 School Textbook
Making a wiener dog tie rack from an old school text book.
How to Make a Tie Rack | Woodworking Project
I love collecting old woodworking books from thrift stores and antiques stores. There’s so much useful information in them and since woodworking technology moves slow these books are still relevant. Plus the illustrations are just fantastic to look at and represent the style from their time period.
While flipping through the book the other night I found this wiener dog tie project and about lost my marbles! I’m a wiener dog owner/lover and thought I just have to make this! The truth is I only own 1 tie so I had to go out and buy new used ties to demonstrate this project. This is a start to many more projects from old books. As always, be passionate and Make Something!
Tools and Supplies Used for this Woodworking Project


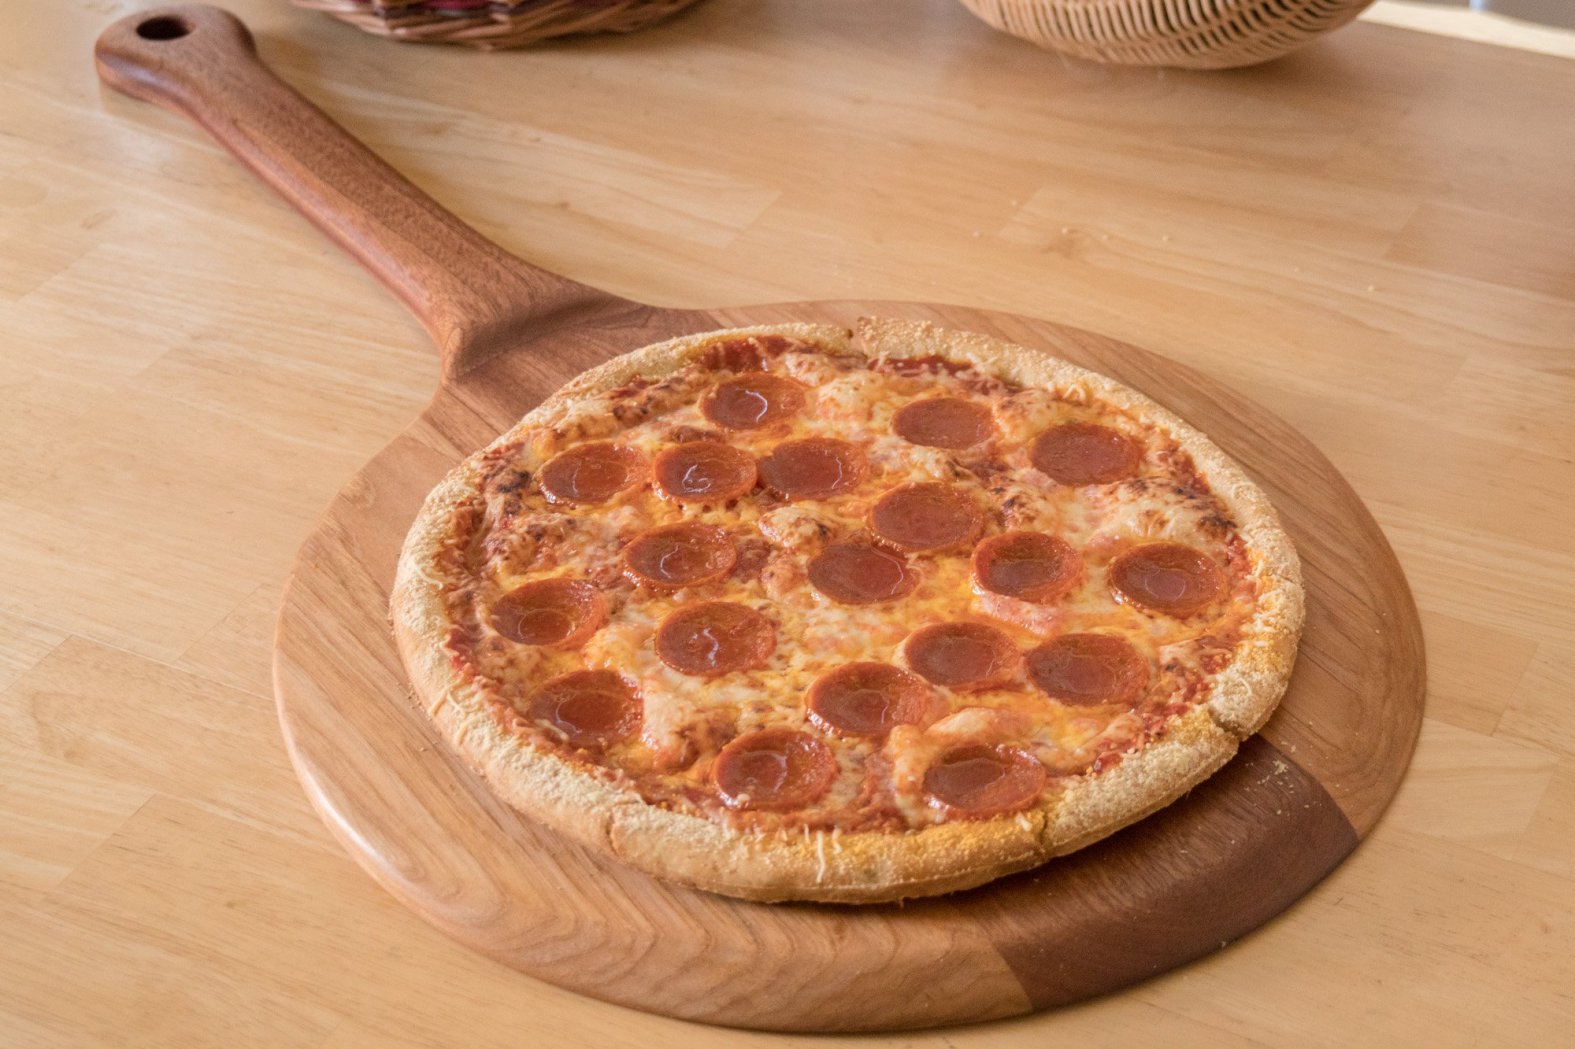
How to Make a Pizza Peel
Having a pizza peel in your kitchen is a great way to pull pizza out of the oven and also doubles as a cutting and serving board.
Making a Wooden Pizza Peel | Woodworking Project
This was a crazy fun and easy project. I didn’t know how useful a pizza peel was until we had one in the house. We generally cook our pizza right on the oven grill so having a pizza peel available to pull the pizza from the oven is very useful. Plus you can cut the pizza right on the peel and use it as a serving tray. The finish used on this is a food grade mineral oil and paraffin wax. Like any cutting board you’ll need to reapply a finish on it after a handful of uses. We like to keep a bottle of butcher’s block conditioner in our kitchen for quick and easy applications. If you like this tutorial please share it with your friends! Let me know in the comments down below what you think and how you would make yours different! As always, be safe, be passionate and Make Something!
Tools and Supplies Used in This Project
- Festool Kapex Miter Saw
- Bar Clamps
- Titebond Wood Glue
- Spring Clamps
- 50 Pack Pencils
- Grizzly Bandsaw
- Disc Sander
- Spindle Sander
- Dremel Tool
- F Style Clamps
- Microjig GRR-Rip Block
- Belt Sander
- Jet Drill Press
- Festool Random Orbit Sander
- Gulfwax Paraffin Wax
- Food Grade Mineral Oil
- Camera Used – DJI OSMO
- Wireless Mic – Sony

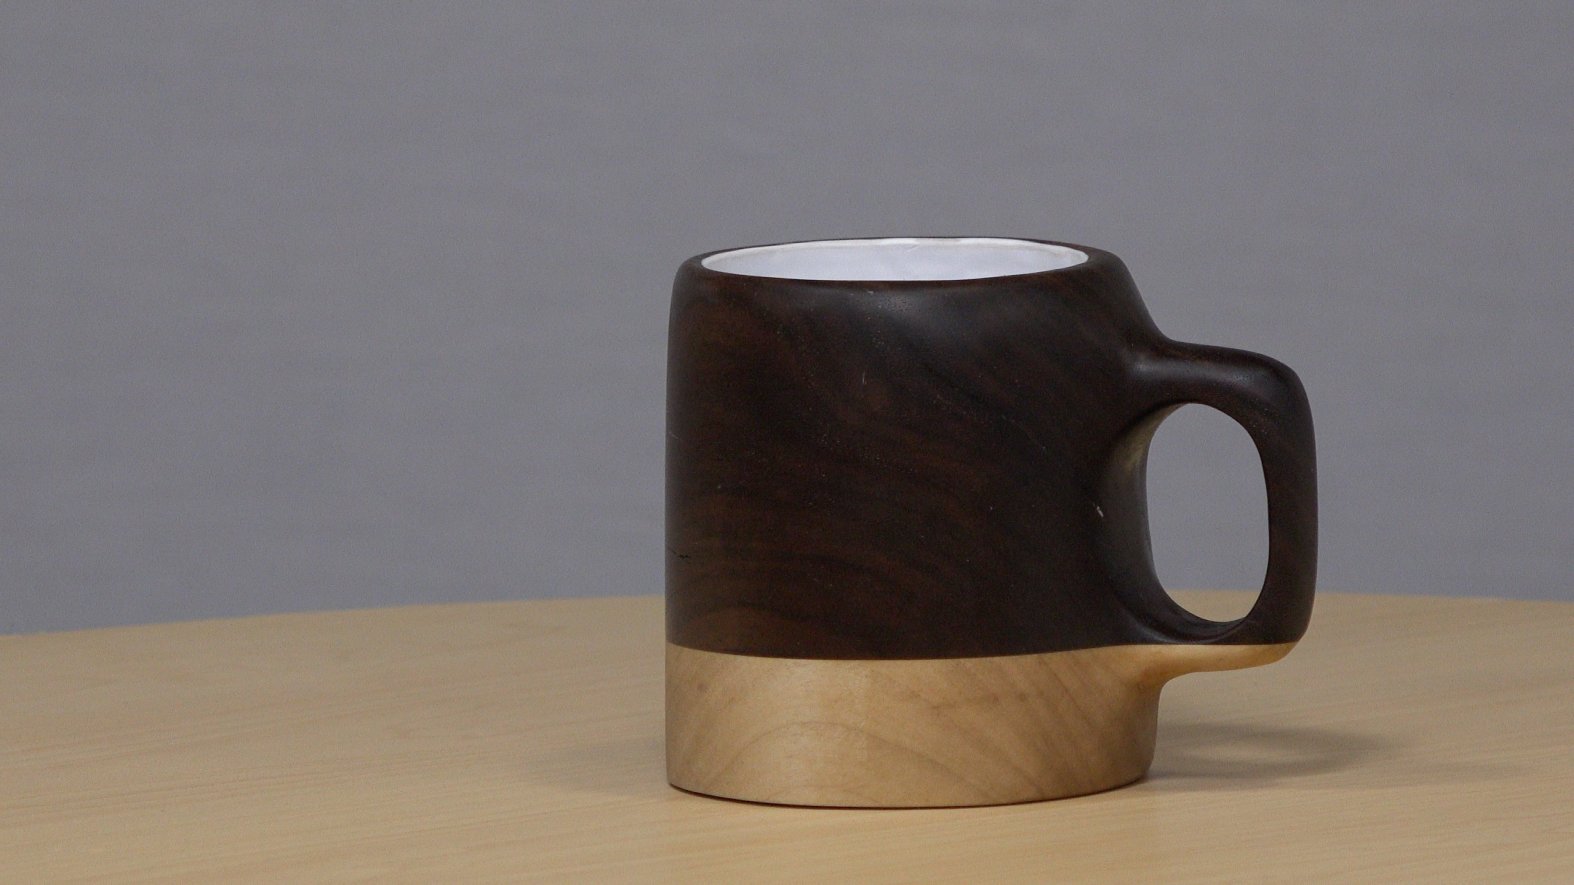
How to Make a Wood Coffee Mug
How to make a coffee mug out of walnut and maple.
Making a Wooden Coffee Mug
I got this beautiful chunk of walnut from my step dad. He cut down an old walnut tree from my childhood home an it’s been air drying for a few years now. I wanted to make the entire coffee mug out of one piece of walnut but the slab I had wasn’t tall enough so I ended up adding the maple bottom as you see here.
Food Safe Finish
When I started this wood coffee mug project I fully intended to use it as a real coffee mug. I coated the inside with a white Smooth-On plastic resin. When most resins and finishes completely cure after a few weeks they are food safe. Even if they don’t claim to be food safe. Your dining room table for instance probably has a polyurethane finish on it. Polyurethane isn’t promoted as food safe but once fully cured after a few weeks it’s safe enough to eat off of. I thought the white plastic resin I used would be perfect but it turns out that it gets soft when exposed to heat which is definitely not food safe. In my research I was able to find a few different “food safe” labeled epoxies but none of them mentioned they can be used for hot liquids. I’m sure there is something out there that can be used but I was unable to find it. If you know of anything that’s food safe for hot liquids please let me know in the comments down below. I may try and find a stainless steel insert and attempt this project again.
Thanks for stopping by! Be safe. Be passionate and Make Something!
Tools and Supplies Used


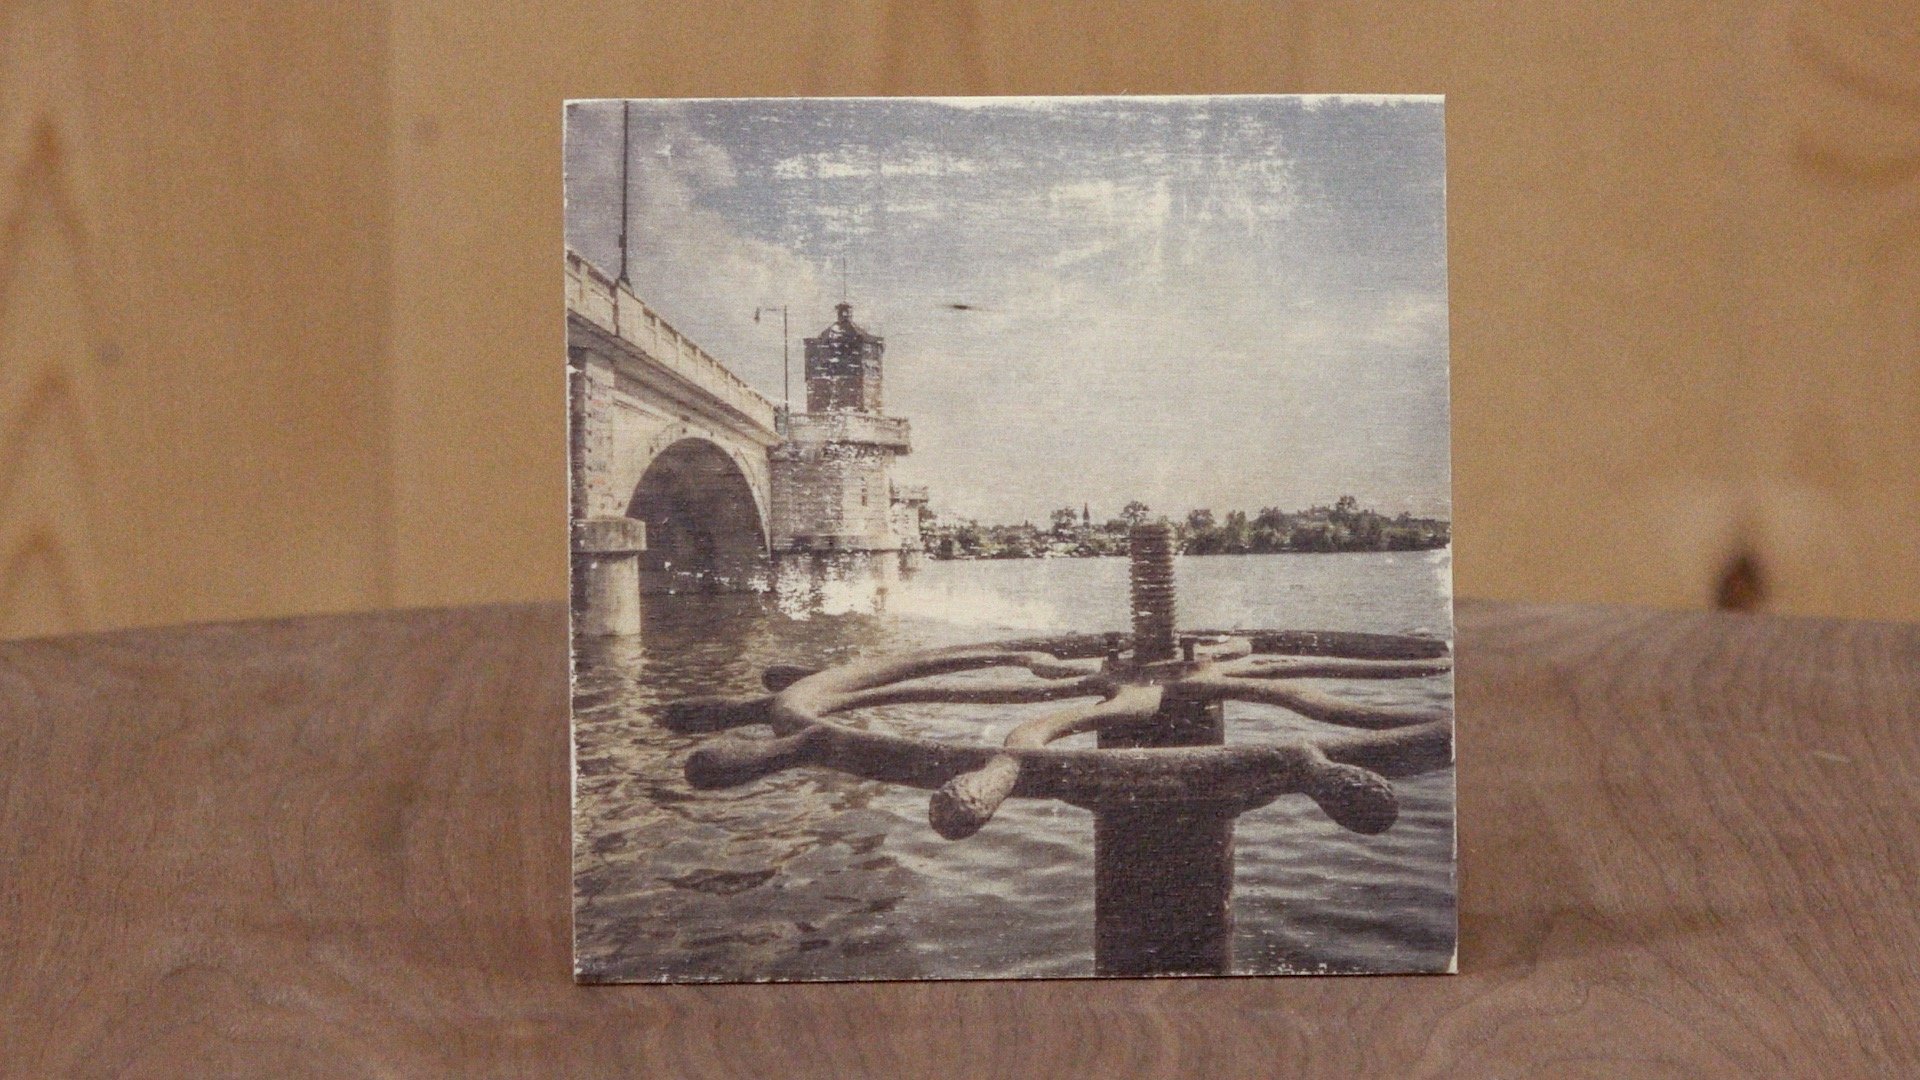
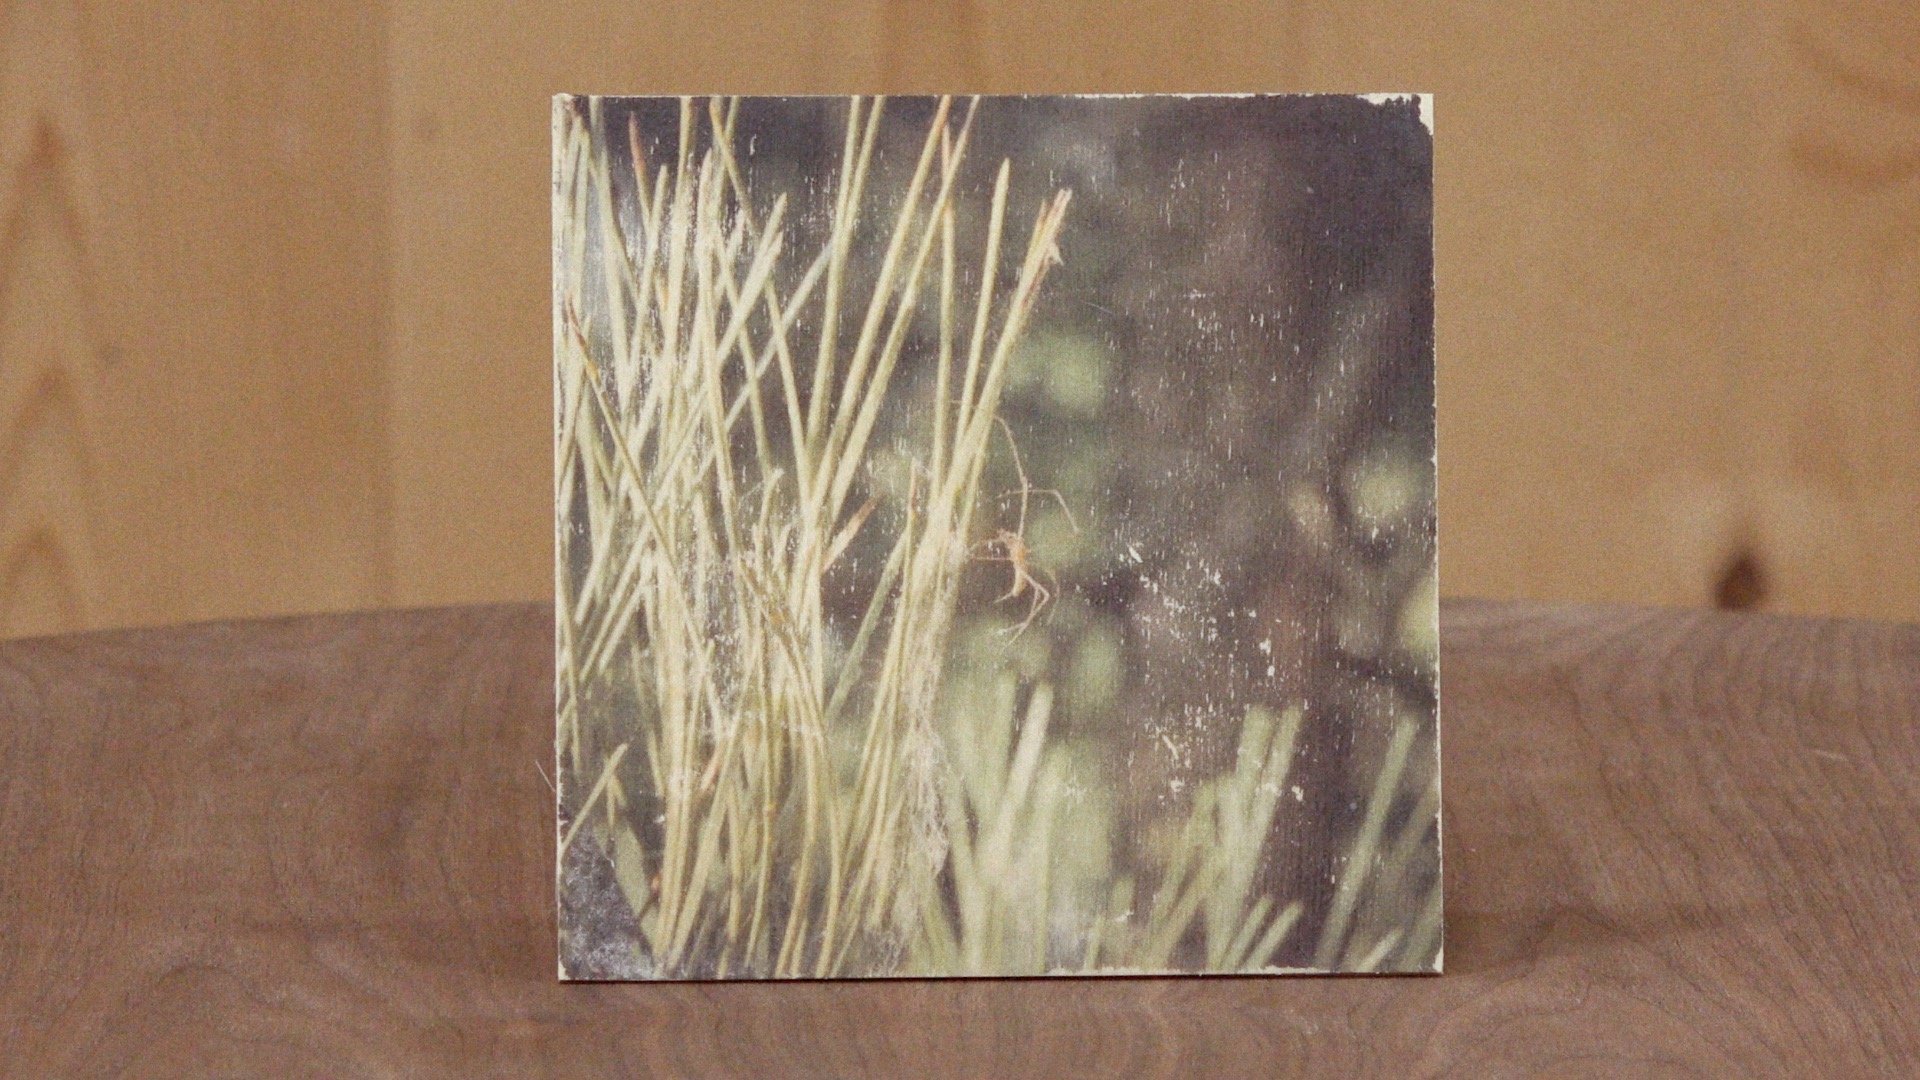
How to Transfer a Photo to Wood
This is an easy way to add some style and texture to your photos!
Image Transfer to Wood
This is an easy way to add some style and texture to your photos. Using this photo transfer technique there will be some loss of quality and some photos will work better than others. You’ll want to choose images with high contrast (dark areas and light areas). Any photographs with lots of detail or made up of mostly mid-tones may not work. The final product will have a vintage look and feel, almost like an old postcard. I chose some clean baltic birch plywood without much noticeable grain pattern so the focus would be on the photos. This is one of those art projects I’ll be experimenting with more and trying to come up with creative pieces using this simple technique. Let me know in the comments down below if you have any cool techniques you’d like to see me try!
Tools and Supplies Used


How to Make an Alaskan Ulu Knife
How to make a classic ulu knife and cutting board combination.
The Making of the Ulu Knife
In our house we’ve been using an Alaskan ulu knife for many years. It’s an easy and quick way to cut fruits and vegetables. The curvature of the blade rocks back and forth on the mating cutting board for efficient slicing. The ulu knife and cutting board is based on one we purchased while visiting Alaska many years ago.
Knife Making
The blade is made from a sheet of 16 gauge stainless steel cut with a jigsaw and metal cutting blade. Some final sanding and shaping was done on the disc sander and belt sander. I sharpened the blade using a Work Sharp 3000 sharpening station and finished up by hand with a sharpening stone. The blade is sandwiched and glued using epoxy between to pieces of soft maple and reinforced with 1/4″ brass dowels.
Cutting Board
The mating cutting board is also made up of soft maple with walnut accents. Once squared up I chucked it on the lathe to carve a recessed bowl to allow the blade to rock back and forth. All the wood was then sanded smooth and finished with butcher block conditioner.
Cook With Meat
This video was made in collaboration with Cook With Meat. Check out his YouTube channel and website for some amazing cooking tutorials.
Tools and Supplies Used


How to Make an Armrest Drink Holder
A simple and quick project that allows a place to put your beverage no matter what shape your couch arms are.
Easy Woodworking Project for Beginners
This is one of those woodworking projects that I’ve had in the back of my mind for months. We don’t have room for end tables in our living room and depending on where you sit the coffee table can be out of reach. This project was made in about 2 hours which includes the time it took to glue and finish. Something I don’t do very often is go into a project without a plan and that’s exactly what I did here and it turned out great. I just started cutting to size on the table saw what I thought looked to be a good size. The center piece is 4″ x 4″ with a 2 7/8″ hole drilled in the middle. Many of you may not have a forstner bit that big and a jigsaw would do just fine in this situation. The bottom is made up of leather scraps I got from a local art scrap store. Another option would be to take an old pair of jeans and I think that would work equally as well. If you make this project be sure to Tweet me some photos! I’d love to see what you come up with! Be passionate and Make Something!
Tools and Supplies Used
- Micro Jig GRR-Rippers
- Kreg Trak and Stop (Tablesaw Sled)
- 2 7/8″ Forstner Bit
- GRR-Rip Block
- 1/4″ Round Over Bit
- Festool Orbital Sander
- Minwax Lacquer Spray, Satin
- Leather used was picked up from a local art scrap store.
- Titebond Quick and Thick (Not available yet and didn’t work for this)
- Contact Cement
- Foam Brush


Woodworking Books

Make Your Own Cutting Boards
15 cutting board projects to make as gifts or sell! Get your signed copy!

The New Bandsaw Box Book
8 bandsaw box projects you can make and sell at craft shows. Signed copies now available!