
DIY Speaker Build
How to make a speaker cabinet from a wire kit.
In this DIY speaker build I’m using 1/2” baltic birch plywood to make a pair of stereo speakers to look like vintage guitar amps. I’m using orange Tolex on the outside with grill cloth for the face and chrome corner protectors on all the edges. The speaker kit comes from Rockler Woodworking and Hardware and includes all the wiring, base ports, speaker and internal dimension plans. If you want to build the exact same speakers as you see in the video, I have plans for sale in my store and there are links down below to all the supplies needed. You can easily change the look of these speakers but choosing a different color Tolex and grill cloth. This was a really fun and pretty simple project to build. Don’t be intimidated with the speaker wiring. If you purchase the kits from Rocker the plans are easy to follow and don’t take any special tools.
Supplies Needed
- 1/2” Baltic Birch Plywood
- Orange Tolex
- Grill Cloth
- Velcro Squares
- 6 1/2” Speaker Kit
- Front Corner Protectors
- Rear Corner Protectors
- Rubber Feet
- Speaker Wire
Tools Needed


Cheap and Easy to Make Planter Boxes
A quick an easy DIY project making window planters.
Earlier this year we had a new front deck installed and we thought it was time to replace all the old planter boxes in the front of the house to go along with the new porch. To make these planters I’m using $6 common board pine from Home Depot. One $6 board is enough for one planter box. This is a real quick and easy project that anybody with a few basic woodworking tools can do.
Products Used


How to Make a Guitar with a CNC Machine
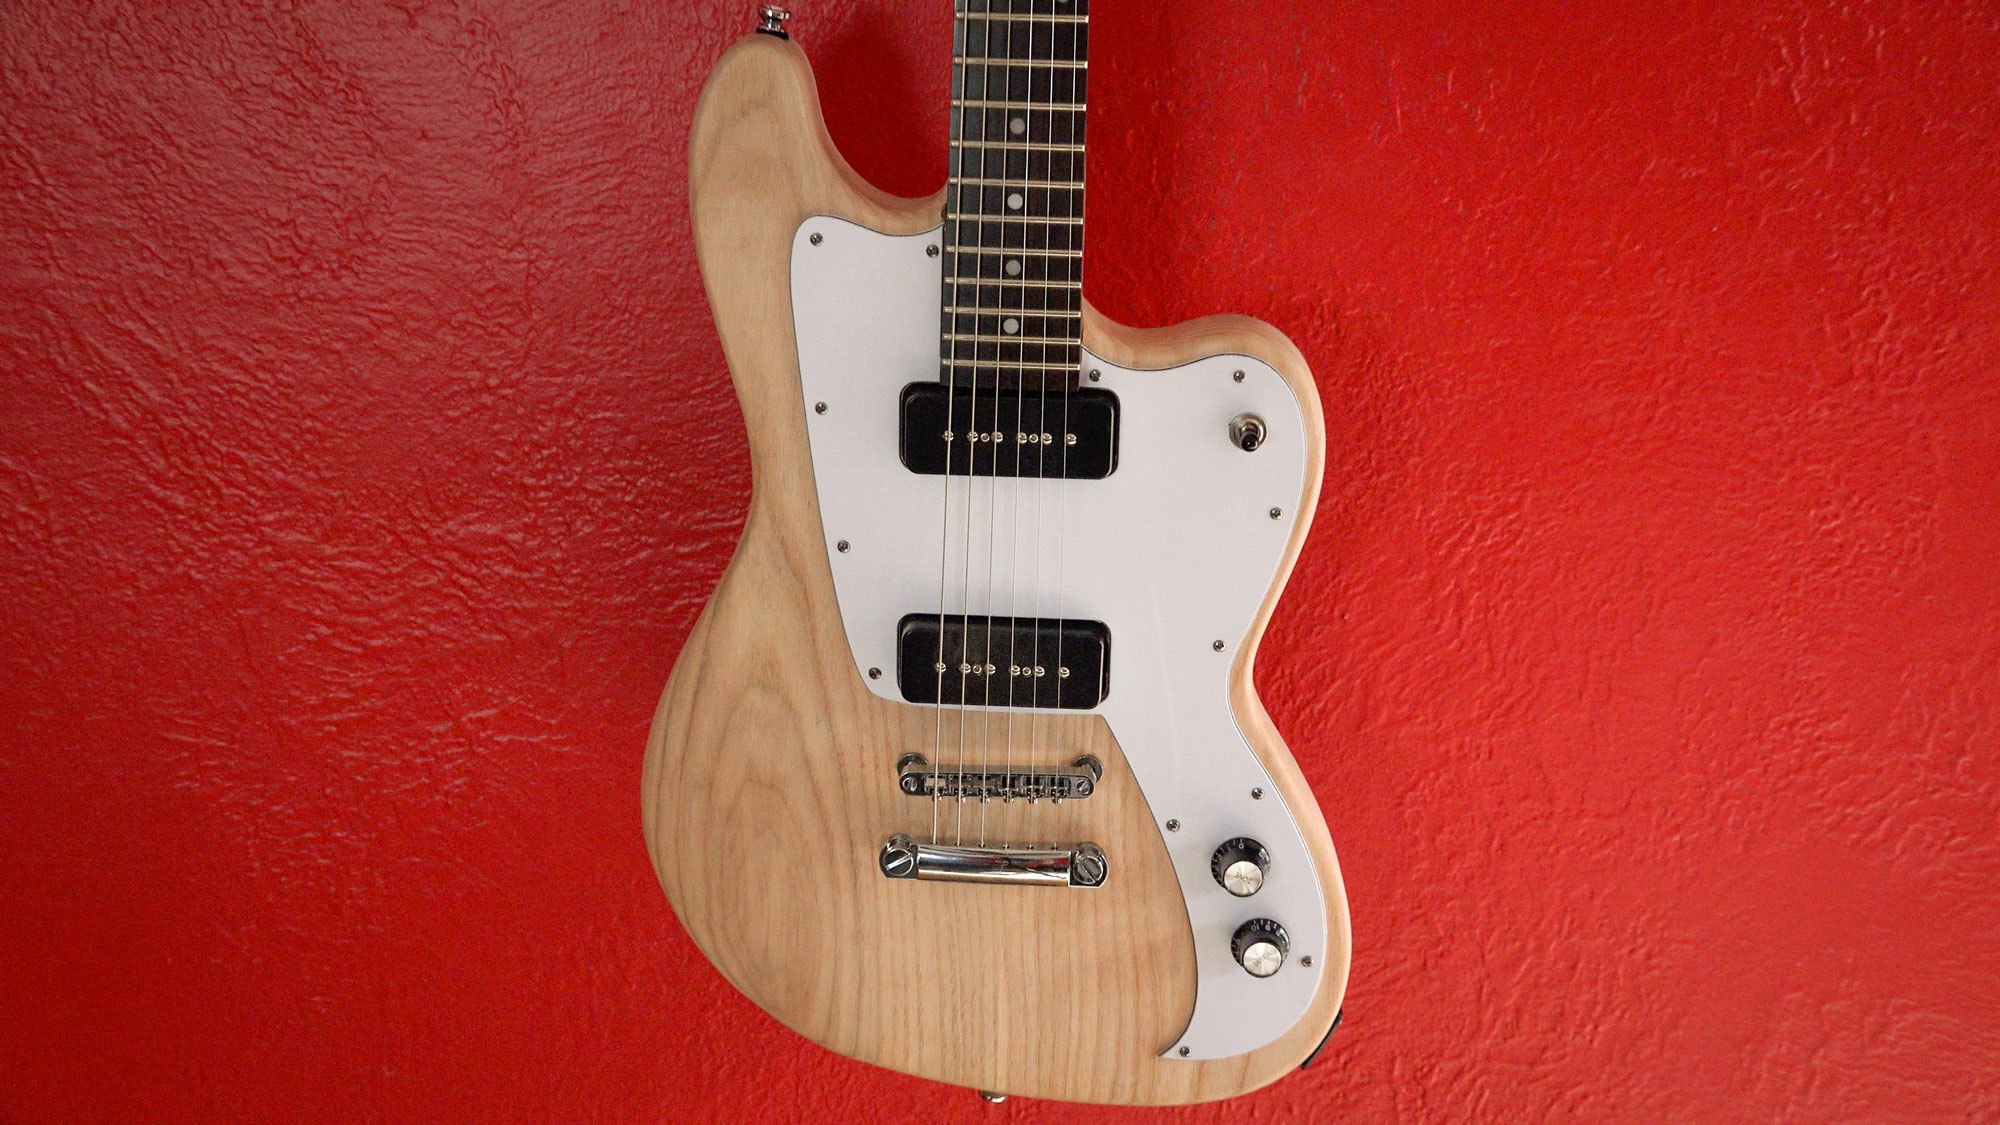
Step by step instructions on how to make a solid body guitar on the CNC using parts from a cheap Epiphone Les Paul.
Step by step instructions on how to make a solid body guitar on the CNC using parts from a cheap Epiphone Les Paul. I purchased my Epiphone Les Paul online for only $120 just to gut it for the electronics, hardware and neck. I used some 8/4 ash for the body and carved out the neck pocket, pickup and electronics cavities on the X-Carve CNC. With an angle grinder and TurboPlane blade I did some final shaping. The pick guard, headstock laminate and truss rod cover was also cut out on the X-Carve CNC using carbide bits from ToolsToday. I’m very please with this guitar build and plan on filming a follow-up video answering your questions as well as discuss what I’d do differently for the next guitar build.
Products Used


Use Flocking to Enhance Your Boxes!
Use flocking on the inside of your drawers to enhance the look and feel of your boxes.
I show you a technique called flocking. This is commonly used in lining the drawers of boxes and cases. It leaves a soft velvety feel and adds a touch of class to your projects. The fibers used in the process are very small and lightweight so I highly suggest proper air filtration and a dusk mask. I flock all the drawers of my bandsaw boxes and sometimes I will flock the cavity the drawer slides into. I really like the look and feel of flocking fibers.
Tool and Supplies Used

Endgrain Cutting Board with Epoxy Inlay
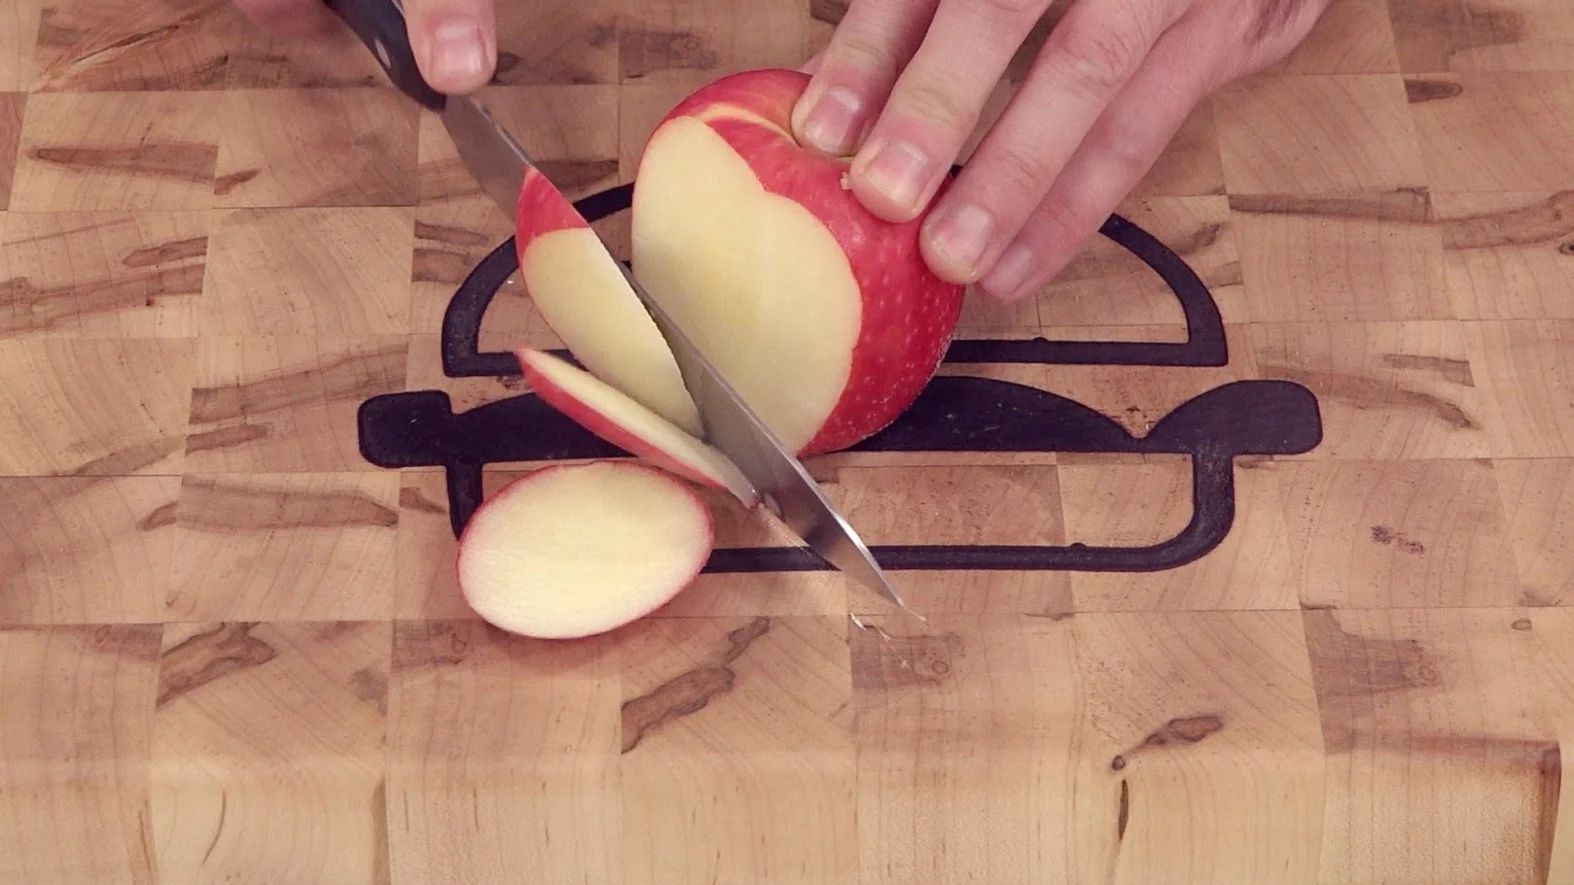
Endgrain cutting boards are supposed to be easier on your knives than long grain cutting boards because the wood fibers open up and close as the knife passes through.
Endgrain cutting boards are supposed to be easier on your knives than long grain cutting boards because the wood fibers open up and close as the knife passes through. The cutting board we’ll be making is made from soft maple and measures 10.5” x 17” inches. It has some rubber feet and a hamburger inlay that I designed carved out on my X-Carve and filled in with a food safe epoxy. The finish I chose leaves a film on top. If you’re looking for more of a natural finish you could mix up some mineral oil and paraffin wax. Although that type of finish needs to be reapplied more often than this salad bowl finish. In an upcoming video I’m going to make another engrain cutting board but but use a contrasting wood as the inlay instead of epoxy.
Products Used


Super Simple Way on How to Make Paper
How to make homemade paper from recycled materials you can find around the house.
I show you how to make homemade paper from recycled materials you can find around the house. For this easy craft project you will need a paper making deckle (link below), blender, tub of water, sponge, window screen, bath towel, paper towels, an iron and a heat gun. This is a fun craft project that anybody can do. I use my homemade paper to print my photographs on for framing. This adds and extra element of uniqueness to my art.
Links and Products Used


How to Make a 3D Layered Photograph with ArtResin Epoxy
How to make a 3D layered photo using epoxy.
I to show you how to make this 3D layered photograph of my dog. It involves taking 1 image, cutting out the background and making a print from that and another print from the foreground image. In this example I’m making the frame from scratch but you could easily take an existing frame and do this as long as the depth is over 1/2”. That will allow a reservoir for all the epoxy we’re about to use.
I’m using a new product call Art Resin and I’m loving it. Unlike most 2-part epoxies, Art Resin is free of VOCs has no fumes and safe. It’s super clear and easy to use. This is now my go-to for all my kitchen based woodworking projects.
Products Used


Mid Century Modern Cabinet
This mid century modern influenced cabinet is made from baltic birch plywood and walnut plywood.
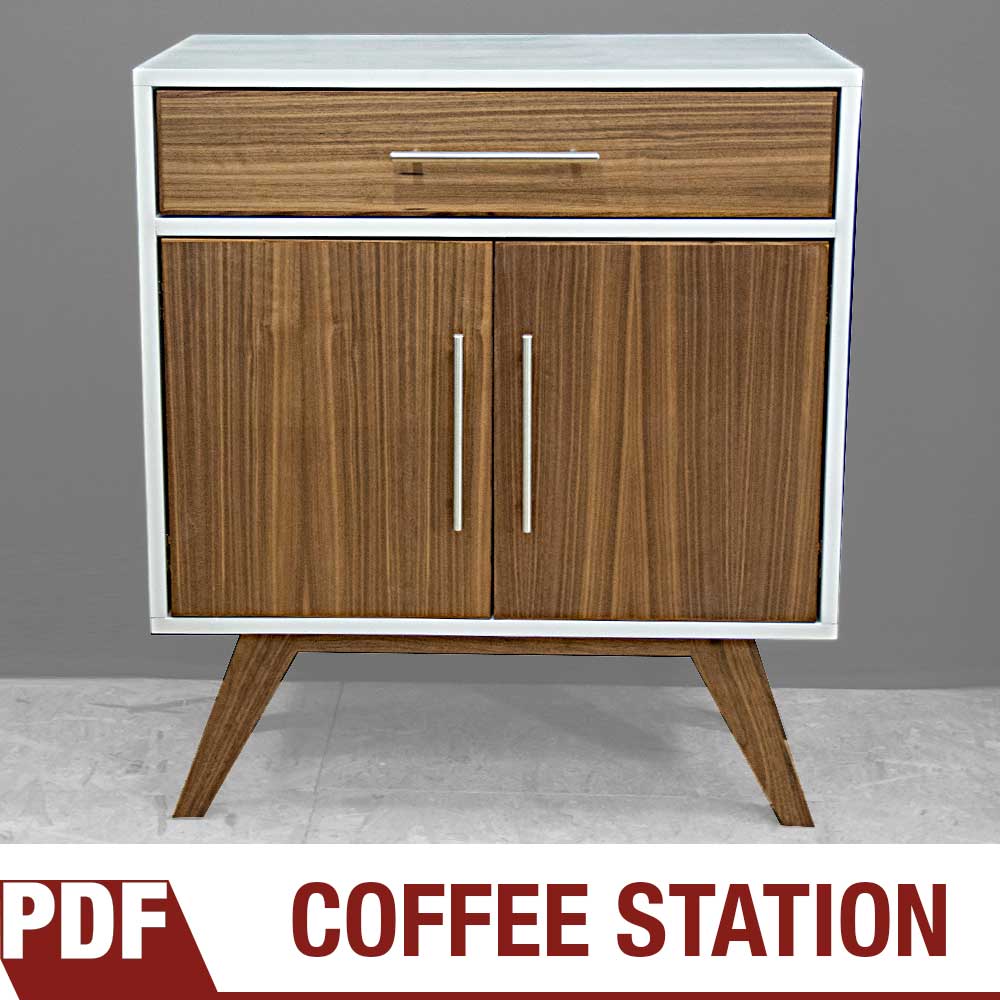
The PDF plans contains 19 pages of detailed step-by-step instructions on how to make a Mid Century Modern style cabinet. The cabinet is made from painted baltic birch plywood with edge banding. The doors and drawer are made from walnut plywood and the legs are using solid 2″ thick walnut. For this woodworking build you will need to make a tenon for the legs. In this example I’m using the Festool Domino. You could easily use dowels or mortis & tenon.
This mid century modern influenced cabinet is made from baltic birch plywood and walnut plywood. The legs on the mid century cabinet are made from 1 1/2″ thick solid walnut and angled for that classic vintage retro vibe. The drawer is custom fitted to hold k-cup coffee packages along with everything else to make a fine cup of coffee. The two hinged doors open up to reveal an adjustable pinned shelf. Iron on edge banding was applied to the baltic birch to hide the texture of the exposed edges and the outer cabinet was painted white with a standard paint roller. The drawer face and two cabinet doors are make from walnut plywood with solid walnut edge banding to hide the plywood edges. Most of the joinery was made from Festool Domino loose tenons which makes for easy alignment when assembling and provides durable long lasting strength.
Products Used in the Tutorial


X-Carve 3D Carving Overview and CNC Sign Making
Meet the X-Carve the newest 3D carver from Inventables. It’s got 50% less parts than their previous machine which means it takes 50% less time to assemble.
X-Carve 3D Carver Router by Inventables
Meet the X-Carve the newest 3D carver from Inventables. It’s got 50% less parts than their previous machine which means it takes 50% less time to assemble. One power supply to power everything, and a new spindle mount for more rigidity and accuracy. This machine is open source and completely customizable. Today I’m going to show you a technique to make this sign and keeping all the small pieces properly spaced. This technique can be used with any CNC projects that involve small pieces where alignment is key. You can find out more about this machine at Inventables.com


Pallet Wood Project: Key and Coat Rack
A simple coat rack make from free pallet wood!
Pallet Wood Project
The goal of this video is to inspire you to make something. Pallet wood is free and readily available to use and makes for some great woodworking projects. If you leave it rough you’ll get a nice rustic look. This is my first time using pallet wood as well as chalk paint. In this video I’m making a key rack/coat rack/sunglass holder that will be used in the entrance of my house. This is a very basic and simple woodworking project that anybody can do with a few tools. The chalk paint takes that rustic look over-the-top. I’ll add a base coat of gray let that dry and then add some color over top of that. Which we will then distress using sandpaper and a scraper.
- Micro Jig GRR-Ripper
- Folkart Plaid 34168 Home Decor Chalk Paint, 8-Ounce, Castle
- Folkart Plaid 34994 Home Decor Chalk Paint, 8-Ounce, Tuscan Red
- Folkart Plaid 34155 Home Decor Chalk Paint, 8-Ounce, Vintage Mustard
- Folkart Plaid 34169 Home Decor Chalk Paint, 8-Ounce, Rich Black
- Folkart Plaid Sanding Foam Block
- Folkart Plaid Scraper


How to Make a Spline Jig for Picture Frames
How to make a spline jig for easily creating mitered corners.
This is the second video in a multi-part series on picture frame making. You can find the other videos in the links down below. This here is a real simple and easy to make jig that rides along your table saw fence and allows you to cut splines in picture frames. Just using glue on mitered corners may seem good enough but over time as the width of the wood expands and contracts with the seasons the joints will eventually break. And that’s why you need splines. Unlike a lot of spline jigs, this rides along the fence and not in the miter slot which means you can place the spline anywhere you want and even cut wider splines by moving the fence and making multiple passes. Setting the blade height is easy since the corner sits just a hair above the table and the two guides easily clear the blade. Let’s get started!
I suggest using a full kerf blade with a flat grind. A thin kerf blade will work just as well and if your blade doesn’t leave a flat bottom cut, don’t worry about it too much. The tiny little gap that it may leave may not even be noticeable and it could always be filled in with sawdust and glue.
How to Make Picture Frames Series
Making The Ultimate Picture Frame Sled
This video gives you an overview on how to make the ultimate picture frame sled.
Here’s What You’ll Need
This is the first video in a multi-part series on picture frame making. This video gives you an overview on how to make the ultimate picture frame sled. In order to make perfect picture frames you need two things… One, the two corner pieces must add up to 90° and the short sides as well as the long sides must be the exact same length. This sled covers both of those issues as well as it allows for larger picture frames than a traditional miter sled stop system. Picture frames are not measured by the inside or outside length but by the rabbit so if your artwork or matte is 5×7 we can set the stop to create a frame for that exact size. To make sure there is no play in our sled we’re using the MicroJig Zero Play Guide bar system that adjusts to fit any table saw. Also, I must give credit to where credit is due. This is a modified and updated sled to one published by Fine Woodworking.


Antique Flip Clock Up-Cycle Project
Taking an old antique flip-clock and upcycling it into a modern design.
Antique flip clock up-cycle woodworking project. I found this old antique flip clock at an antique store for $15. I gutted the clock and rebuilt the outer shell out of walnut using a joinery technique called birdsmouth joinery. Birdsmouth joinery takes a special router bit designed for 8 sided pieces (you can also purchase a router bit for 6 sided pieces). Using some glass I had lying around and a glass cutting tool, cut the octagonal shape. Wedged in behind the glass is metallic card stock cut on a Silhouette Cameo die-cutting machine. The glass and the metallic card stock sits in a groove cut into the inside of the walnut. There is also a rabbet cut in the back to hold the rear piece that is held in by hot glue. The gutted clock fits into the shell snuggly by hot gluing pieces of scrap wood on the inside to hold the mechanical unit. The complete clock was finished with a mixture of boiled linseed oil and polyurethane.
Here’s What You’ll Need


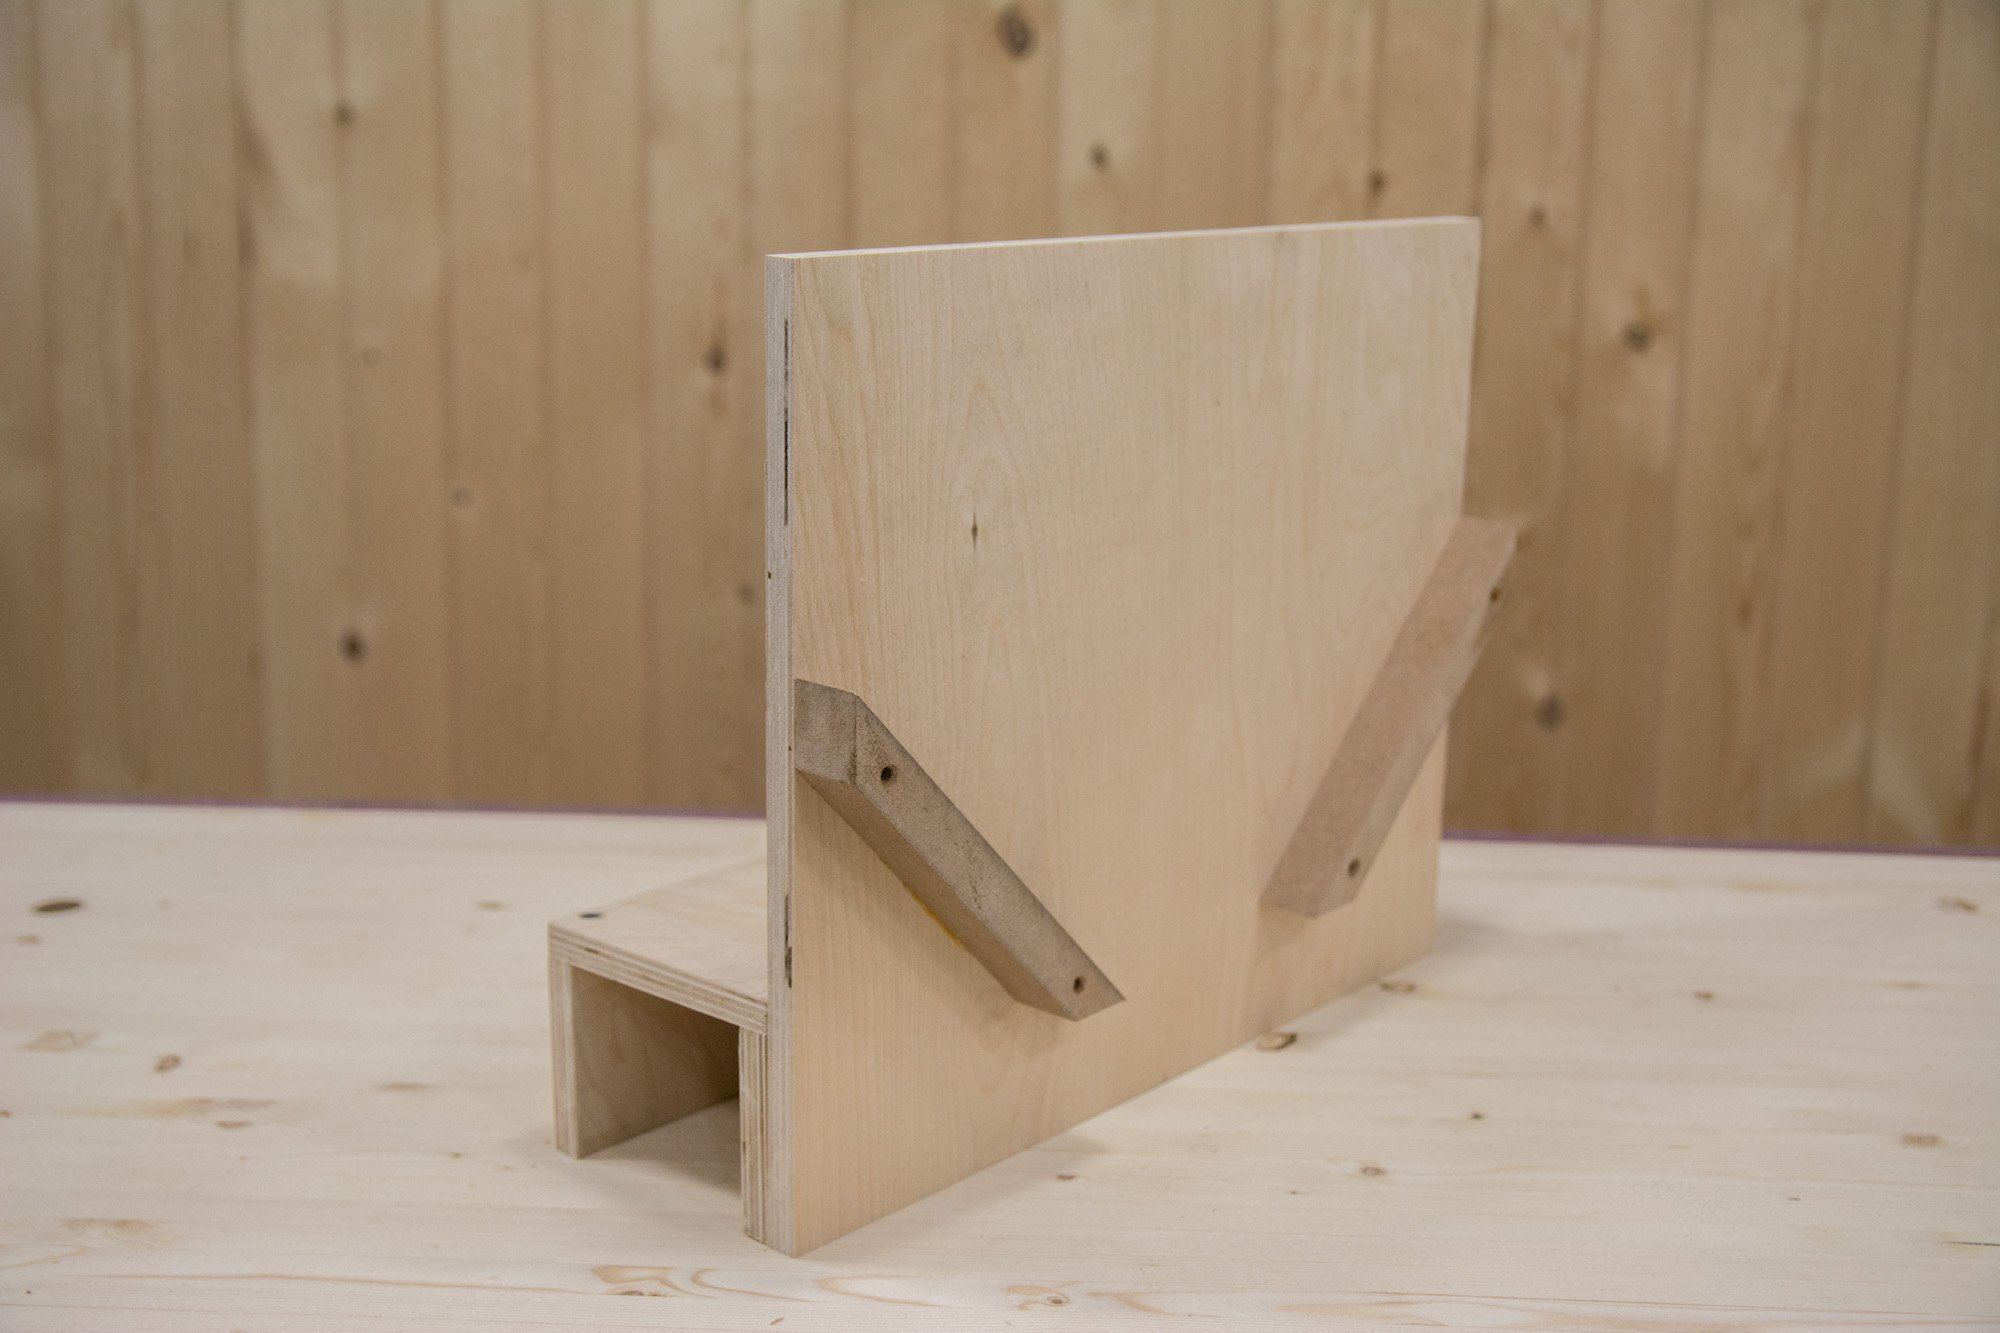
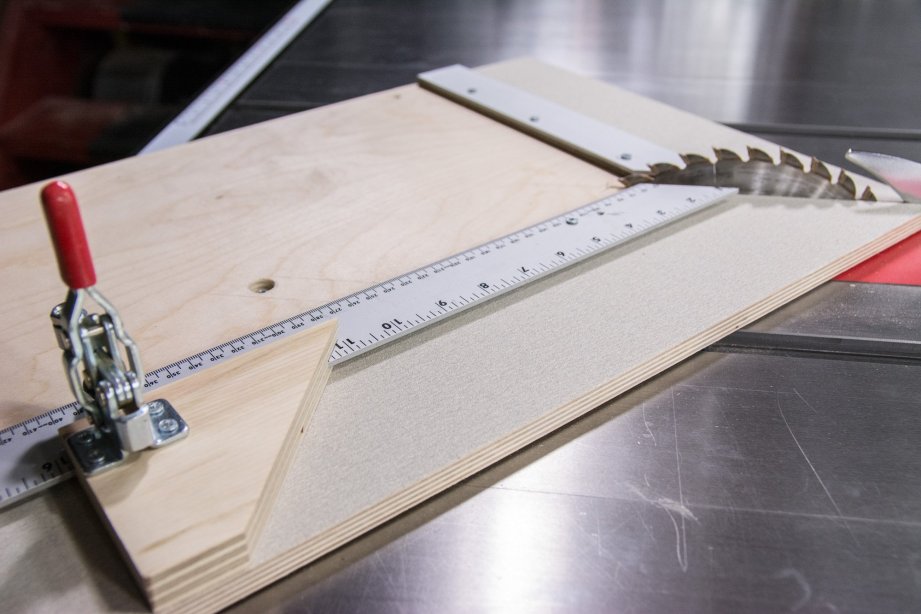
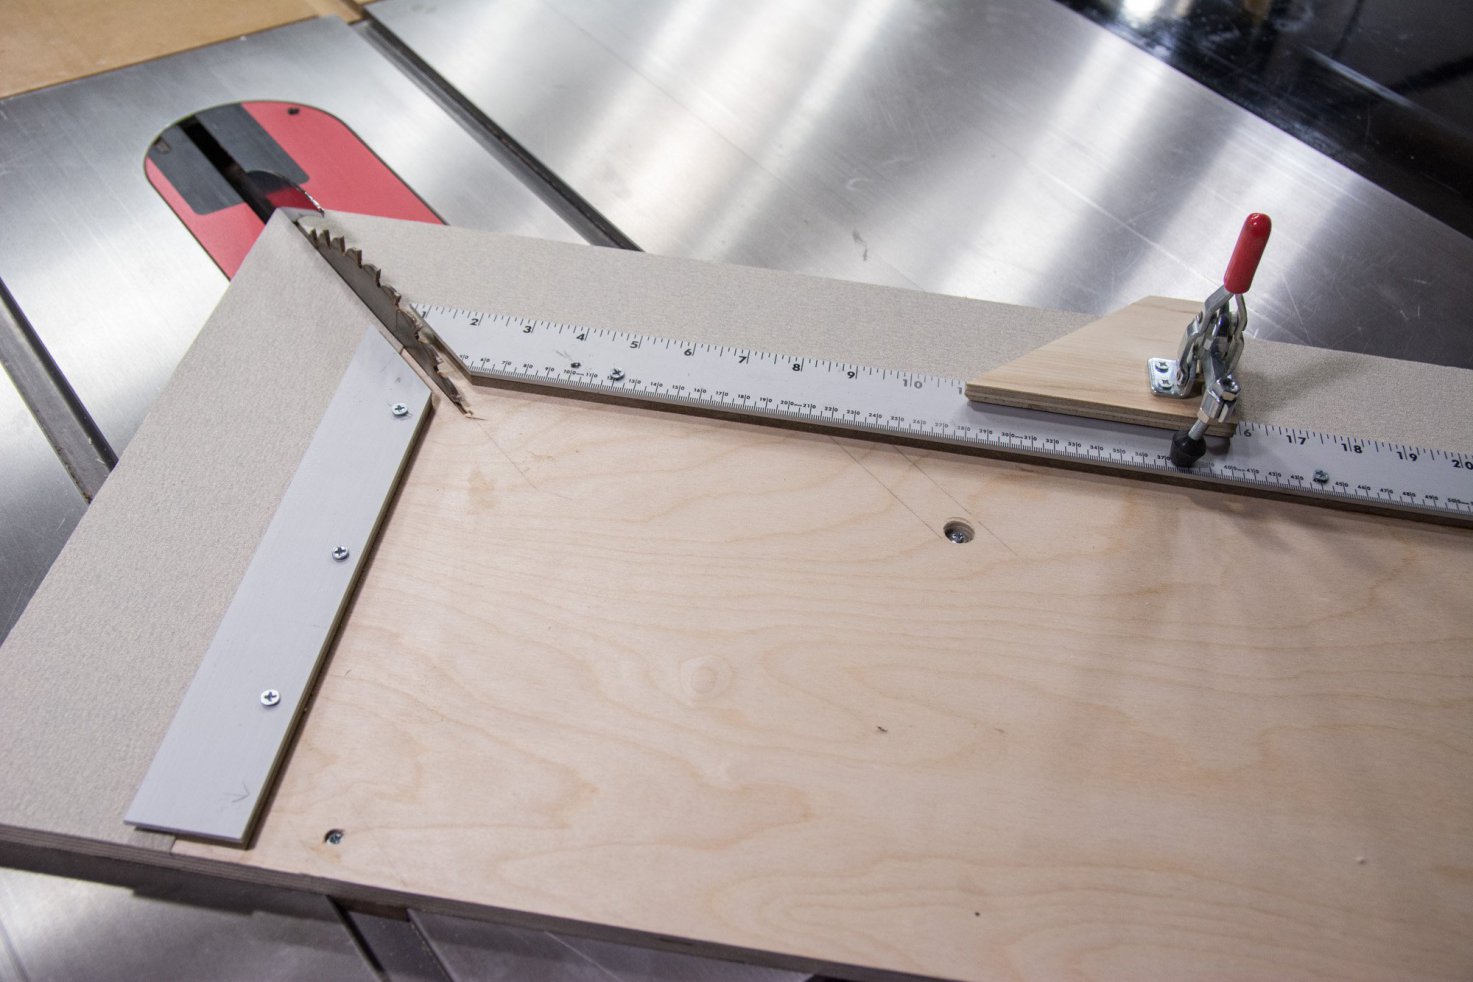
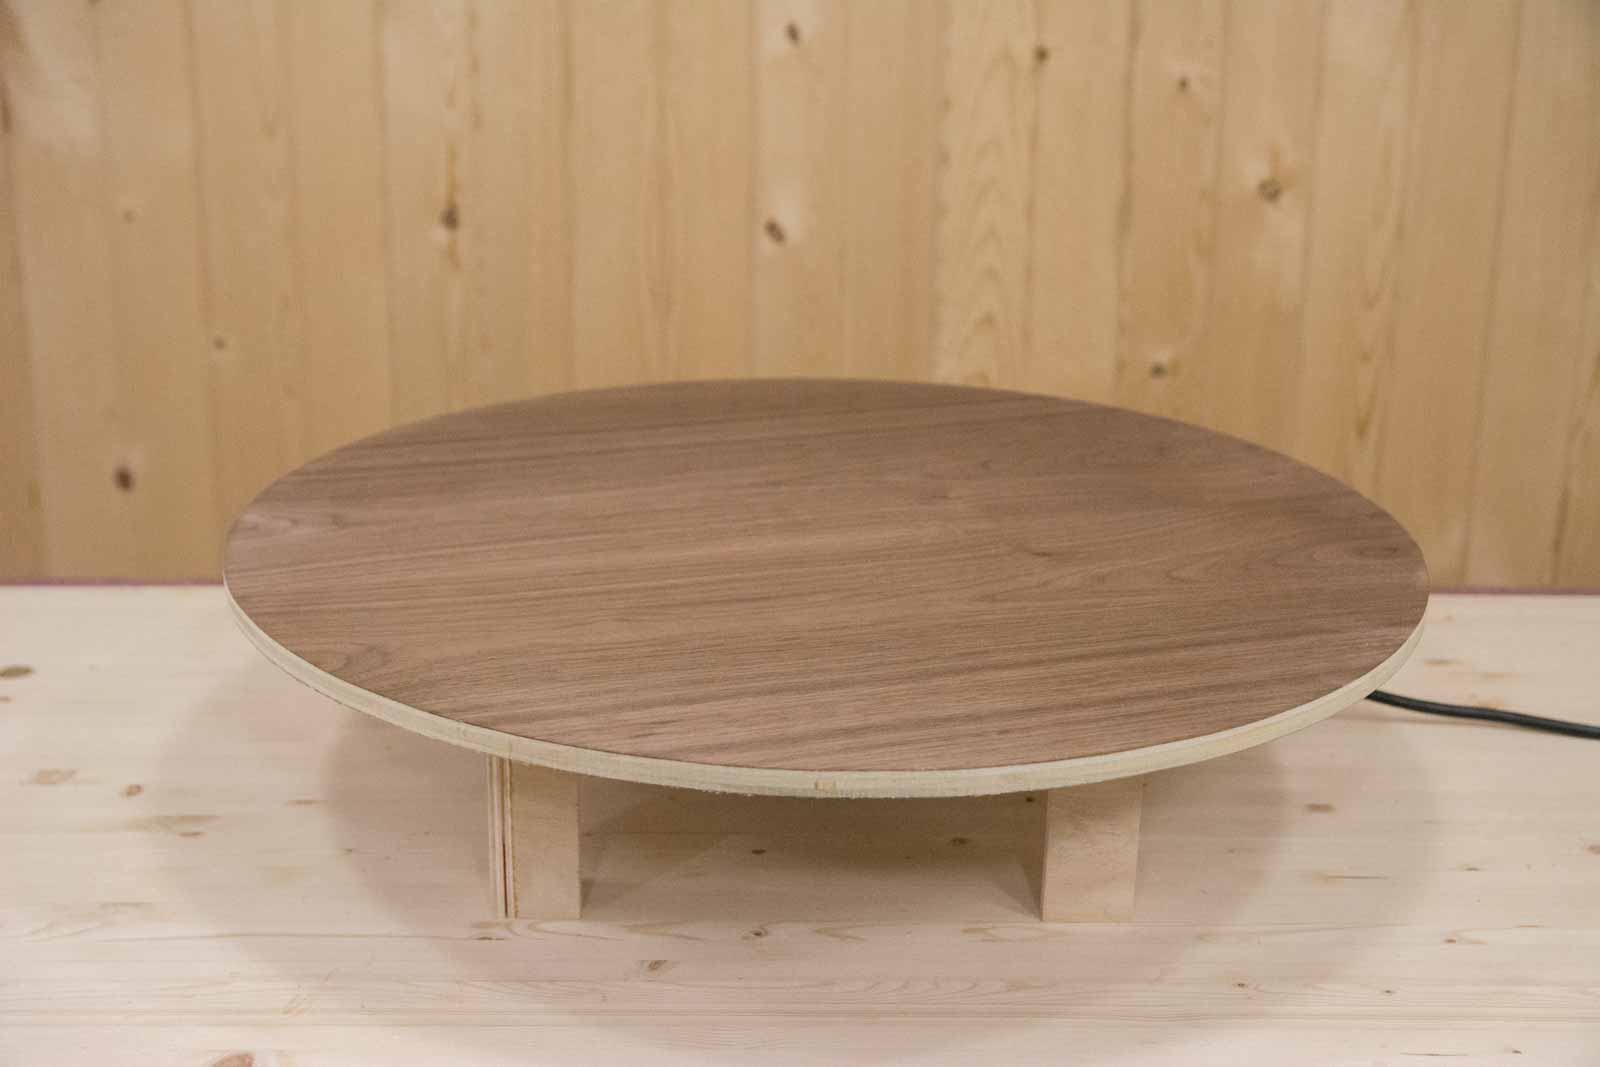
How to Make a Motorized Lazy Susan
How to make this motorized lazy suzan with a rotisserie motor.
I show you how to make this motorized lazy suzan with a rotisserie motor. This is motorized lazy susan is used quite a bit in my videos to highlight and show off my work. When combined with zooms and pans you can create some professional looking video shots without spending a lot money on video gear. What you’ll need is a rotisserie replacement motor found on Amazon and a lazy susan bearing that you can get at any hardware store. I’m using baltic birch plywood for the base construction and veneered plywood for the rotating table. This is an easy project for anybody with a few tools. In this video I’m using a table saw and a band saw but you could easily replace those tools with a hand held jig saw. This motorized lazy susan is great for video work but also makes still photography a more efficient process by placing your subject on the table, turn it on and start shooting photographs without having to stop and rotate the item by hand. This will give you consistent lighting while using the same backdrop and allows you to shoot on a tri-prod.
Here’s What You’ll Need

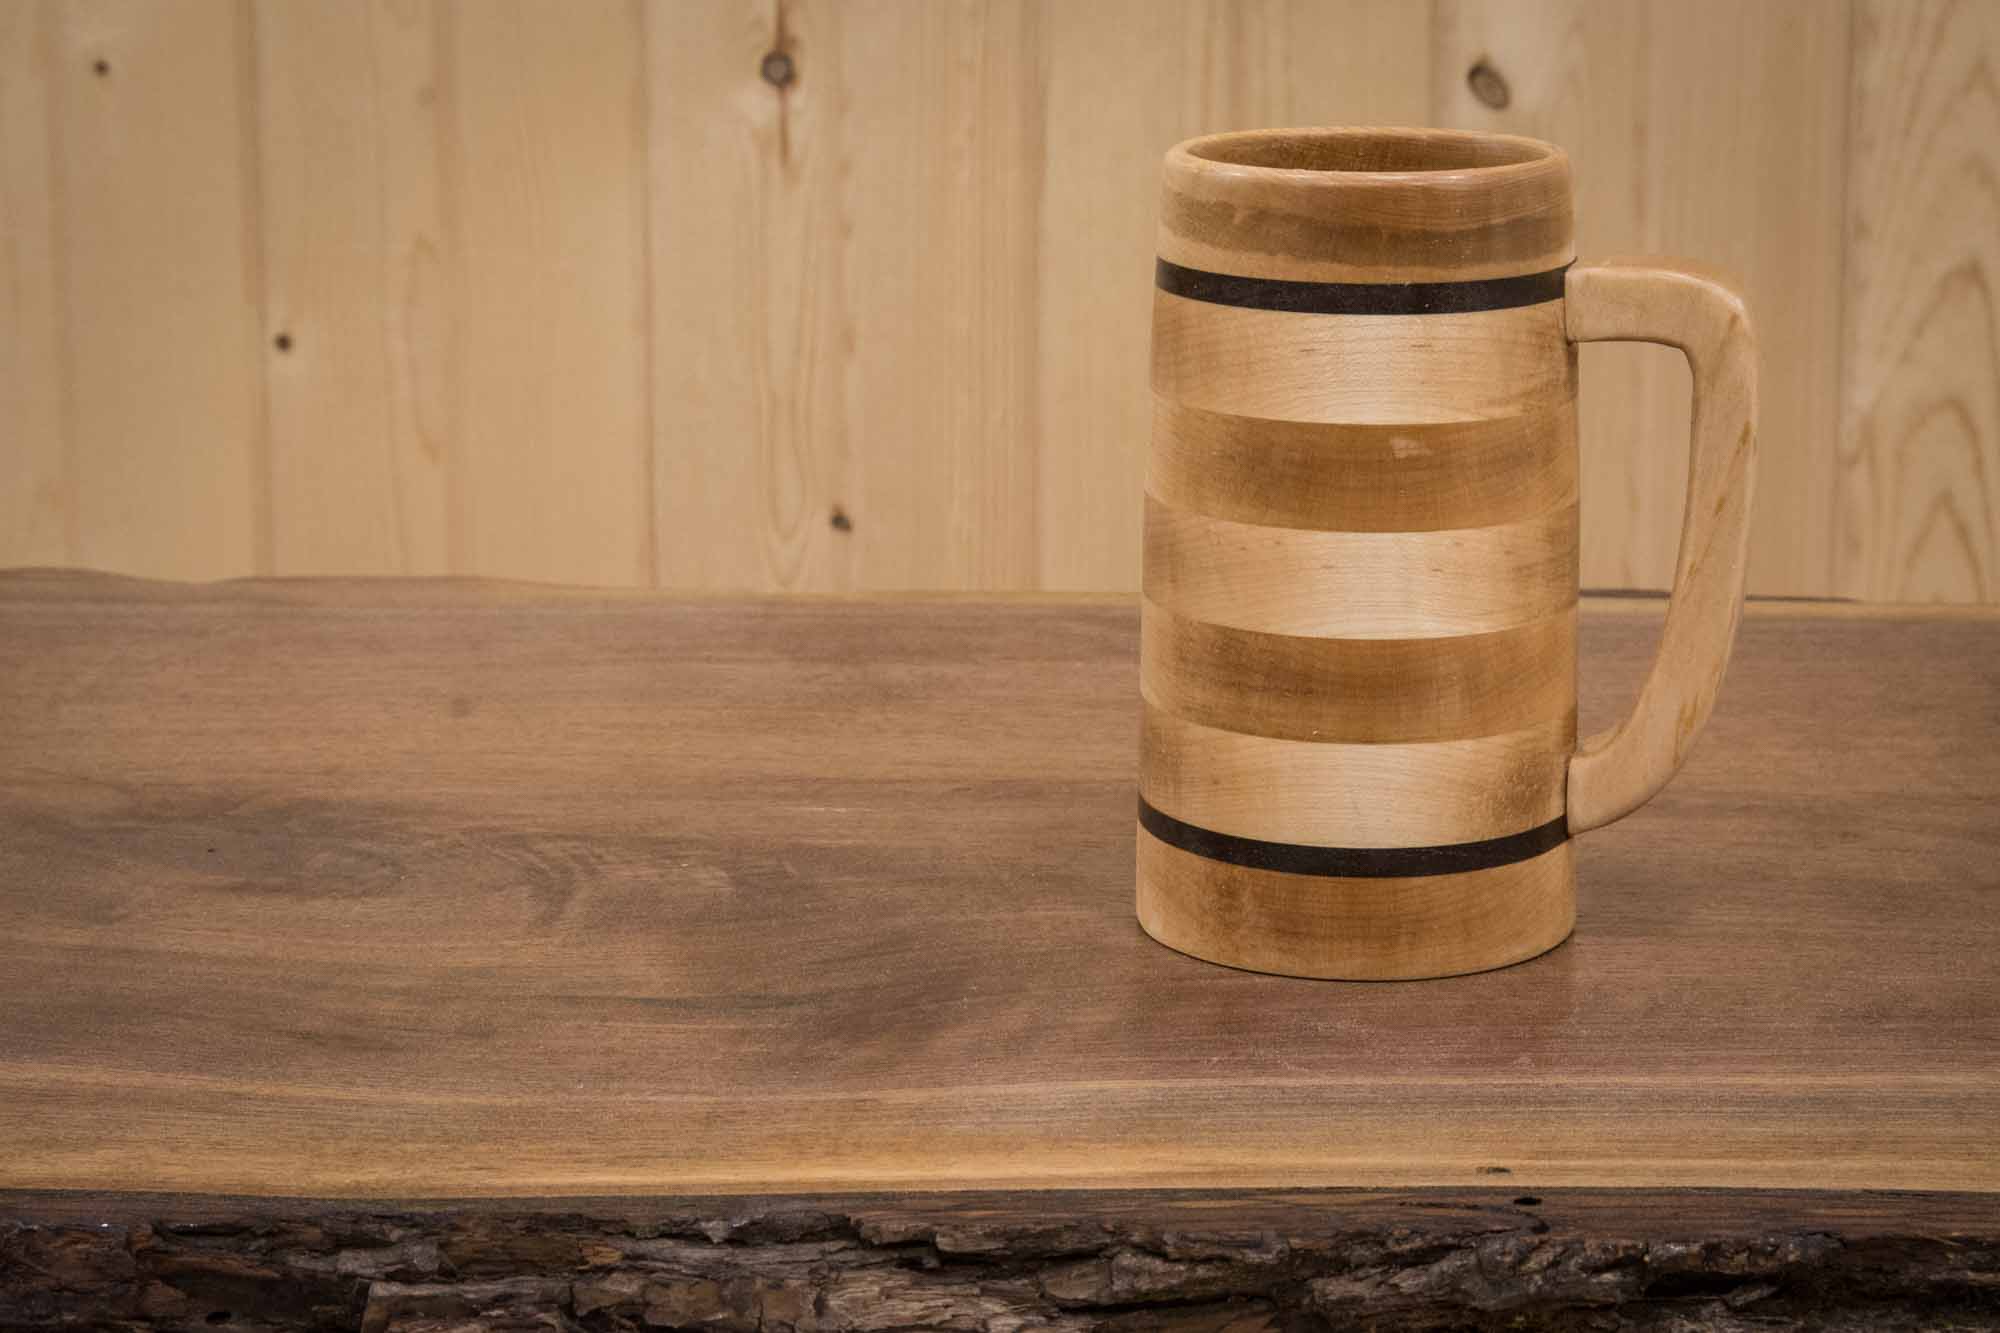
How to Make a Beer Mug on the Lathe
A fun weekend woodworking project on how to make a beer mug/beer tankard on the lathe.
Making a Beer Tankard
A fun weekend woodworking project on how to make a beer mug/beer tankard on the lathe. We’ll start by cutting up all the pieces on the tablesaw. Next we’ll glue and clamp them all up and once dry, mount it up on the lathe and start turning. The inside is hollowed out using a forstner bit which makes it a quick and clean cut. And finally we’ll coat the inside with epoxy making it water proof and ready for a nice cold beer.
This is one of those projects where you’ll want to make a few at a time because once your family and friends see it they’re going to want one as well!
Is Epoxy Food Safe?
That’s not an easy question to answer and there are very few epoxies that are labeled food safe. Acquiring that label is a long costly process that many companies just don’t bother with. I’ve found a few woodworking articles saying all finishes are food safe once fully cured. It is to my understanding that epoxy is fully cured and inert after 30 days and is not much different than using a plastic cup. There are a few people who say that the mix of the two-part epoxy must be the exact ratio for this to be true and if it is mixed correctly and fully cured must only be used to serve cold drinks and not be exposed to high temperatures like coffee or a dishwasher. From what I gathered I feel safe drinking beer out of these mugs using the epoxy I got from the Home Center. It is up to you to use your best judgement and research what will work for you.
Here’s What You’ll Need
Speaker Cabinet Rebuild with Walnut and Hickory
Remaking and up cycling an old pair of Sony speakers with a new wood enclosure.
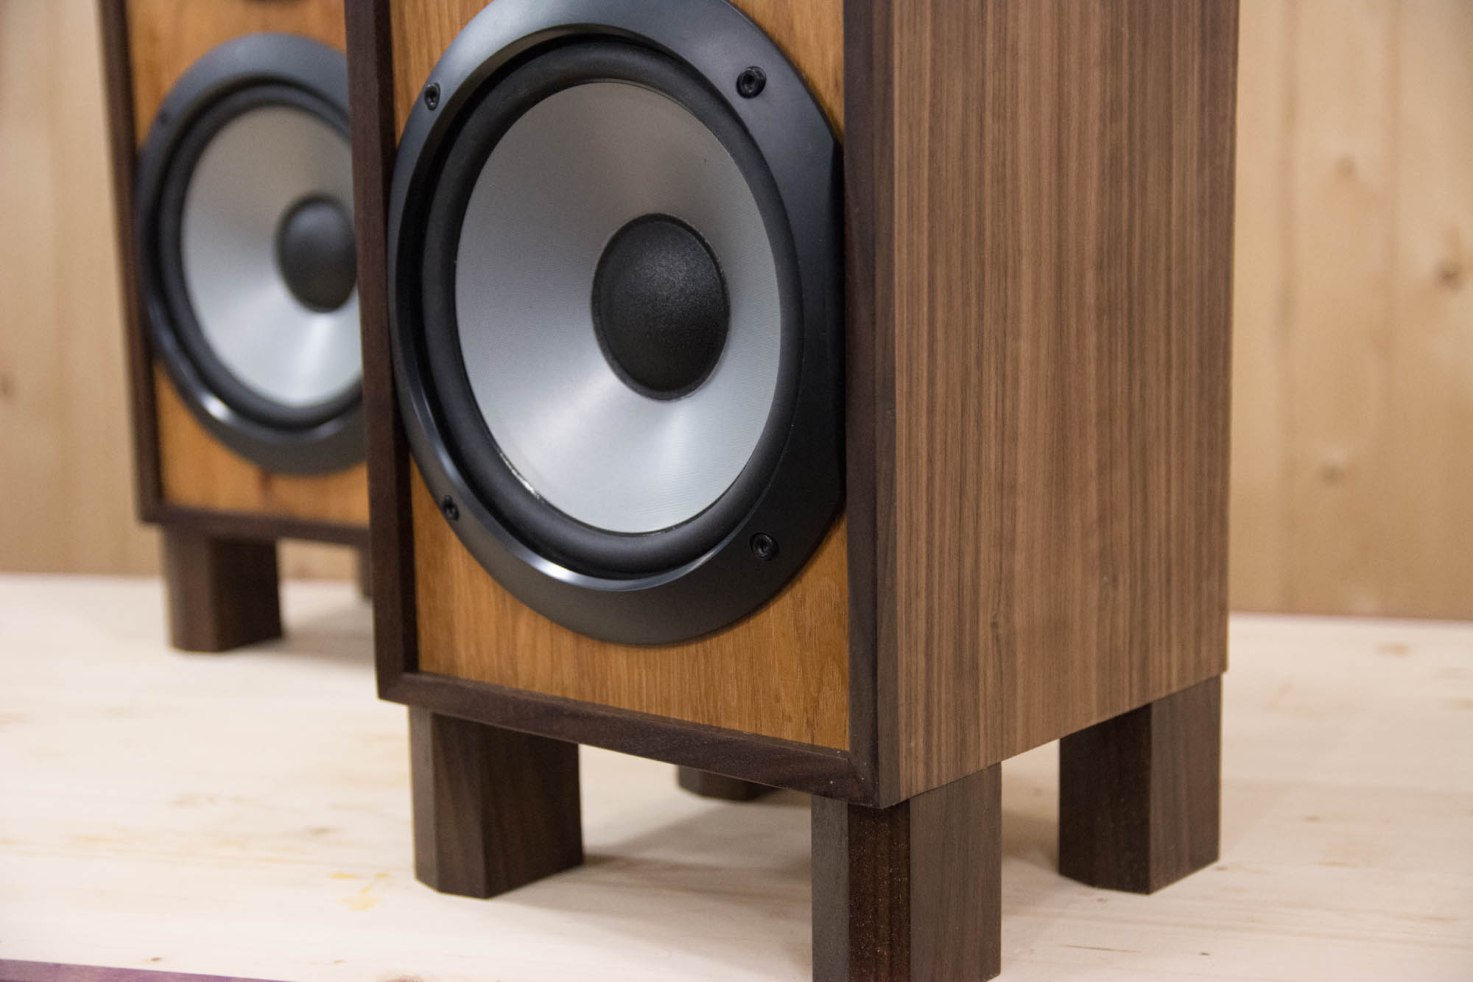
Speaker Cabinet Rebuild
I got tired of looking at the boring ol’ black Sony stereo speakersin my living room so I decided to break them down and rebuild them. I decided to use 1/2” walnut plywood for the shell of the cabinets and 1/2” hickory for the front face. Since there is a science to the dimensions of a speaker cabinet including depth and where the bass port is, I decided to keep all the specs of the original cabinets. The only change that was made was I decided to include feet to raise them up from the floor. They are finished with a heavy coat of boiled linseed oil and couple coats of Deft spray lacquer. This is one of my favorite projects because I finally get to build something for myself that’ll enhance my living room. I think this is going to be the start of a new passion for me. That is rebuilding and upgrading things around the house with wood.
Song used at the end of the video is called Flickering and is a rough mix by my band Hound. The album’s official release is scheduled in the distant future. Be safe. Stay passionate. And make something!
Products Used


How to Make a Wood Crate from a 2×6
Each crate is made from a single 2x6 that you can get at your local Home Depot or Lowes.
Making a Wood Crate
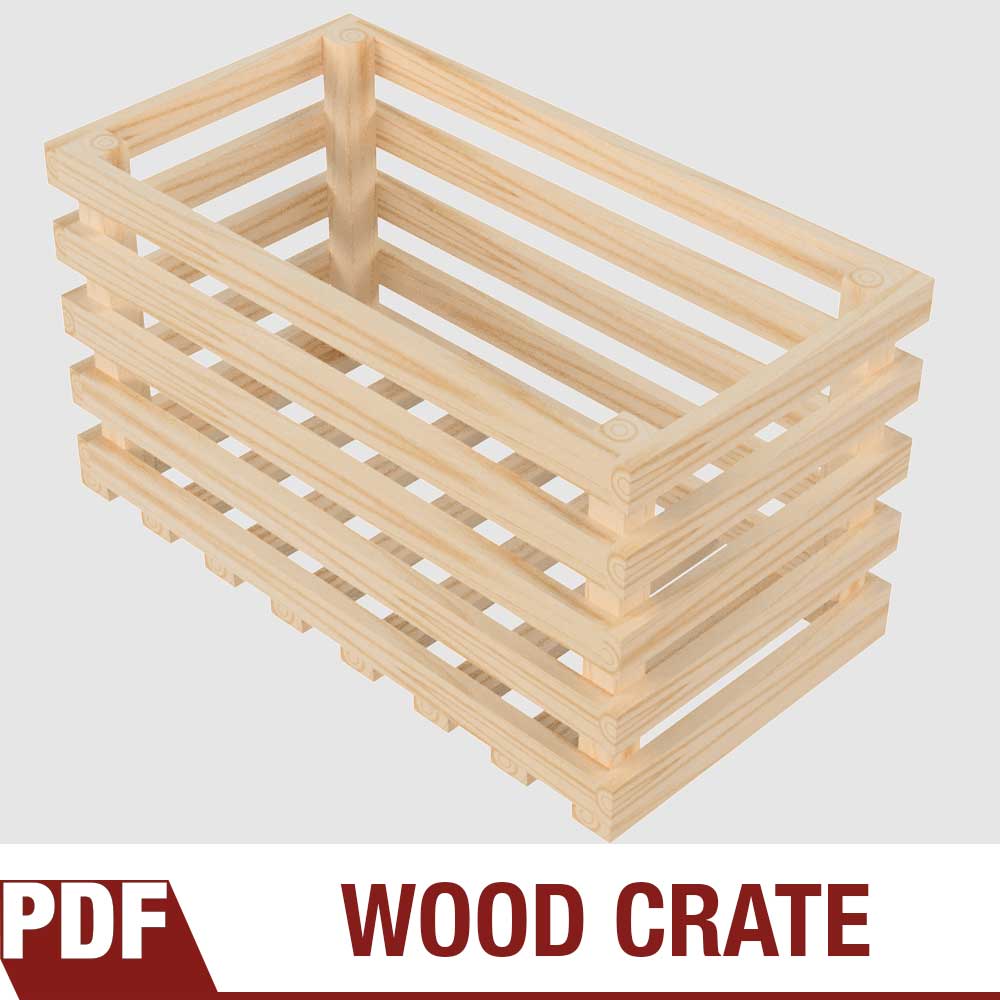
Downloadable PDF plans to make a simple wood crate from a single 96″ 2×6 from a home center. Watch the video below to see how easy it is to make these wood creates from a single 2×6!
How to make a wood crate from a cheap home center 2×6. This is a super quick and simple process anyone can do with a tablesaw, some nails and glue. I like to take these crates on the road with me and use them for my display stand at craft and handmade shows. Back at home I stack them on their sides and use them like you would a book case. This is one of those projects where accuracy isn’t important and a single crate can be made in under an hour. And since I don’t worry about glue squeeze out and don’t use a finish on them, BOOM, they’re done! In fact I was able to batch out six of these crates in about two hours. Having a pin nailer surely will help save a lot of time but isn’t necessary. You could easily use a hammer or even just screws. Each wood crate is made from one 96” 2×6 and each 2×6 only costs $4 at my local Home Depot. Enjoy, be safe and make something!
Products Used


Craft Show Tips and Tricks
Craft show tips to help you succeed at selling your handmade items.

How to Make a Beer and Whiskey Flight
Impress your guest with these beer and whiskey flight trays. They also make great craft show items when paired up with glasses.
Making a Beer Flight
Here’s a quick and simple woodworking project that can be made in a day without a lot of fancy tools. This display could be used as a candle holder, beer flight or whiskey flight. Whichever one suits you best! In the example in the video I’m using hickory wood but I’ve also made them in red oak and walnut and look just as great. This is also one of those woodworking projects that can be easily modified to your own style.
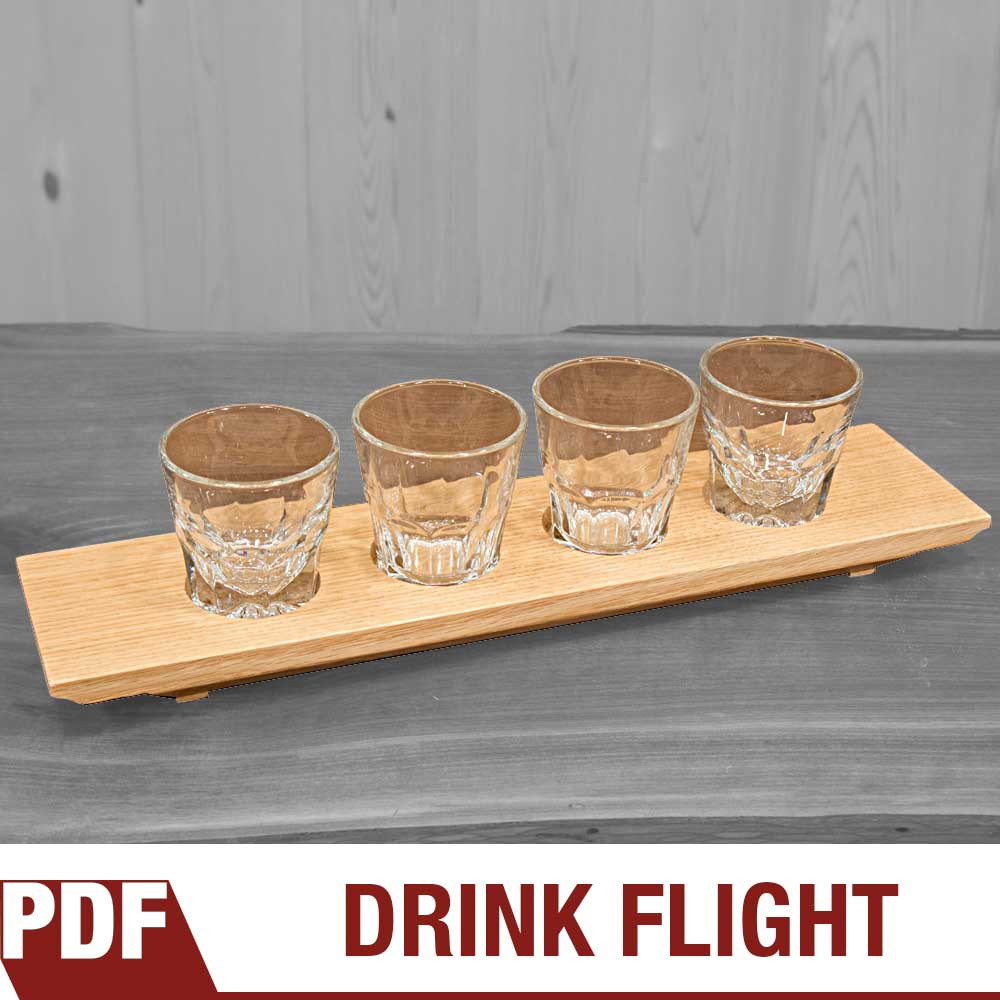
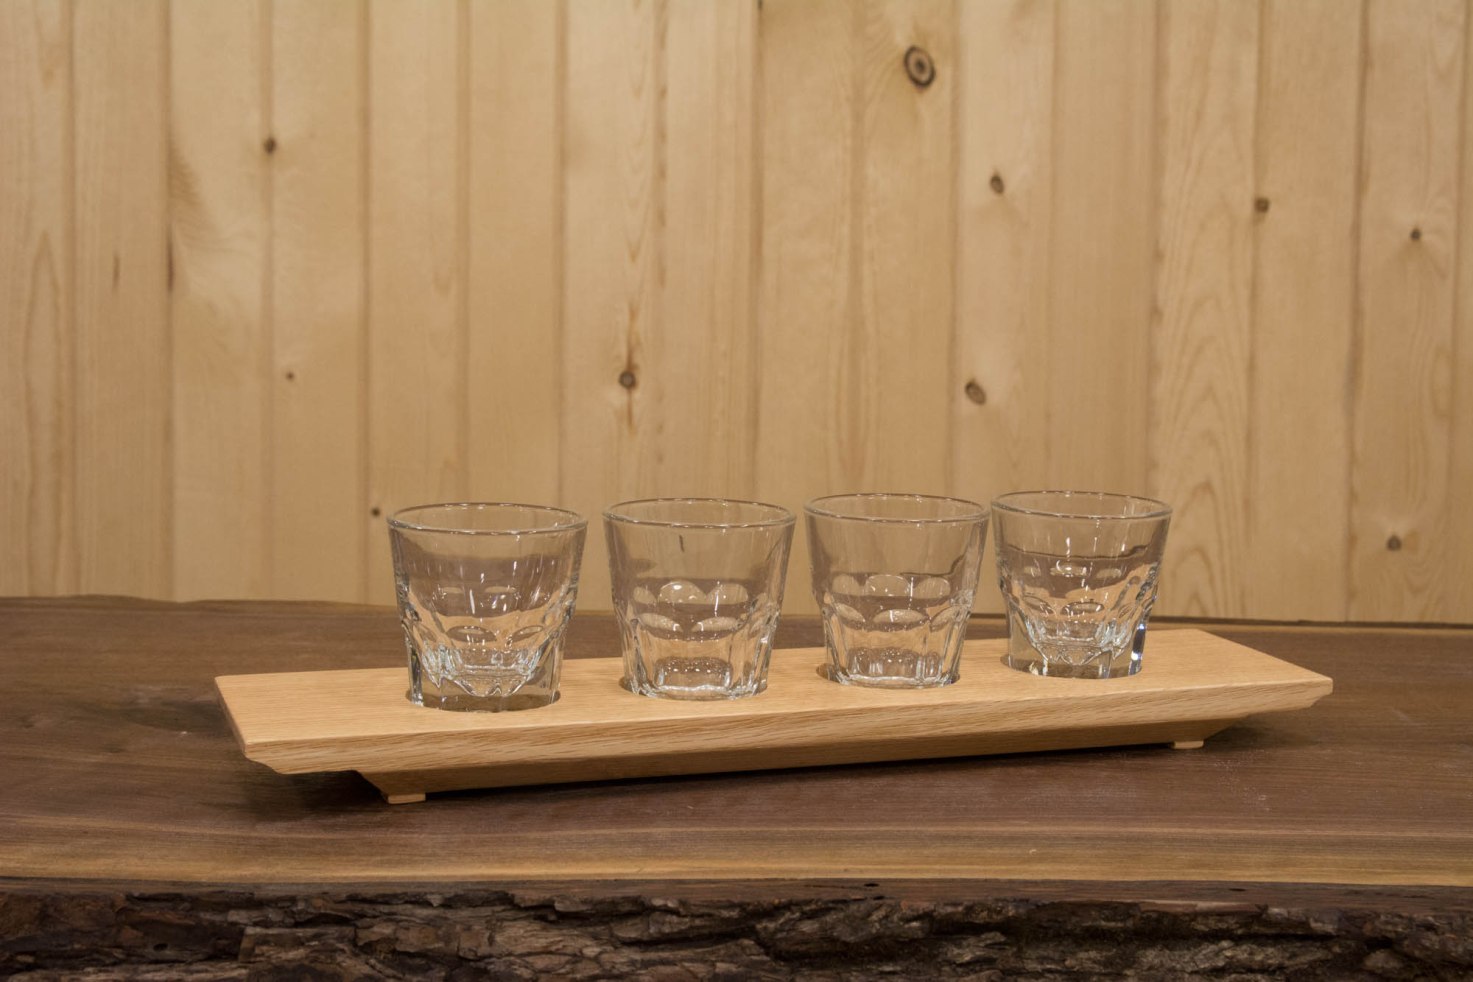
A fun and quick project that can be made in a few hours. I sell this item at craft show as either a beer flight, whiskey flight or even a candle holder. If you do plan on selling these I suggest getting some glassware to sell with it. Seeing the flight with the candles, beer glasses or whiskey glasses increases your chance of a sale. You can watch a video on how I make this flight below.
As always I encourage you to come up with your own design or you can use the link below to purchase the plans and use my design. Please feel free to use, make and sell these online or at craft shows. If you do sell them please let me know how well they sell. I’m always looking for good feedback. I myself have sold a few of these at recent handmade shows for $40 which includes your choice of candle votives, mini pilsner glasses or whiskey glasses Enjoy, be safe and make something!
Products Used


How to Make a Cutting Board in 20 Minutes
For this woodworking project we get the stopwatch out to show how quickly you can make one of these cutting boards in about 20 minutes.
For this woodworking project we get the stopwatch out to show how quickly you can make one of these cutting boards in about 20 minutes (minus glue and finish drying). Here I’m using 8/4 walnut for a super thick and heavy cutting board. Yours doesn’t need to be this thick. It’s just what I had laying around. All it takes is a few cuts on the table saw, some contrasting wood (here I’m using maple) and some clamps and glue.
A simple and elegant design that most anyone with limited tools can make. I sell these cutting boards for around $50-$60 at handmade events and I encourage you to try the same. Be safe, stay passionate and make something!
Products Used
Woodworking Books

Make Your Own Cutting Boards
15 cutting board projects to make as gifts or sell! Get your signed copy!

The New Bandsaw Box Book
8 bandsaw box projects you can make and sell at craft shows. Signed copies now available!